This repository is no longer being maintained. Please use https://github.com/mhkeller/pulp-press2.
A web comic maker to be used with the Pulp comic viewer.
We have a hosted version of the interface here. To begin:
- Select your images make sure they are named according to the following convention
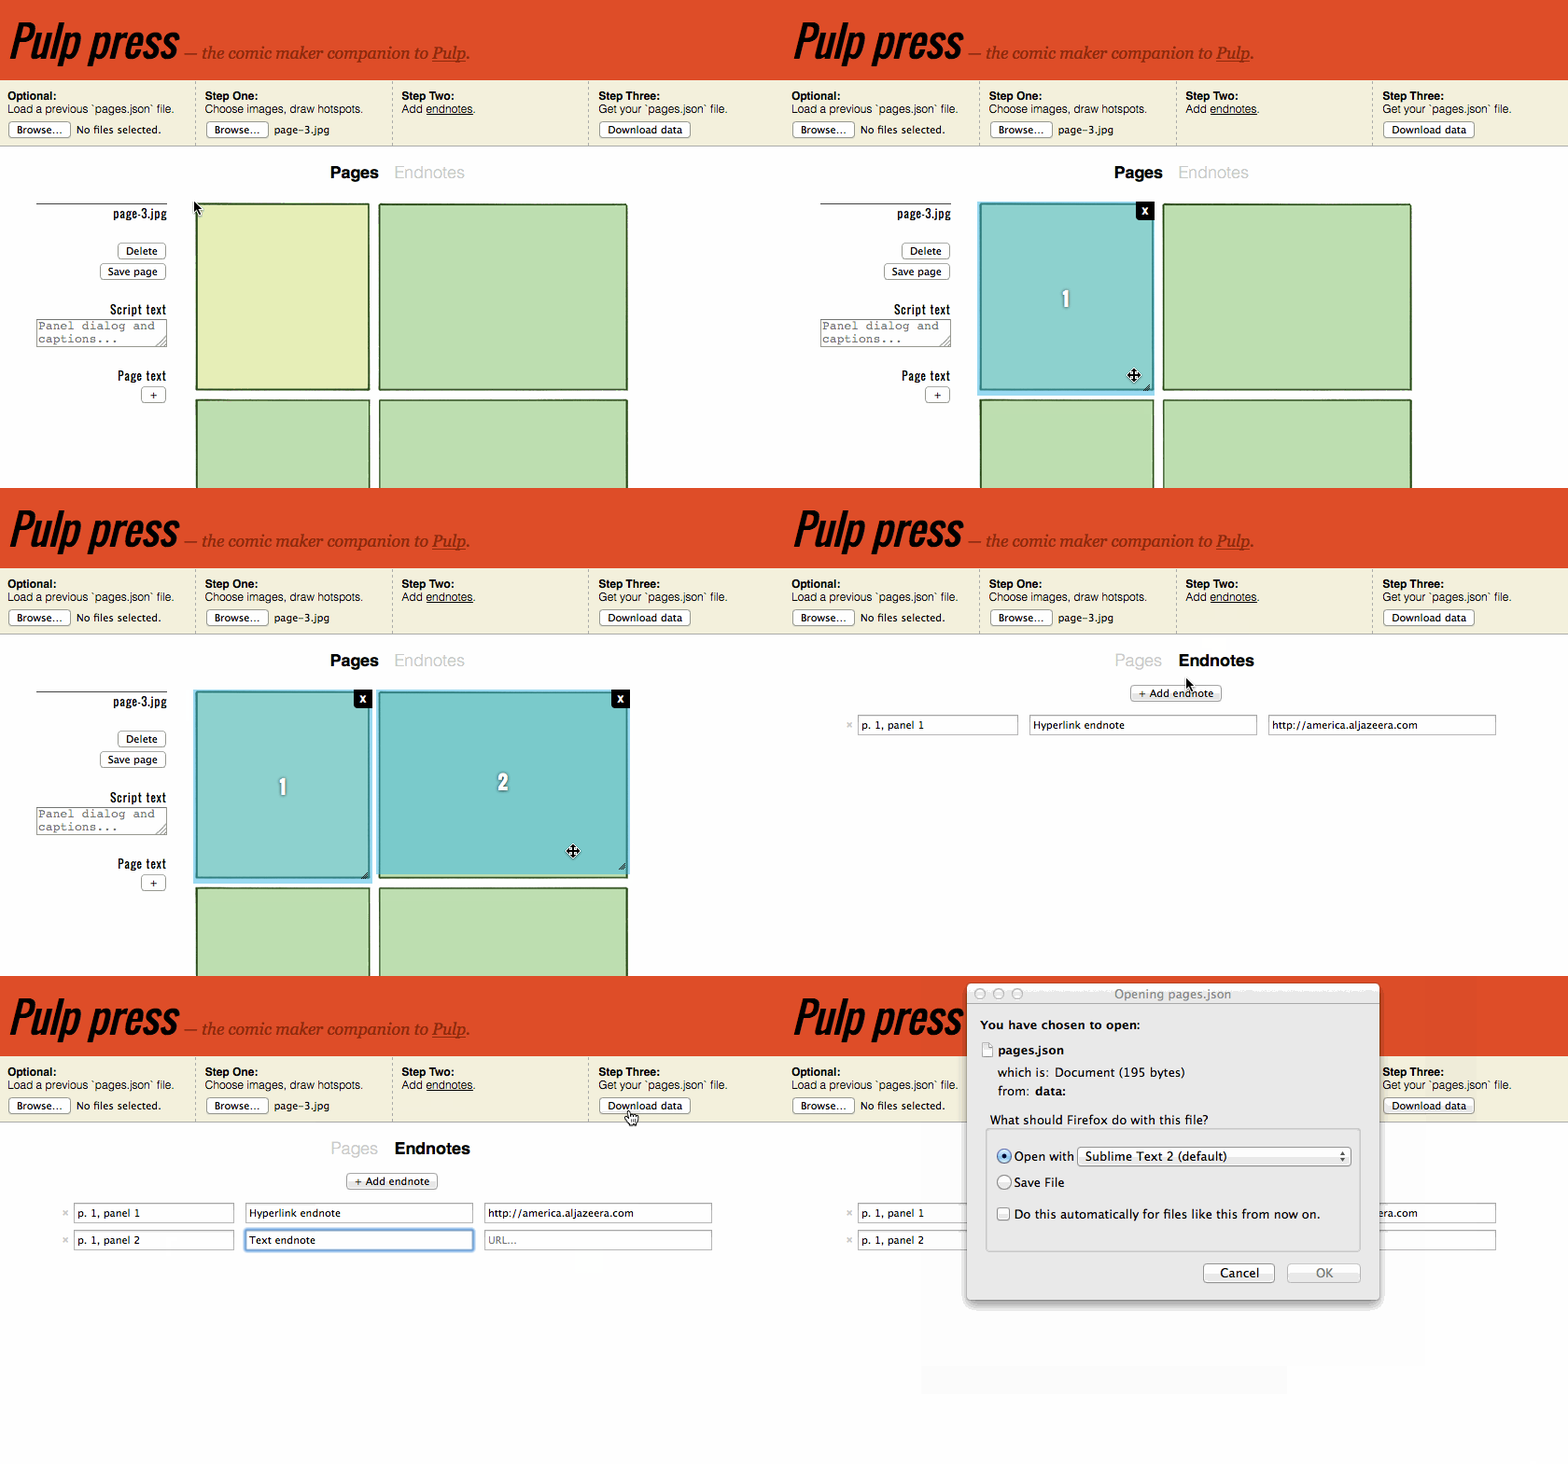
page-1,page-2etc. File format can be anything. - Start clicking and dragging to define the location of your panels.
- You can also add alt text for each page with the fields on the left — useful for adding the script so that the HTML still contains your text.
- When you're done with a page, click "Save page"
- You can also add endnotes to the entire document using the text fields at the top.
- When you're done with all of your pages, click "Download data".
- Copy the
pages.jsonfile into thedatafolder in Pulp. - You're pretty much done! Check out the Pulp instructions for the final steps and other options.
If you want to modify Pulp Press, specifically its CSS, you'll want to use Stylus and Nib, a NodeJS CSS preprocessor and a handy add-on for setting vendor prefixes.
To install run (you will most likely be prompted for your system password):
sudo npm install -g stylus
sudo npm install -g nib
Then, in the project folder, watch your .styl files for changes and recompile the .css files with:
stylus -w css -u nib
This command says to watch the css folder and use Nib.
You can also ignore Stylus altogether and modify the .css files and disregard the .styl files if you like.
If you don't want to use the hosted version, clone this repository and from the project root run a simple Python server. You can do that with the following two commands
git clone https://github.com/ajam/pulp-press && cd pulp-press
python -m SimpleHTTPServer 8000
In your browser, now go to http://0.0.0.0:8000 to view.
MIT
