- Kyma ✅
- Cloud Foundry ✅
In this part of the Expert Features you will learn how to use the local and hybrid development features of CAP. This will simplify the development process and let's you implement new features in a local environment with and without multitenancy enable.
- Local and hybrid development
- Local Development
- Hybrid Development
A local development environment (LDE) is the way of running applications and services on your laptop/desktop. Software developers use local development to test their development, examine newly added features and debug their applications.
Hint: You may follow this documentation for both the Basic and Advanced Version of the application.
With SAP Cloud Application Programming Model's (CAP) latest MTX package release (@sap/cds-mtxs) developers are able to run their applications in local mode as mentioned here.
Run the command below in your project root directory to start the backend application locally. This will start the application including multitenancy support on your local device. An initial t0 tenant is initialized which contains technical data managed by CAP. The t0 tenant is not a real SaaS application tenant.
cds watch srv --profile local-with-mtxIf everything is fine, you should see an output as shown below.
[cds] - connect to db > sqlite { url: ':memory:' }
[cds] - serving cds.xt.SaasProvisioningService { path: '/-/cds/saas-provisioning' }
[cds] - serving cds.xt.ModelProviderService { path: '/-/cds/model-provider' }
[cds] - serving cds.xt.DeploymentService { path: '/-/cds/deployment' }
[cds] - serving AdminService { path: '/catalog/AdminService', impl: 'srv/admin-service.js' }
[cds] - serving PublicService { path: '/catalog/PublicService', impl: 'srv/public-service.js' }
[cds] - serving cds.xt.ExtensibilityService { path: '/-/cds/extensibility' }
[cds|t0] - loaded model from 1 file(s):

  node_modules/@sap/cds-mtxs/db/t0.cds

[mtx|t0] - (re-)deploying SQLite database for tenant: t0
/> successfully deployed to sqlite in-memory db


[cds] - server listening on { url: 'http://localhost:4004' }
[cds] - launched at 21/11/2022, 15:42:19, version: 6.3.1, in: 8.626s
[cds] - [ terminate with ^C ]Since we have our application up and running, the next step is adding a new SaaS tenant to our application so that a new SQLITE instance for that specific tenant is generated.
Create a new terminal instance and run the command below to onboard tenant t1.
cds subscribe t1 --to http://localhost:4004 -u aliceYou should see an output as shown below.
Subscribing { tenant: 't1' } to { url: 'http://localhost:4004' }
Subscription succeeded.
Please note that user alice is defined in your .cdsrc.json file as a member of tenant t1 with the roles Admin, cds.Subscriber and cds.ExtensionDeveloper as shown below. Therefore we were able to subscribe the credentials of user alice since that user has privileges to subscribe a tenant.
...
        "[local-with-mtx]": {
          "strategy": "mock",
          "users": {
           "alice": {
              "tenant": "t1",
              "roles": [
                "Admin",
                "cds.Subscriber",
                "cds.ExtensionDeveloper"
              ]
            },
  ...
For further information, please see the official documentation.
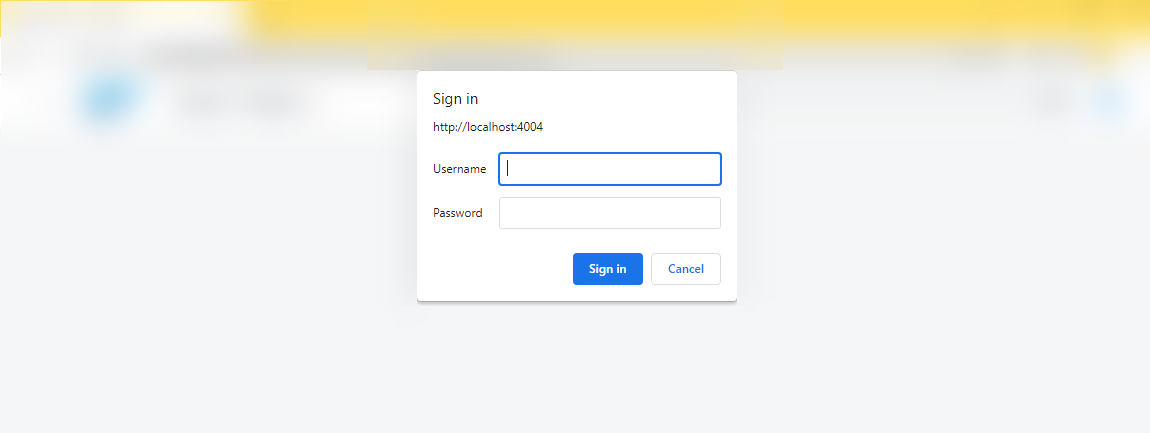
Now that the application backend is running, we can directly go to http://localhost:4004.

After e.g., clicking on the Projects entity, a popup will ask for your credentials. You can again enter alice as username since that is our tenant t1 sample user. Leave the password field blank and hit Enter.
You should see the projects in your browser as a response, as shown below.

Local frontend development is also crucial for the developers, since as a developer you would like to try things locally first then deploy the real environment. By following this section, you will be able to run your frontend application locally and do the local development.
Local testing can be as easy as calling cds watch --open, but if you want to test like in a production environment, you can make use of the so called HTML5 Repo Mock. This tool allows you to mock an SAP HTML5 Application Repository like it is used in you SAP BTP account.
For local testing without the HTML5 Repo Mock, just simply start the application as explained in the previous step w/ multitencany or w/o multitenancy.
w/ Multitenancy
cds watch srv --profile local-with-mtx --openHint - Don't forget to subscribe your t1 tenant in this case before opening the application in your browser.
w/o multitenancy
cds watch srv --openYour browser should automatically open http://localhost:4004. You will see a link launchpad.html pointing to a Web Application providing a mocked Fiori Launchpad for opening and testing all provided SAPUI5 apps. Furthermore, you will find links to the standalone SAPUI5 apps if required for testing.

Click on the standalone link(s) or the respective tiles within the Fiori Launchpad and you will be asked for username and password in a dialog. Use alice as username and leave the password field blank as we explained in the previous step. Then you can explore the application, modify the UI by changing the annotations in the backend and test your development.
Using the HTML5 Repo Mock requires a few more steps compared to using the pure cds watch test approach. Still, this approach is similar to what's actually happening in your SAP BTP environment. To use the HTML5 Repo Mock, you need to rename or copy the .env.sample file in your code directory to an .env file (if not done yet). The .env file contains some relevant environment variables for running the HTML5 Repo Mock locally.

# Application Router
TENANT_HOST_PATTERN='^(.*).localhost'
EXTERNAL_REVERSE_PROXY=true
destinations='[{"name": "srv-api","url":"http://localhost:4004/","forwardAuthToken": true,"strictSSL": false}]'

# Mock Repo
MOCK_DIR=../app
AR_DIR=../router
Before you start the HTML5 Repo Mock, make sure your SaaS backend is started (npm run srv:local or cds watch srv). Then start your frontend application locally (using the HTML5 Repo Mock) by running the commands below:
npm run mock:watchAfter running the commands, go to http://localhost:5000. You should see the application as below.

Click on anything and you will be asked for username and password in a dialog. Use alice as username and leave the password field blank as we explained in the previous step. Then you can explore the application, modify the UI by changing the annotations in the backend and test your development.
In addition to frontend and backend, we also have a multitenant API endpoint which you might want to test locally. Please note that on local mode your changes will not be reflected to frontend or backend application since the sqlite does not share. But you will still be able to check your API, if the relevant data is inserted correctly, if the handlers are running correctly and so on.
In your root directory run the command below.
w/ Multitenancy
npm run api:mtxHint - Please ensure to subscribe a tenant using th cds subscribe command before testing the API in this case.
w/o Multitenancy
npm run api:watchYou should see that API is running locally as shown below.
[cds] - connect to db > sqlite { url: ':memory:' }
  > init from test/data/susaas.db-Assessments.csv
  > init from test/data/susaas.db-CircularityMetrics.csv
  > init from test/data/susaas.db-MaterialSplits.csv
  > init from test/data/susaas.db-Members.csv
  > init from test/data/susaas.db-Products.csv
  > init from test/data/susaas.db-Projects.csv
  > init from test/data/susaas.db-RecyclingCountries.csv
  ...
/> successfully deployed to in-memory database.

[cds] - serving ApiService { path: '/rest/api', impl: 'api/srv/api-service' }

[cds] - server listening on { url: 'http://localhost:4004' }
[cds] - launched at 7/26/2023, 10:13:58 AM, version: 6.8.4, in: 2.754s
[cds] - [ terminate with ^C ]You can use the request below from a terminal to read the current products.
Hint - The port might be different in your case (e.g., 4004). Check the output of your npm run api:watch command.
curl http://localhost:4004/rest/api/Products -u "alice"

Enter host password for user 'alice':  # <- Just hit "Enter"
{"ID":"HT-1000","typeCode":"PR","category":"Notebooks","supplierId":"0100000046",...}
### 3.3. Insert Products to API locally
You can use the request below from a terminal to insert products.
curl --location --request POST 'http://localhost:4004/rest/api/bulkUpsertProducts' \
-u 'alice' \
--header 'Content-Type: application/json' \
--data-raw '
{
      "products" : [
            {"ID": "HT-1000-1","eolProductDesign": 43,"traditionalSalesShare": 82,"repairSalesShare": 8,"resellSalesShare": 10},
            {"ID": "HT-1001-2","eolProductDesign": 38,"traditionalSalesShare": 97,"repairSalesShare": 3,"resellSalesShare": 0}
      ]
}'

Enter host password for user 'alice':  # <- Just hit "Enter"
Records successfully updated!You can use the request below from a terminal to insert recycling materials.
curl --location --request POST 'http://localhost:4005/odata/api/bulkInsertRecyclingMaterials' \
--user 'alice' \
--header 'Content-Type: application/json' \
--data-raw '{
      "recyclingMaterials" : [
            {"product_ID":"HT-1000","material":"MT10000001","materialName":"Aluminium","weightShare":14,"recycleShare":23},
            {"product_ID":"HT-1000","material":"MT20000008","materialName":"Plastic","weightShare":34,"recycleShare":30}

      ]
}'
Feel free to modify this requests and try other endpoints which are served by your API.
Important - We are currently analyzing issues that are affecting Hybrid development and testing in SAP Business Application Studio. We apologize for any inconvenience caused and appreciate your patience. If you are experiencing similar issues, please be assured that we are working to resolve them as quickly as possible. In the meantime, you can try the proposed hybrid development in Visual Studio Code. Thank you for your understanding.
You can easily test your CAP application using a local database and mock ups. But at some point, you’re going to want to test with real cloud services. Of course, you can always deploy your application to the cloud.
With hybrid testing capabilities, you can stay in your local development environment and avoid the long turnaround times of cloud deployment, and you can selectively decide which services you want to use from the cloud.
To explain it a bit simpler, you will be still running on your laptop but you will be using SAP BTP Services like SAP HANA Cloud or XSUAA.
To be able to start hybrid development you need to deploy your multitenant application to your SAP BTP Kyma Cluster or Cloud Foundry Runtime at least once and you should have at least one subscribed tenant to your multitenant application.
Hint - You may follow this documentation for the Basic and Advanced Version.
In this section you will learn how to run your susaas-srv module in hybrid mode. That means the application runtime will be on your laptop but all the other backing services will be used from your SAP BTP Account.
Kyma
If you are using the SAP BTP, Kyma Runtime please use kubectl to set the context to the right namespace of your Kyma Cluster, because all the backing services are created there.
kubectl config set-context –current –namespace=<KymaNamespace>Example
kubectl config set-context –current –namespace=defaultYou can double-check whether the context was correctly set by running the following command:
kubectl config get-contexts

CURRENT   NAME                   CLUSTER                AUTHINFO               NAMESPACE
          docker-desktop         docker-desktop         docker-desktop
*         shoot--kyma--a1b2c3    shoot--kyma--a1b2c3    shoot--kyma--a1b2c3    default
Cloud Foundry
Run the command below and please make sure to log in to the correct Cloud Foundry Space, because all the backing services are created there.
cf login Make sure to target the correct Cloud Foundry Organization and Space.
Kyma
For hybrid testing in a Kyma scenario, you need to store valid Service Binding details in the srv/.cdsrc-private.json file. To do so, please run the following commands from the code directory.
Important - Please replace the <ReleaseName> placeholder with the Kyma Release Name of your Deployment (e.g., susaas or susaas-prod).
cds bind -2 <ReleaseName>-srv-destination,<ReleaseName>-srv-xsuaa --on k8s --for hybrid --output-file srv/.cdsrc-private.json
cds bind hana -2 <ReleaseName>-srv-hana --kind hana --on k8s --for hybrid --output-file srv/.cdsrc-private.json
cds bind saas-registry -2 <ReleaseName>-srv-saas-registry --kind saas-registry --on k8s --for hybrid --output-file srv/.cdsrc-private.json
cds bind sm-admin -2 <ReleaseName>-srv-sm-admin --kind service-manager --on k8s --for hybrid --output-file srv/.cdsrc-private.json
cds bind sm-container -2 <ReleaseName>-srv-sm-container --kind service-manager --on k8s --for hybrid --output-file srv/.cdsrc-private.json
cds bind alert-notification -2 <ReleaseName>-srv-alert-notification --kind alert-notification --on k8s --for hybrid --output-file srv/.cdsrc-private.json
This will create a new .cdsrc-private.json file in your srv folder, containing all binding details. Those bindings are dynamically resolved when running your application in hybrid mode.
Cloud Foundry
Run the following commands in your code directory to create Service Keys in Cloud Foundry, which can be used for hybrid testing.
Important - Please replace the <SpaceName> placeholder with your Cloud Foundry Space name.
cf csk <SpaceName>-susaas-uaa <SpaceName>-susaas-uaa-key
cf csk <SpaceName>-susaas-registry <SpaceName>-susaas-registry-key
cf csk <SpaceName>-susaas-destination <SpaceName>-susaas-destination-key
cf csk <SpaceName>-susaas-service-manager <SpaceName>-susaas-service-manager-key
cf csk <SpaceName>-susaas-com-hdi-container <SpaceName>-susaas-com-hdi-container-key
cf csk <SpaceName>-susaas-alert-notification <SpaceName>-susaas-alert-notification-key
cf csk <SpaceName>-susaas-service-manager-admin <SpaceName>-susaas-service-manager-admin-key
Once all Service Keys have been created successfully, please add them to your hybrid testing profile, stored in srv/.cdsrc-private.json. To do so, please run the following commands from the code directory.
Important - Please replace the <SpaceName> placeholder with your Cloud Foundry Space name.
cds bind -2 <SpaceName>-susaas-destination,<SpaceName>-susaas-uaa --for hybrid --output-file srv/.cdsrc-private.json
cds bind hana -2 <SpaceName>-susaas-com-hdi-container --kind hana --for hybrid --output-file srv/.cdsrc-private.json
cds bind saas-registry -2 <SpaceName>-susaas-registry --kind saas-registry --for hybrid --output-file srv/.cdsrc-private.json
cds bind sm-container -2 <SpaceName>-susaas-service-manager --kind service-manager --for hybrid --output-file srv/.cdsrc-private.json
cds bind sm-admin -2 <SpaceName>-susaas-service-manager-admin --kind service-manager --for hybrid --output-file srv/.cdsrc-private.json
cds bind alert-notification -2 <SpaceName>-susaas-alert-notification --kind alert-notification --for hybrid --output-file srv/.cdsrc-private.json
This will create a new .cdsrc-private.json file in your srv folder, containing all binding details. Those bindings are dynamically resolved when running your application in hybrid mode.
This is it, you are ready to proceed with the next steps and start your service in hybrid mode.
Now that you downloaded the environment variables, run the command below to start your application in hybrid mode.
npm run srv:hybridAfter executing this command your application should be up and running but the logs will look different. As the application is now running with the production profile, the application logs are formatted for SAP BTP Application Logging service.
Hint - Please notice that your service is now using the backing services in your SAP BTP Cloud Foundry Runtime such as XSUAA or SAP HANA Cloud.
In this section you will be running your frontend application with the connection to the backing services in your SAP BTP Cloud Foundry Space such as XSUAA or Destination Service. For hybrid testing of your frontend application, you will again use the HTML5 Repo Mock. A simplified testing using cds watch is not possible in this case as a SAP Approuter instance is required.
Kyma
For hybrid testing in a Kyma scenario, you need to store valid Service Binding details in the router/.cdsrc-private.json file. To do so, please run the following commands from the code directory.
Important - Please replace the <ReleaseName> placeholder with the Kyma Release Name of your Deployment (e.g., susaas or susaas-prod).
cds bind -2 <ReleaseName>-router-destination,<ReleaseName>-router-xsuaa --on k8s --for hybrid --output-file router/.cdsrc-private.json
cds bind html5-apps-repo -2 <ReleaseName>-router-html5-apps-repo --kind html5-apps-repo --on k8s --for hybrid --output-file router/.cdsrc-private.json
This will create a new .cdsrc-private.json file in your router folder, containing all binding details. Those bindings are dynamically resolved when running your Application Router in hybrid mode.
This is it, you are ready to proceed with the next steps and start your router in hybrid mode.
Cloud Foundry
Run the following commands in your code directory to create Service Keys in Cloud Foundry, which can be used for hybrid testing.
Important - Please replace the <SpaceName> placeholder with your Cloud Foundry Space Name.
cf csk <SpaceName>-susaas-uaa <SpaceName>-susaas-uaa-key
cf csk <SpaceName>-susaas-destination <SpaceName>-susaas-destination-key
cf csk <SpaceName>-susaas-html5-repo-runtime <SpaceName>-susaas-html5-repo-runtime-key
Once all Service Keys have been created successfully, please add them to your hybrid testing profile, stored in router/.cdsrc-private.json. To do so, please run the following commands from the code directory.
Important - Please replace the <SpaceName> placeholder with your Cloud Foundry Space name.
cds bind -2 <SpaceName>-susaas-destination,<SpaceName>-susaas-uaa --for hybrid --output-file router/.cdsrc-private.json
cds bind html5-apps-repo -2 <SpaceName>-susaas-html5-repo-runtime --kind html5-apps-repo --for hybrid --output-file router/.cdsrc-private.json
This will create a new .cdsrc-private.json file in your router folder, containing all binding details. Those bindings are dynamically resolved when running your Application Router in hybrid mode.
This is it, you are ready to proceed with the next steps and start your router in hybrid mode.
Go to the code directory and run the command below to start your Application Router in hybrid mode.
npm run router:hybridYou should see that your application will be up and running and your Application Router is listening on localhost:5000.
Go to your consumer subaccount and get its subdomain (e.g., from the Subaccount Overview page). Start the application by going to - yourconsumersubdomain.localhost:5000.
For example if your consumer subdomain is - consumer-123xyz - the endpoint that you should go is - consumer-123xyz.localhost:5000.
You should see that the app is up and running as below.

Before running the SaaS API in hybrid mode, please make sure to terminate your local SaaS Backend instances if still up and running.
Kyma
For hybrid testing in a Kyma scenario, you need to store valid Service Binding details in the api/.cdsrc-private.json file. To do so, please run the following commands from the code directory.
Important - Please replace the <ReleaseName> placeholder with the Kyma Release Name of your Deployment (e.g., susaas or susaas-prod).
cds bind -2 <ReleaseName>-api-xsuaa-api --on k8s --for hybrid --output-file api/.cdsrc-private.json
cds bind sm-container -2 <ReleaseName>-api-sm-container --kind service-manager --on k8s --for hybrid:api --output-file api/.cdsrc-private.json
This will create a new .cdsrc-private.json file in your api folder, containing all binding details. Those bindings are dynamically resolved when running your API Service in hybrid mode.
This is it, you are ready to proceed with the next steps and start your API in hybrid mode.
Cloud Foundry
Run the following commands in your code directory to create Service Keys in Cloud Foundry, which can be used for hybrid testing.
Important - Please replace the <SpaceName> placeholder with your Cloud Foundry Space Name.
cf csk <SpaceName>-susaas-api-uaa <SpaceName>-susaas-api-uaa-key
cf csk <SpaceName>-susaas-service-manager <SpaceName>-susaas-service-manager-key
Once all Service Keys have been created successfully, please add them to your hybrid testing profile, stored in api/.cdsrc-private.json. To do so, please run the following commands from the code directory.
Important - Please replace the <SpaceName> placeholder with your Cloud Foundry Space name.
cds bind -2 <SpaceName>-susaas-api-uaa --for hybrid --output-file api/.cdsrc-private.json
cds bind sm-container -2 <SpaceName>-susaas-service-manager --kind service-manager --for hybrid --output-file api/.cdsrc-private.json
This will create a new .cdsrc-private.json file in your api folder, containing all binding details. Those bindings are dynamically resolved when running your API Service in hybrid mode.
This is it, you are ready to proceed with the next steps and start your API in hybrid mode.
Run the command below to start API in hybrid mode.
npm run api:hybridBefore testing your API in hybrid mode, go to your existing consumer subaccount. Make sure this consumer subaccount already has a Sustainable SaaS API service instance including an existing service binding. If not, please create both.

Select the service instance and open your service binding credentials. Copy the binding credentials, use them to fill the placeholders in the following http file and you're ready to go.
Hint - You might consider copying the http file and renaming it to api-test-hybrid-private.http first. This ensures that your credentials are not committed to GitHub.
You can use the http file, to send the requests one by one.