Skip to content

Latest commit


History

History
686 lines (398 loc) · 27.9 KB

README.md

File metadata and controls

686 lines (398 loc) · 27.9 KB
MoneyPrinterPlus | Trendshift

MoneyPrinterPlus

GitHub Contributors Issues

English | 简体中文 | 日本語

This is a project for making easy money.

In the era of short videos, whoever controls the traffic controls the money!

So I'm sharing this carefully crafted MoneyPrinter project with everyone.

It can: Use AI large model technology to generate various short videos in batches with one click.

It can: Batch edit short videos, making it a reality to generate short videos in batches.

It can: Automatically publish videos to Douyin, Kwai, Xiaohongshu, and Video Number.

Making money has never been easier!

If you find it useful, please give it a star! Github stars

Table of Contents

Video Tutorials

Introduction

MoneyPrinterPlus: Open Source AI Short Video Generation Tool

Detailed Explanation

MoneyPrinterPlus AI Video Tool Detailed Usage Instructions

Batch Short Video Generation Introduction

MoneyPrinterPlus AI Batch Short Video Editing Tool Usage Instructions

Beginner's Tutorial

MoneyPrinterPlus Beginner's Tutorial for Generating Thousands of Short Videos with One Click

Image and Text Series Tutorials

MoneyPrinterPlus Introduction

MoneyPrinterPlus Detailed Usage Tutorial

MoneyPrinterPlus Alibaba Cloud Detailed Configuration and Usage Tutorial

MoneyPrinterPlus Tencent Cloud Detailed Configuration and Usage Tutorial

MoneyPrinterPlus Microsoft Cloud Detailed Configuration and Usage Tutorial

Breaking News! Free One-Click Batch Editing Tool Is Here, Making Thousands of Short Videos a Day a Reality

MoneyPrinterPlus Automatic Environment Configuration and Automatic Running

MoneyPrinterPlus One-Click Publishing of Short Videos to Video Number, Douyin, Kwai, and Xiaohongshu Is Now Live

Interface Overview

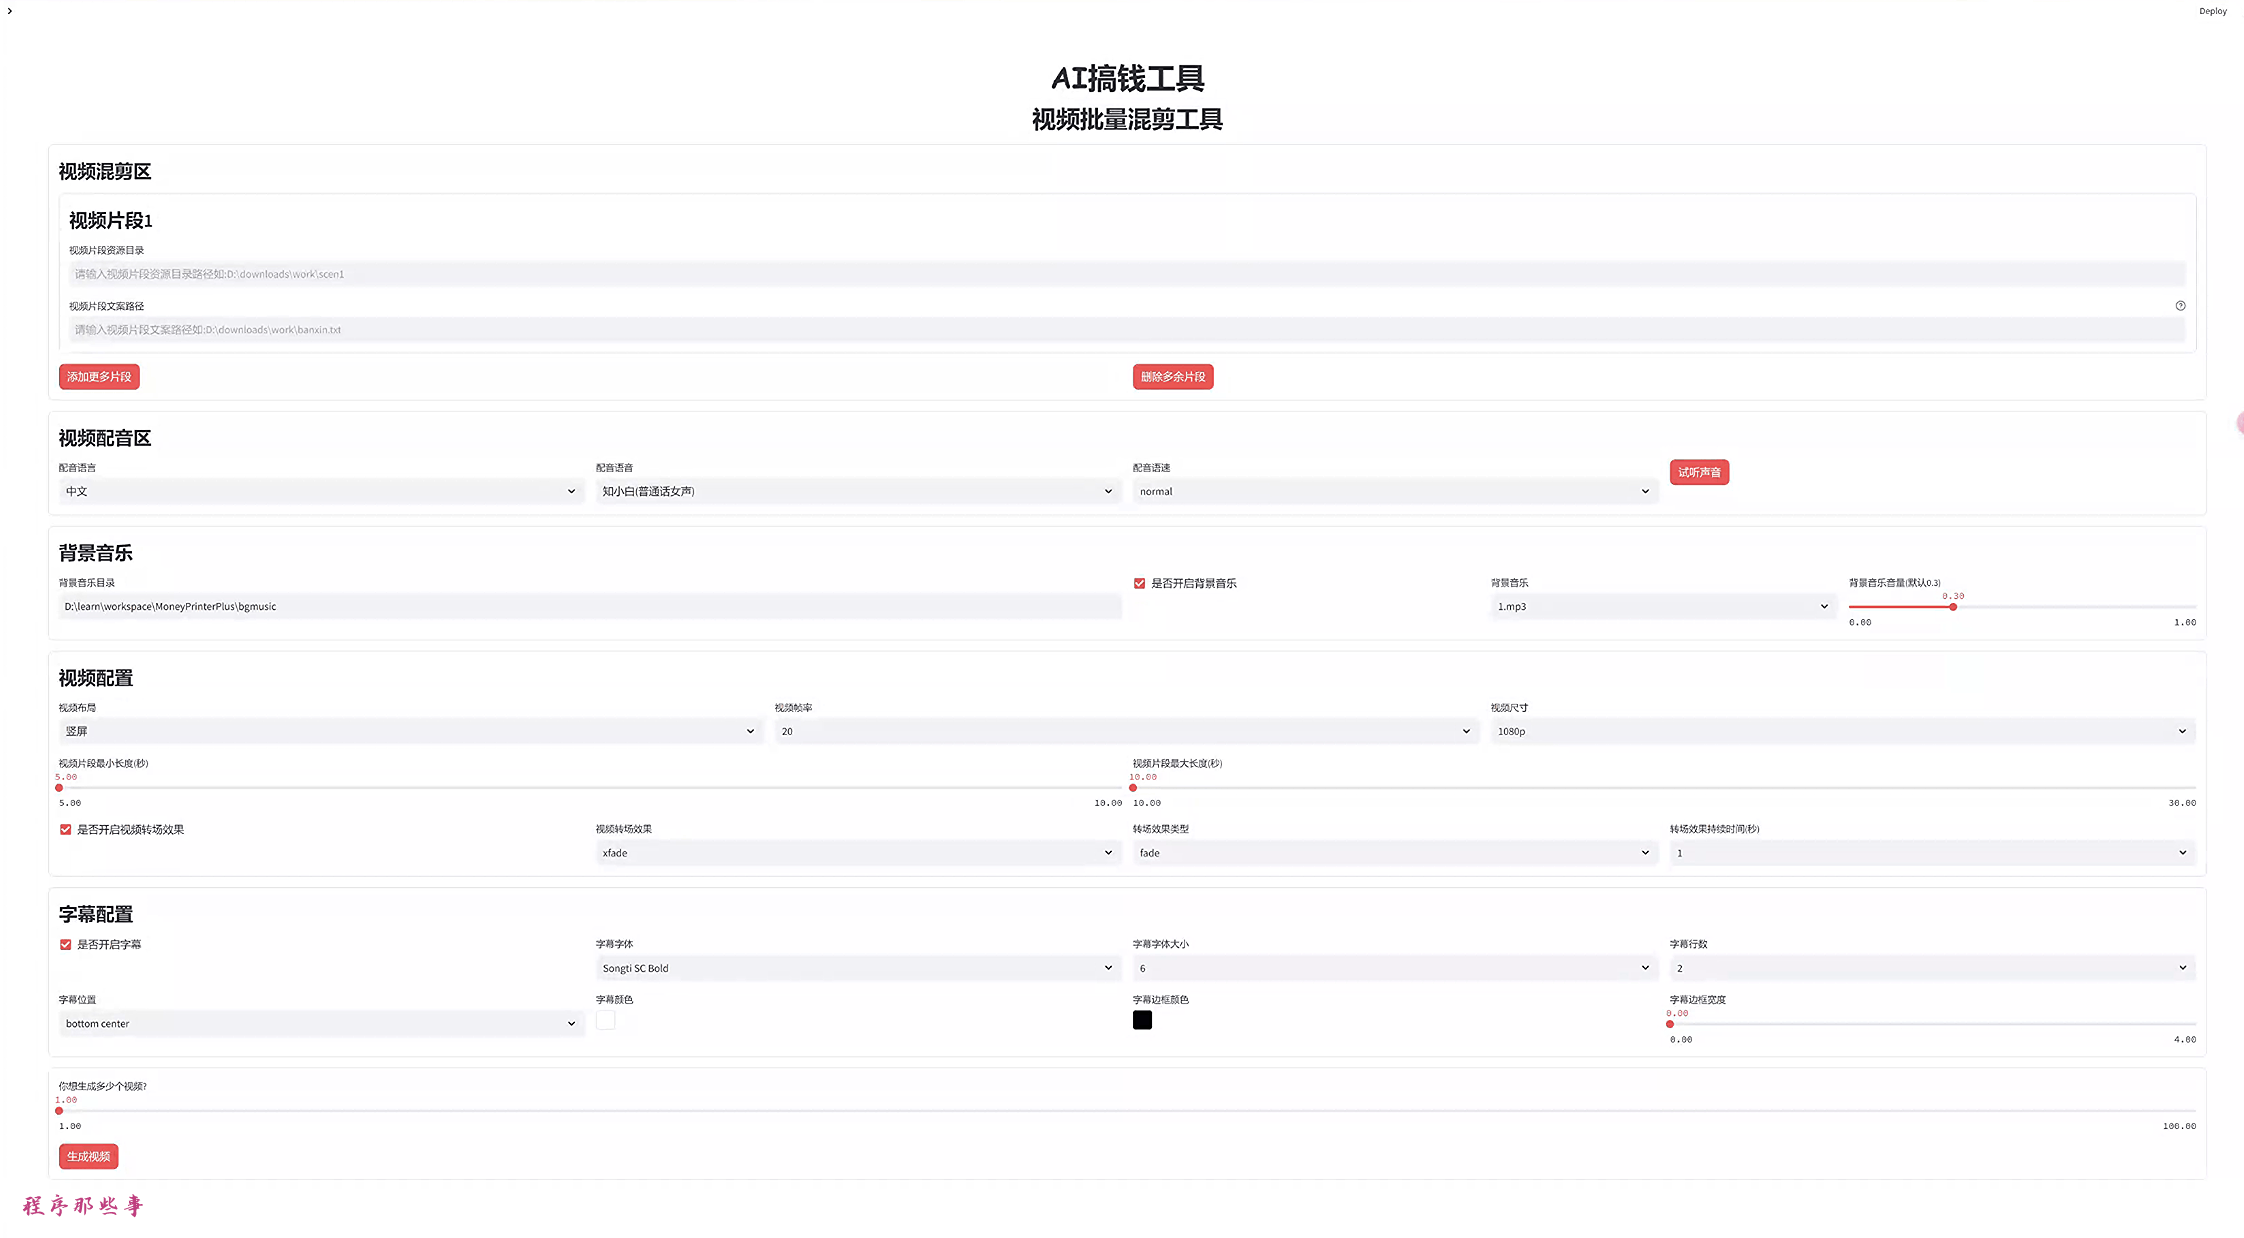
1. AI Video Batch Editing Tool

image-20240628153020140

Usage Introduction: Breaking News! Free One-Click Batch Editing Tool Is Here, Making Thousands of Short Videos a Day a Reality

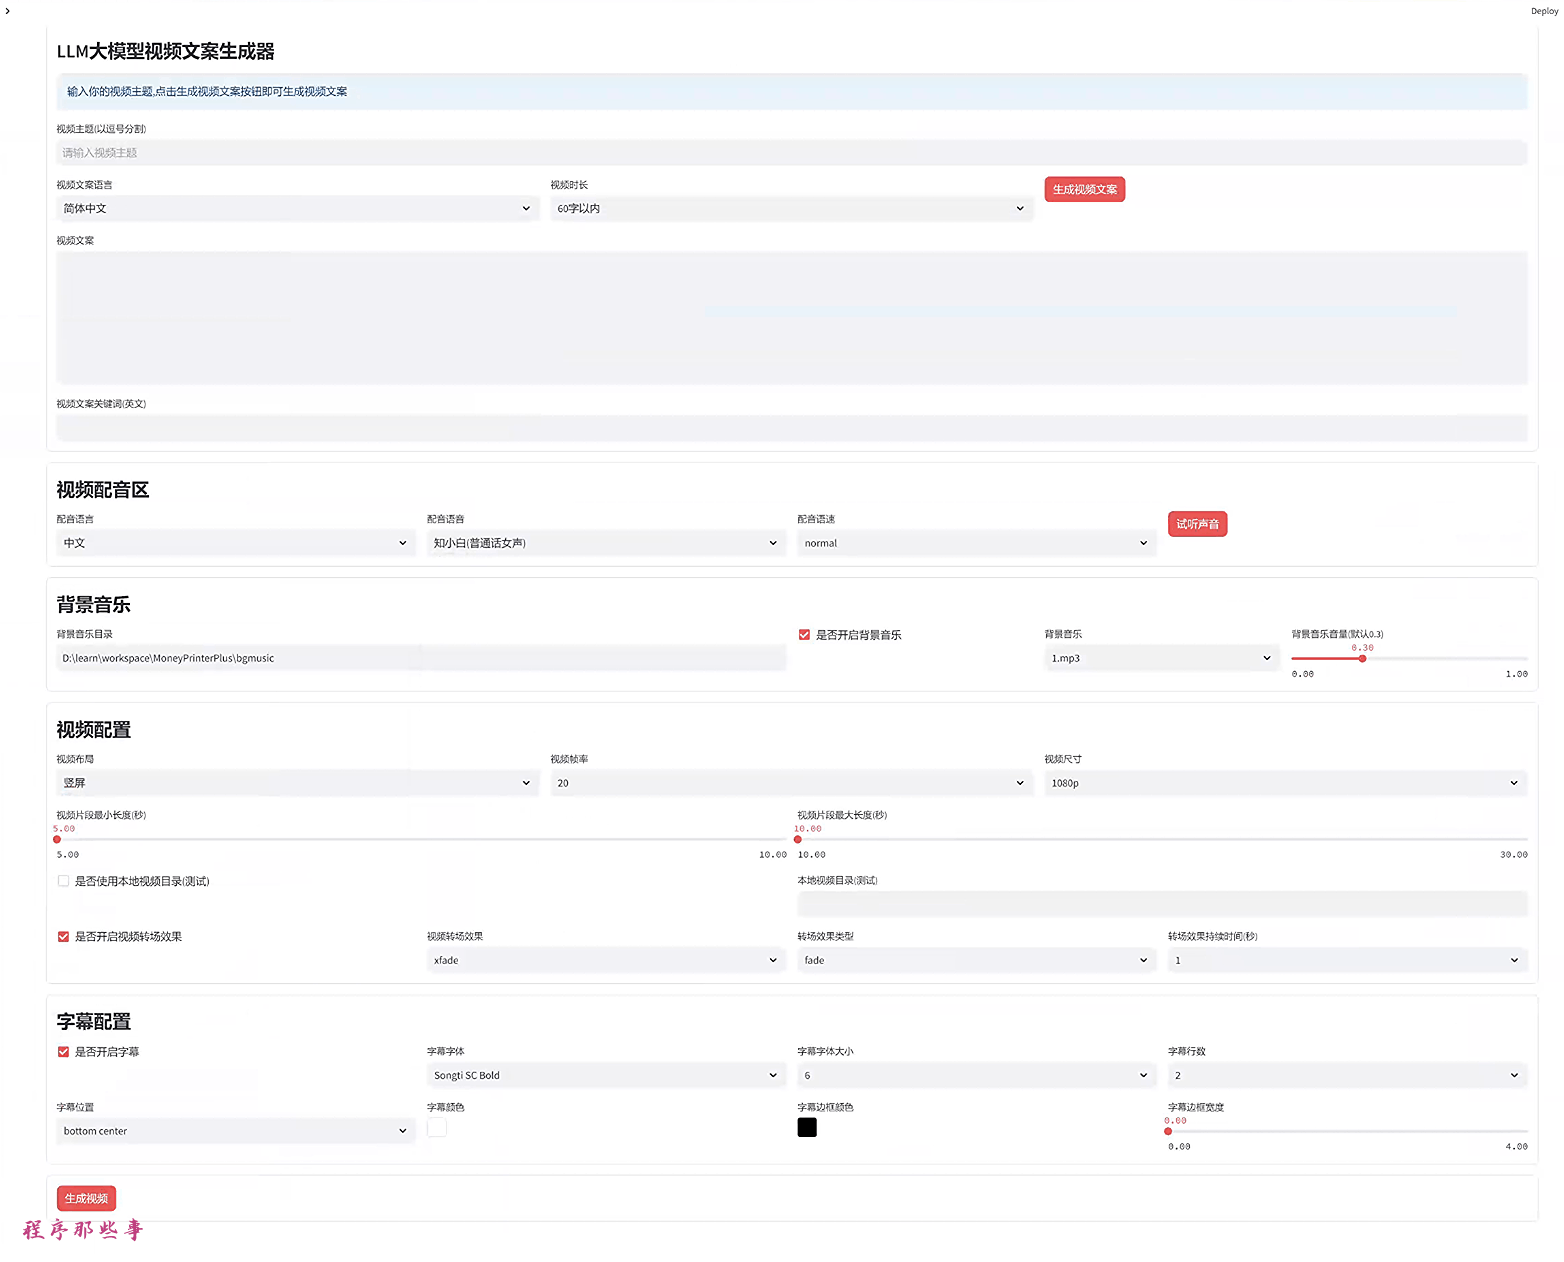
2. AI Video Generator

image-20240628153041166

Usage Introduction: MoneyPrinterPlus Detailed Usage Tutorial

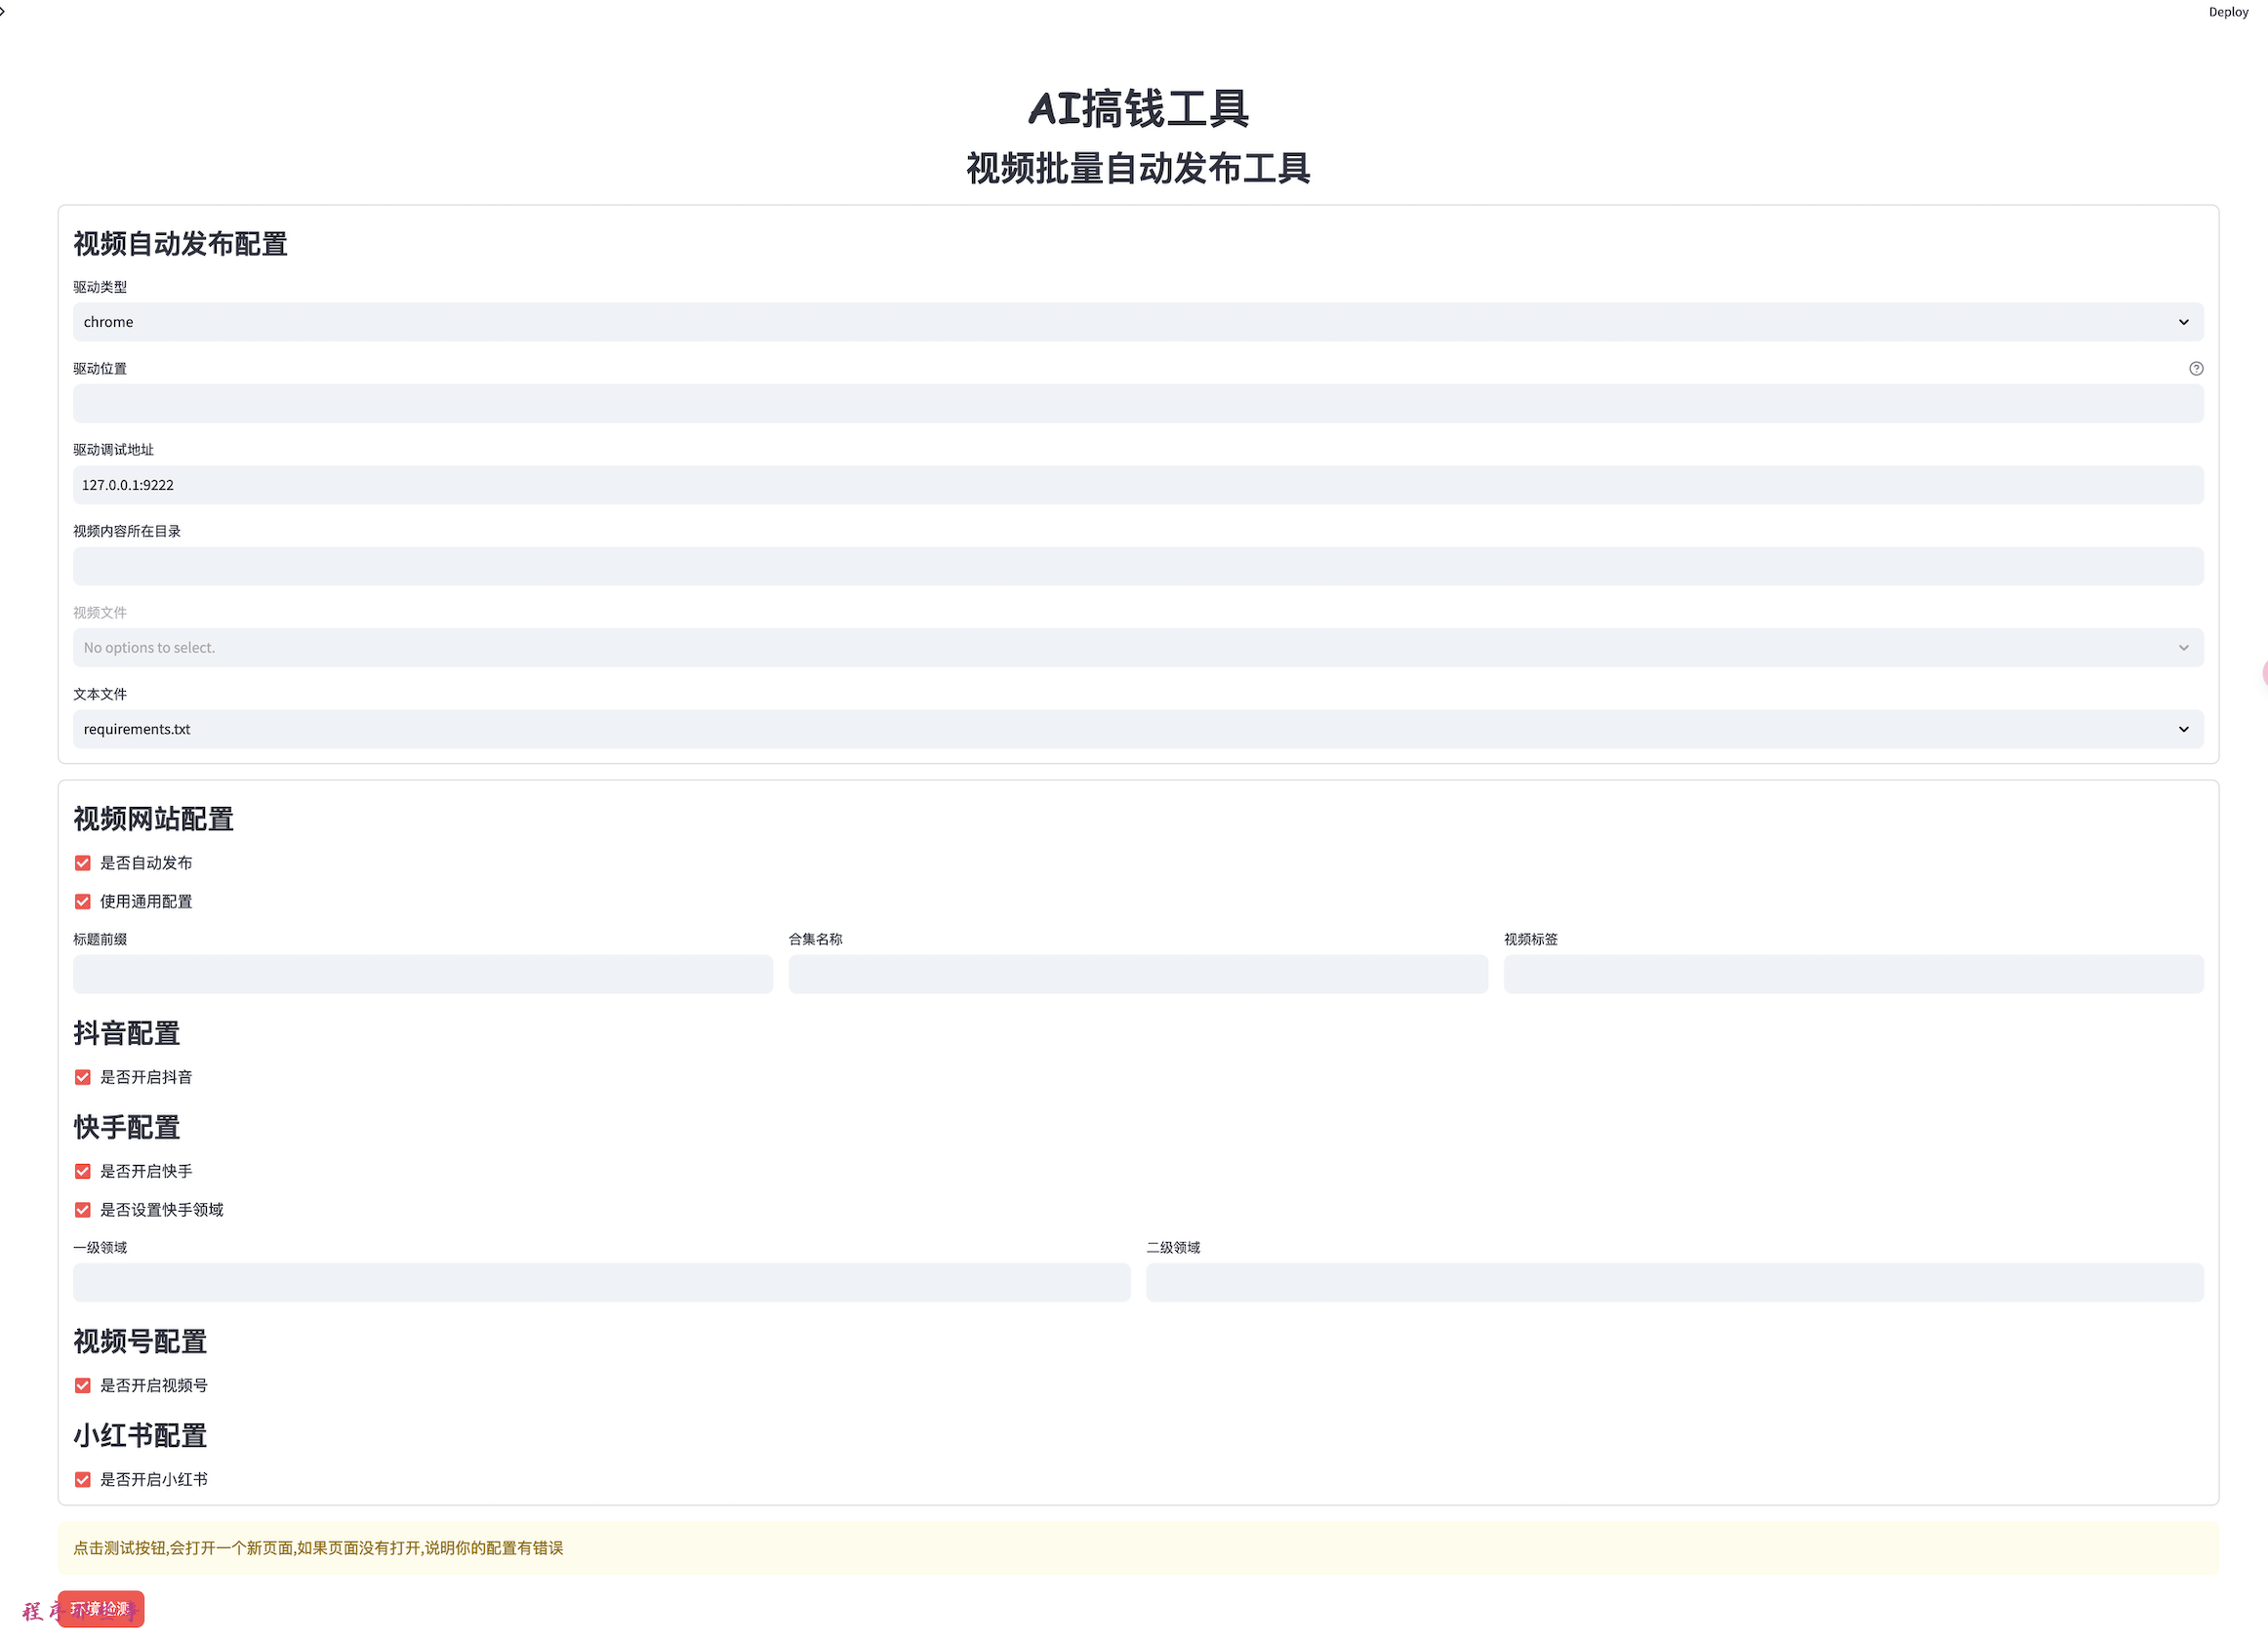
3. Batch Video Automatic Upload Tool

image-20240709093858631

MoneyPrinterPlus One-Click Publishing of Short Videos to Video Number, Douyin, Kwai, and Xiaohongshu Is Now Live

Update Announcement

Update List

  • 20240710 Support for local large model: Ollama
  • 20240708 Unbelievable! The automatic video publishing feature is now live. Supports Douyin, Kwai, Xiaohongshu, and Video Number!!!!!
  • 20240704 Added automatic installation and startup scripts for easy usage by beginners.
  • 20240628 Major update! Supports batch video editing, batch generation of a large number of unique short videos!!!!!!
  • 20240620 Improved video merging effect to make the video ending more natural.
  • 20240619 Speech recognition and synthesis supports Tencent Cloud. Requires enabling Tencent Cloud's speech synthesis and speech recognition functions.
  • 20240615 Speech recognition and synthesis supports Alibaba Cloud. Requires enabling Alibaba Cloud's Intelligent Speech Interaction feature, and must enable speech synthesis and recording file recognition (Express Edition) functions.
  • 20240614 Resource library supports pixabay, supports voice preview function, and fixes some bugs

Implemented Features

  • Automatically publish videos to various video platforms, supports Douyin, Kwai, Xiaohongshu, and Video Number!!!!!
  • Batch video editing, batch generation of a large number of unique short videos
  • Supports local material selection (supports various material formats such as mp4, jpg, png), and supports various resolutions.
  • Cloud large model integration: OpenAI, Azure, Kimi, Qianfan, Baichuan, Tongyi Qwen, DeepSeek
  • Local large model integration: Ollama
  • Support for Azure voice features
  • Support for Alibaba Cloud voice features
  • Support for Tencent Cloud voice features
  • Supports 100+ different voice types
  • Supports voice preview function
  • Supports 30+ video transition effects
  • Supports video generation in different resolutions, sizes, and proportions
  • Supports voice selection and speed adjustment
  • Supports background music
  • Supports background music volume adjustment
  • Supports custom subtitles
  • Covers mainstream AI large model tools on the market

Features to be Implemented

  • [] Support for local voice subtitle recognition model
  • [] Support for more video resource acquisition methods
  • [] Support for more video transition effects
  • [] Support for more subtitle effects
  • [] Integration of stable diffusion, AI image generation, and video synthesis
  • [] Integration of Sora and other AI video large model tools, automatic video generation

Example Display

Portrait Landscape Square
final-1718158522826.mp4
final-1718160166012.mp4
final-1718160533551.mp4

How to Use

System Requirements

Make sure to install ffmpeg and add the ffmpeg path to the environment variable.

Installation

Prerequisites

  1. Make sure you have a running environment with Python 3.10+. If you are using Windows, ensure that the Python path is added to the PATH.
  2. Make sure you have a running environment with ffmpeg 6.0+. If you are using Windows, ensure that the ffmpeg path is added to the PATH. If ffmpeg is not installed, please install the corresponding version from https://ffmpeg.org/.

Manual Installation

If you have the Python and ffmpeg environments set up, you can install the required packages using pip:

pip install -r requirements.txt

Automatic Installation

Navigate to the project directory and double-click on the setup.bat file to run it on Windows. On Mac or Linux, execute:

bash setup.sh

Running

Use the following command to run the program:

streamlit run gui.py

Automatic Running

If you used the automatic installation script, you can execute the following script to run the program:

On Windows, double-click start.bat. On Mac or Linux, execute:

bash start.sh

The log file will contain information about the program's execution, including the URL to access the program through a web browser.

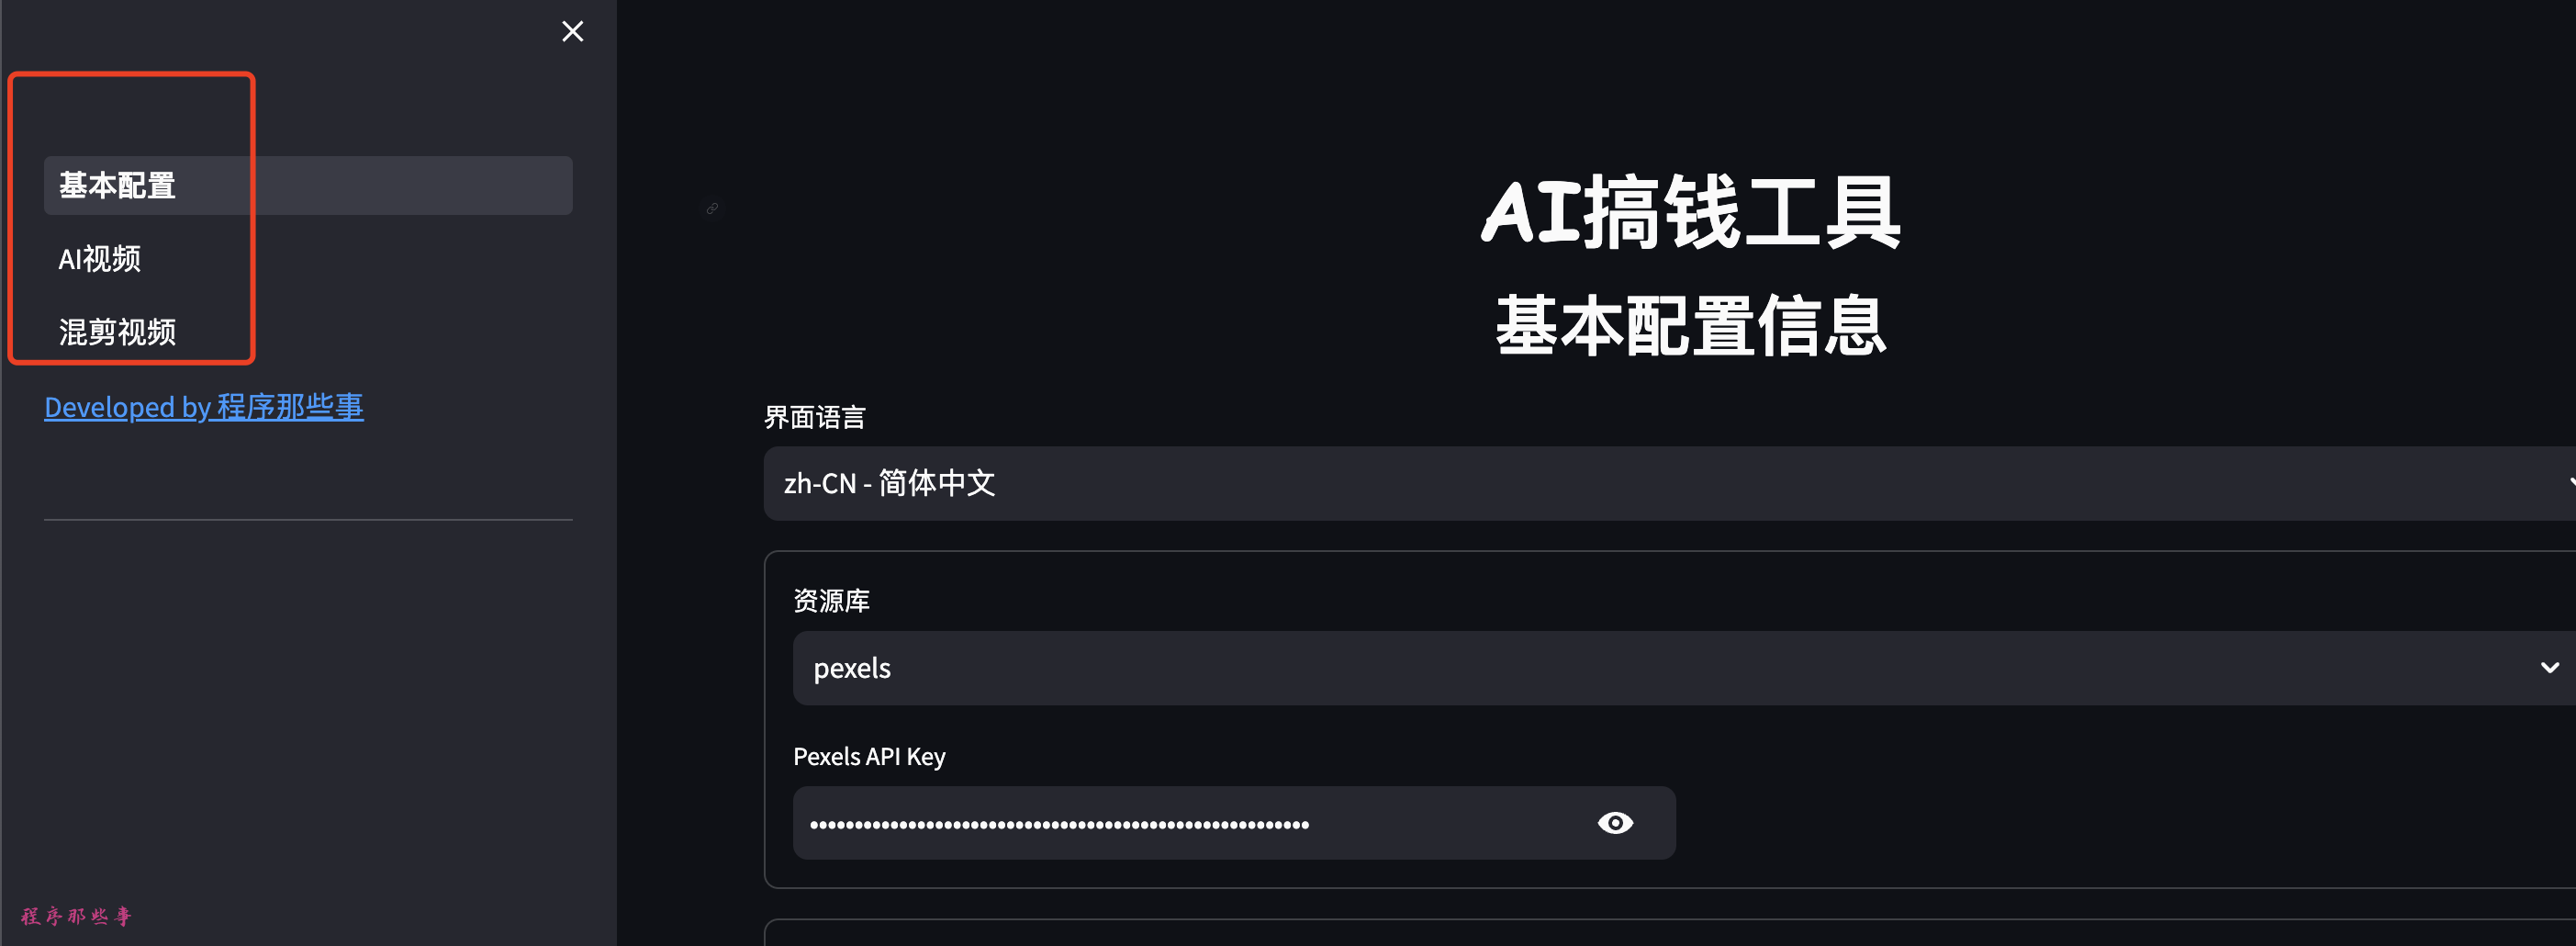
Upon opening the URL in a web browser, you will see the following interface:

image-20240612135131890

The left sidebar contains three configurations: Basic Configuration, AI Video, and Batch Video (under development).

Basic Configuration

1. Resource Library

Currently supported resources:

You will need to register for an API key on the corresponding website to enable API usage.

Other resource libraries will be added in the future, such as videvo.net, videezy.com, etc.

2. Audio Library

The text-to-speech and speech recognition functions currently support:

  1. Azure's cognitive-services.
  2. Alibaba Cloud's Intelligent Speech Interaction
  3. Tencent Cloud's voice technology (https://console.cloud.tencent.com/asr)

Text-to-speech from Microsoft Azure is currently the most outstanding service.

image-20240612135624840

3. LLM Large Model

The large model area currently supports Moonshot, openAI, Azure openAI, Baidu Qianfan, Baichuan, Tongyi Qwen, DeepSeek, and others.

Moonshot API access: https://platform.moonshot.cn/

Baidu Qianfan API access: https://cloud.baidu.com/doc/WENXINWORKSHOP/s/yloieb01t

Baichuan API access: https://platform.baichuan-ai.com/

Alibaba Cloud Tongyi Qwen API access: https://help.aliyun.com/document_detail/611472.html?spm=a2c4g.2399481.0.0

DeepSeek API access: https://www.deepseek.com/

AI Video

After setting up the basic configuration, you can proceed to the AI video section.

Video Content Generation

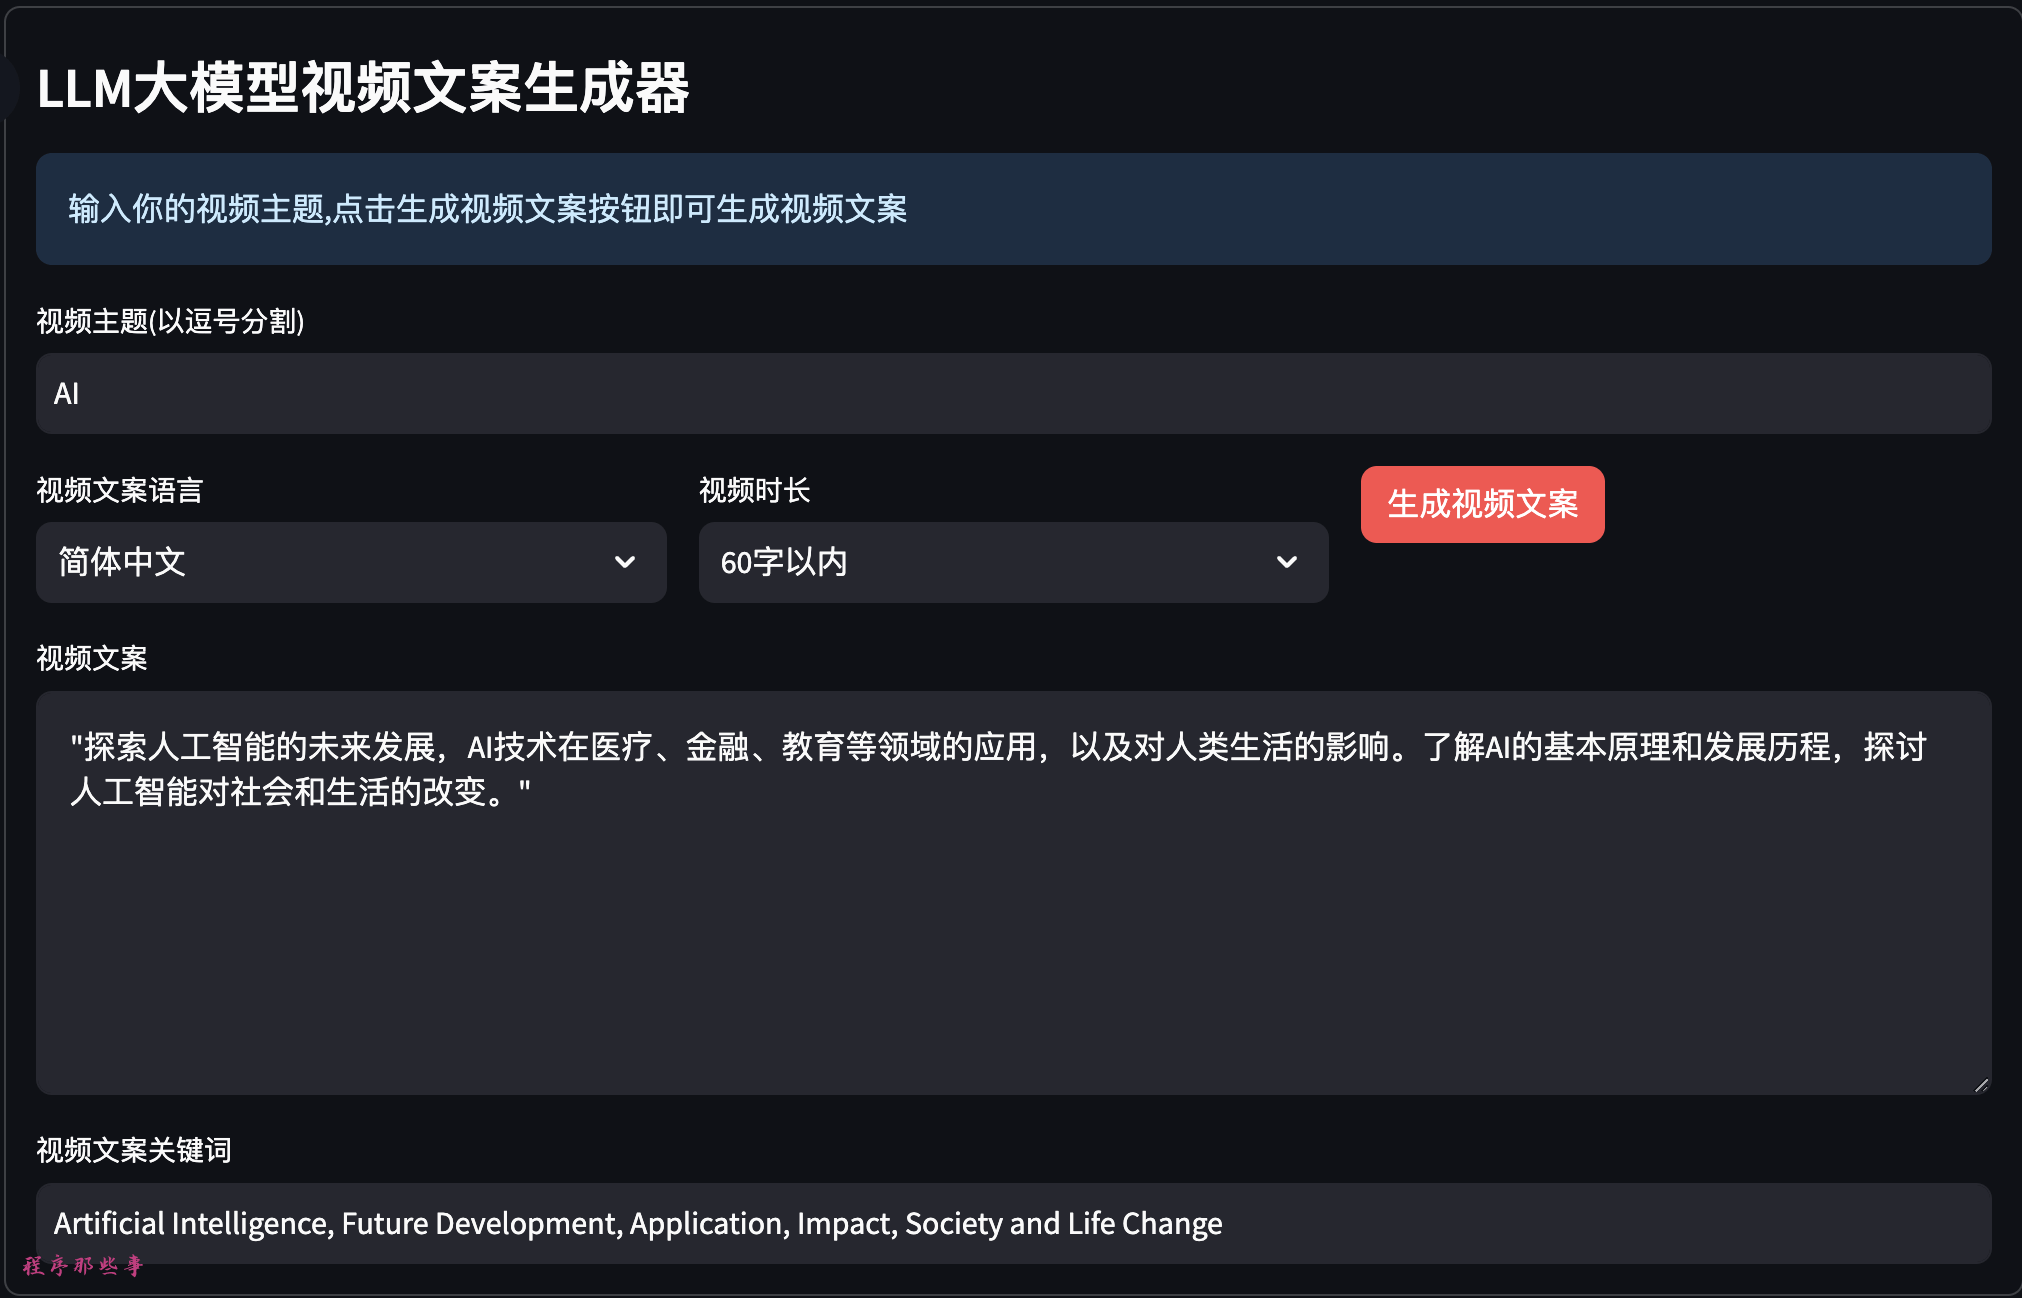
First, provide a keyword, and use the large model to generate video content:

image-20240612140441201

You can choose the language and duration of the video content. If you are not satisfied with the generated video content and keyword, you can manually modify it.

Voiceover and Background Music

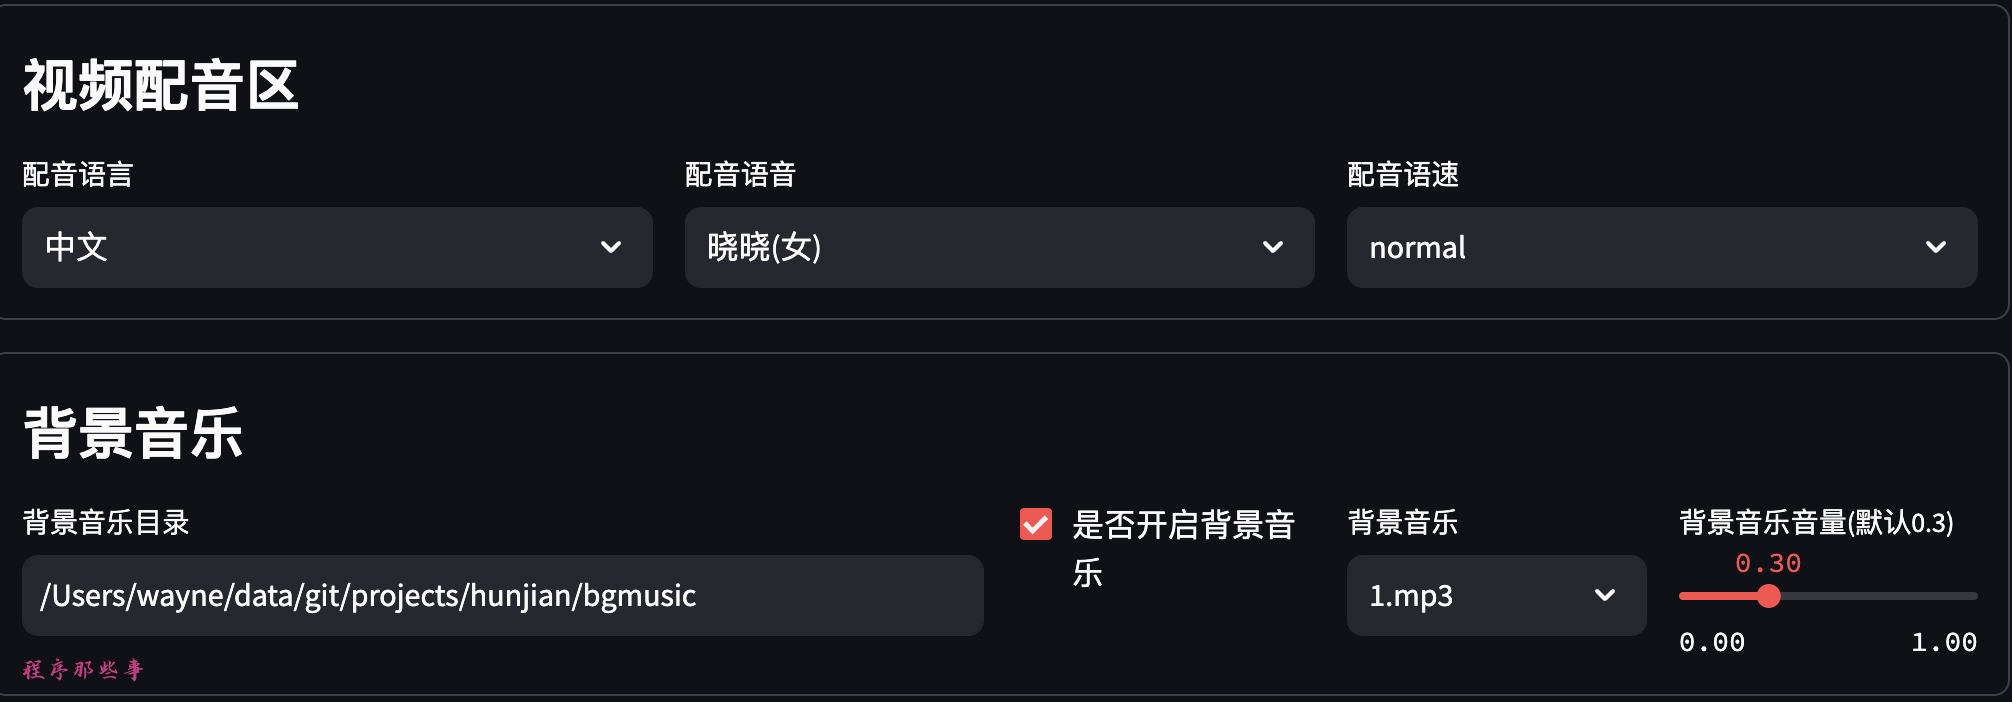
You can choose the language and voice for the voiceover.

You can also adjust the voice speed.

Voice preview function will be supported in the future.

The background music is located in the project's bgmusic folder.

Currently, there are only two background music tracks provided. You can add your own background music files to this folder.

image-20240612140547283

Video Configuration

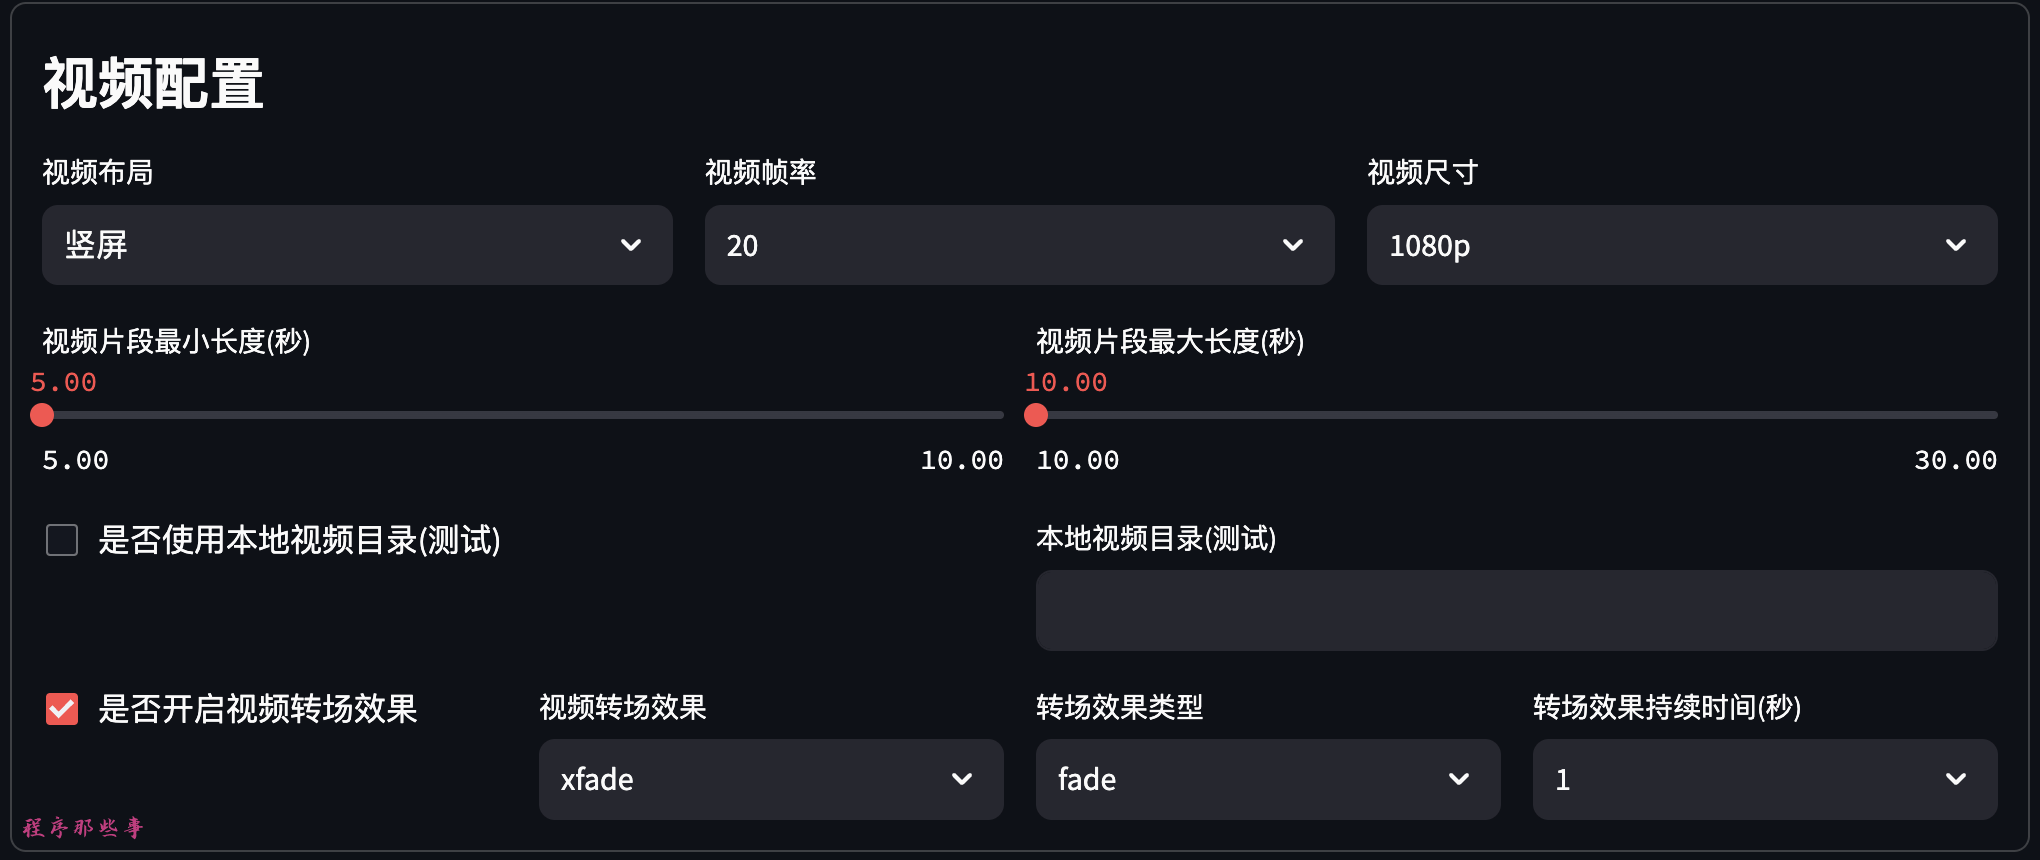
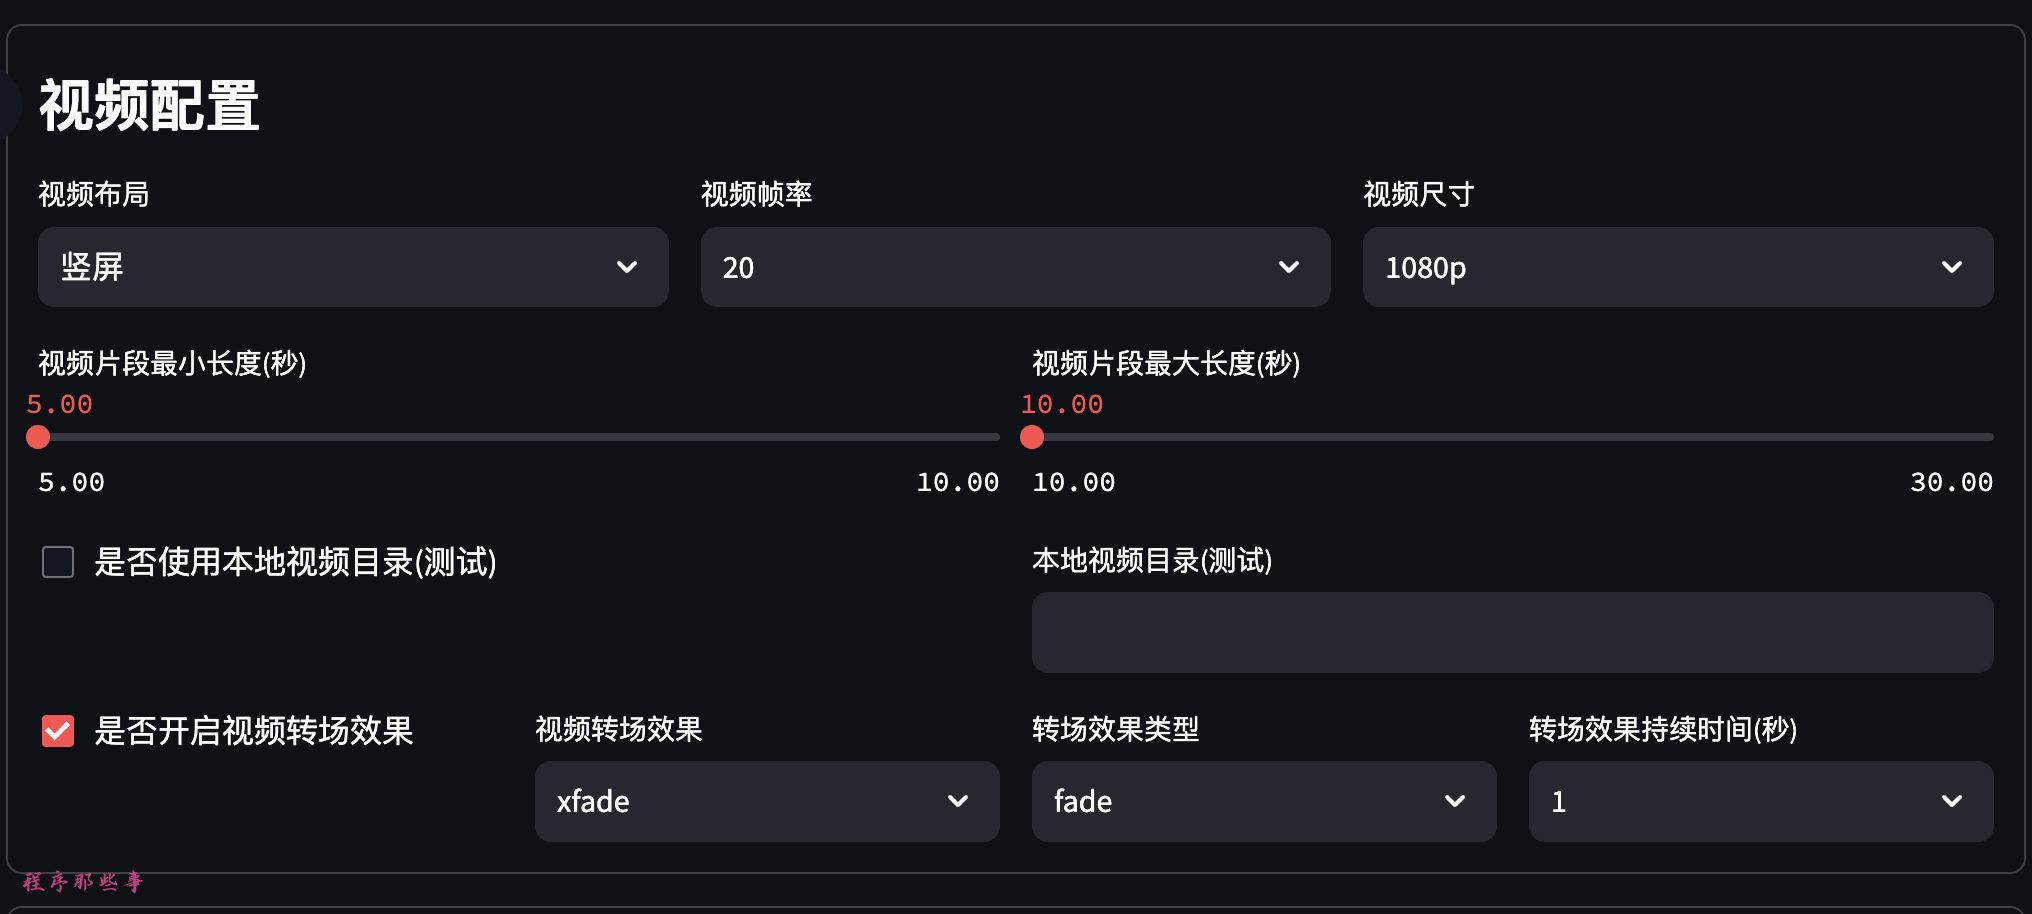
In the video configuration section, you can choose the video layout, frame rate, and video size.

You can also enable video transition effects. Currently, 30+ transition effects are supported.

image-20240612140830765

Local video resource usage will be supported in the future.

Subtitle Configuration

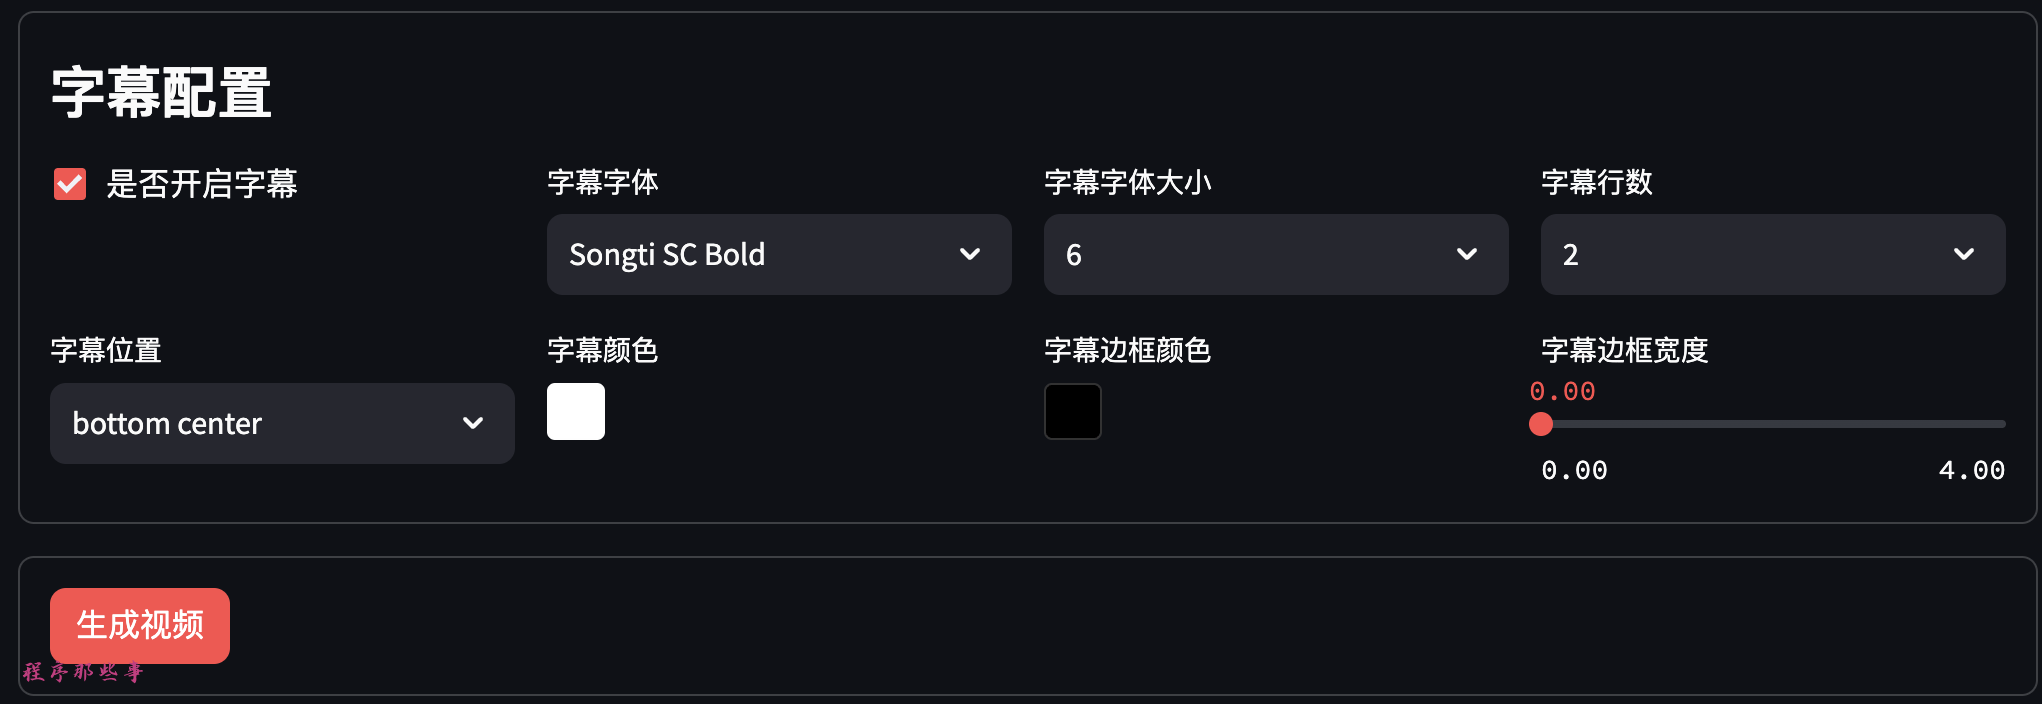
The subtitle files are located in the fonts folder at the project root.

Currently, two font collections are supported: Songti and Pingfang.

image-20240612141000542

You can choose the subtitle position, color, border color, and border width.

Video Generation

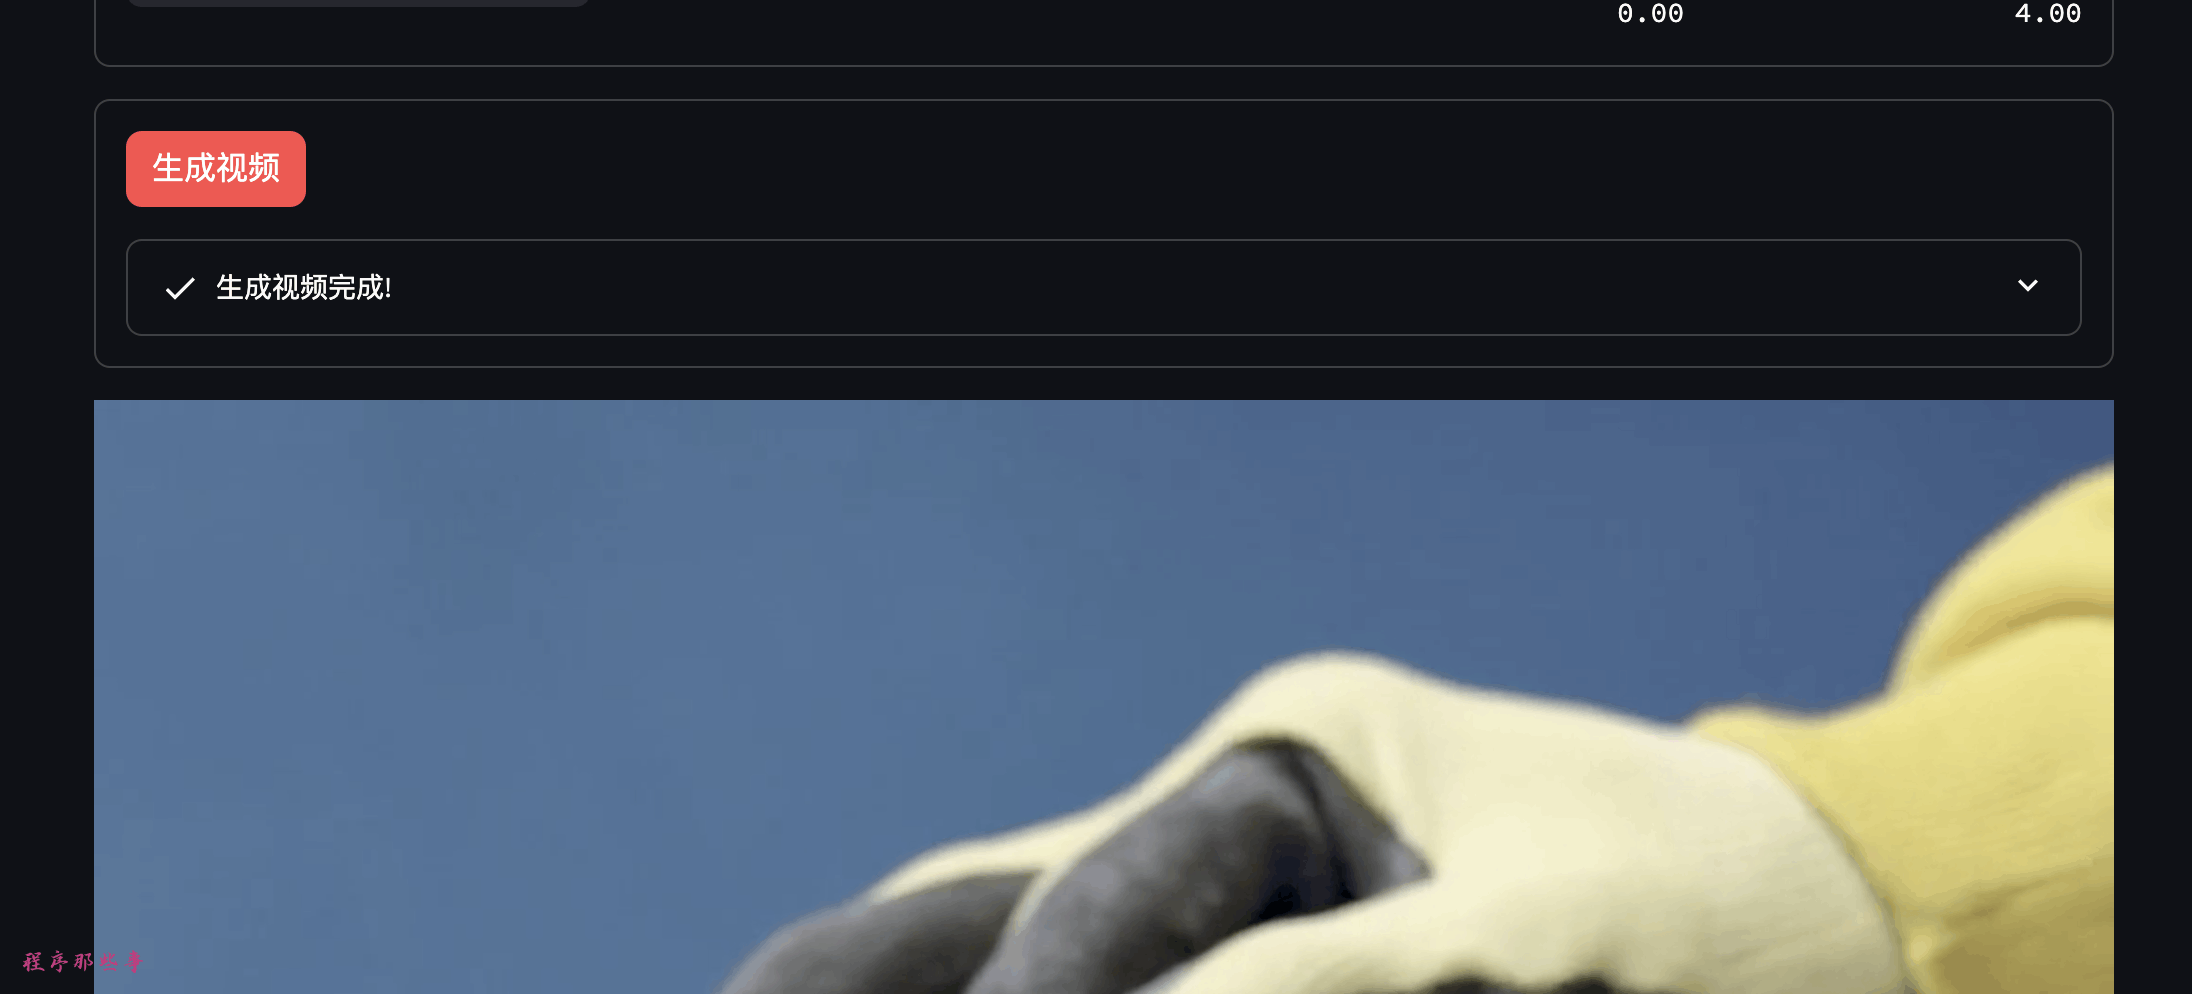
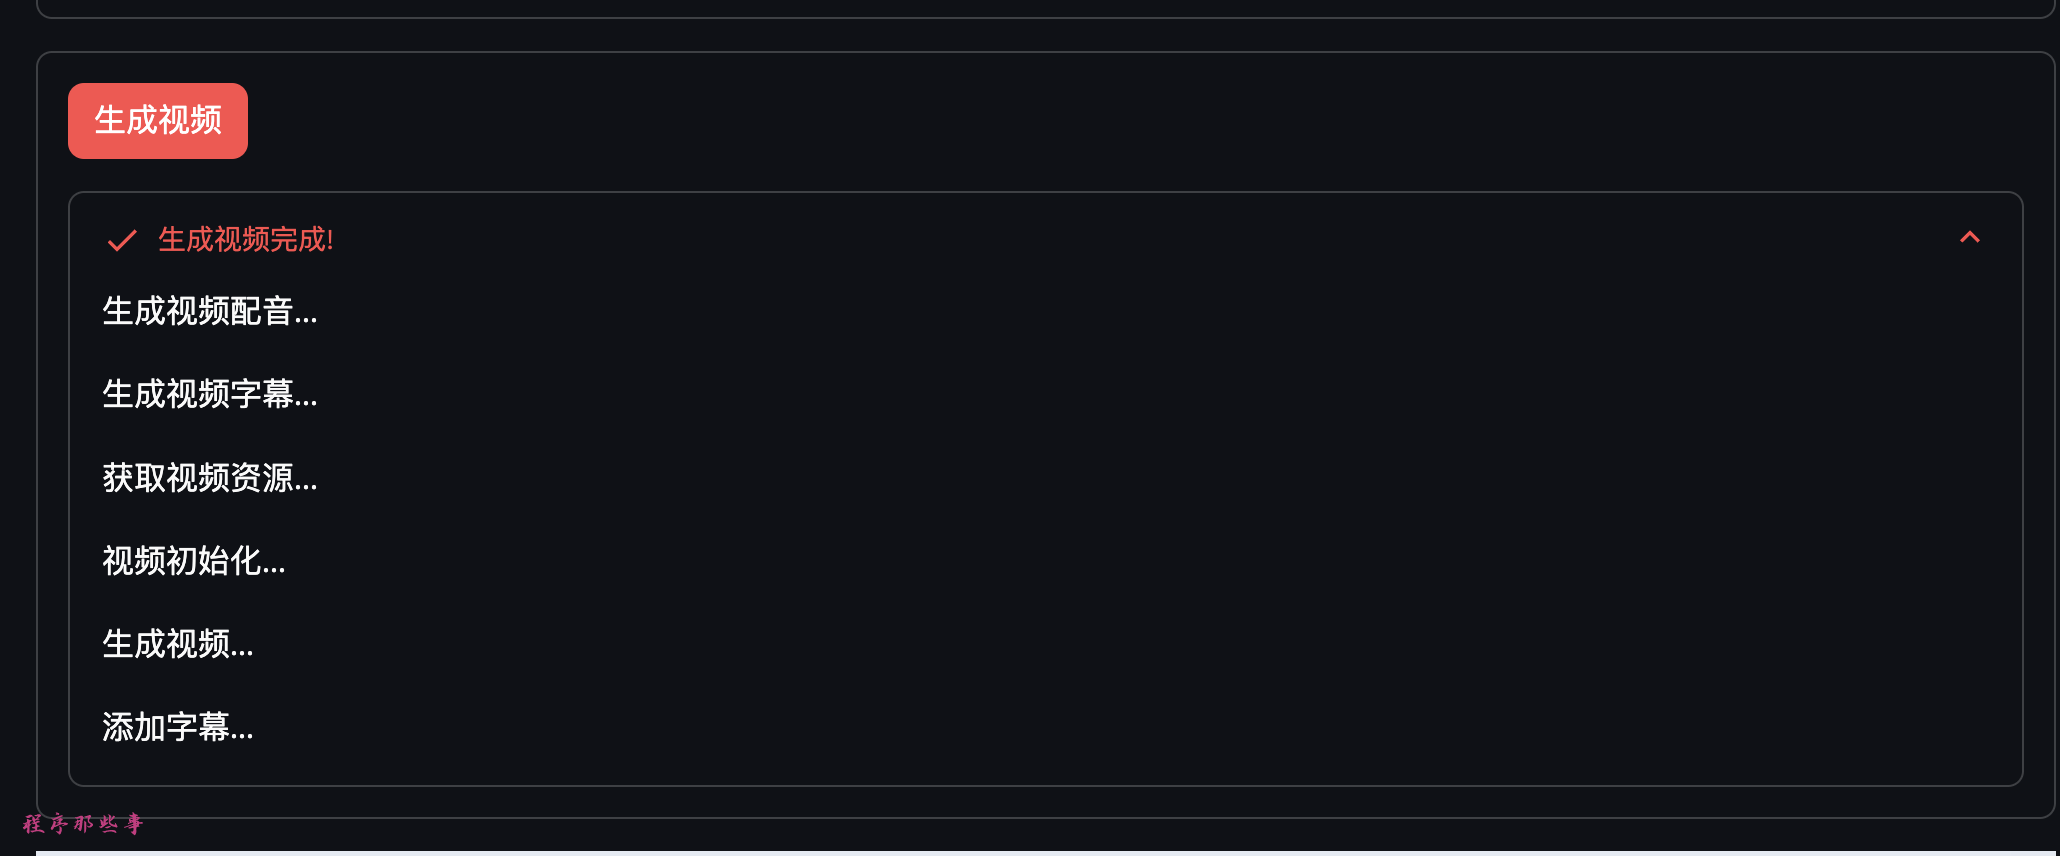
Finally, click the "Generate Video" button to create the video.

The page will display the specific steps and progress.

![image-20240612141446057](https://flydean-1301049335.cos.ap-guangzhou.myqcloud

Batch Video Splicing

After the video is generated, it will be displayed at the bottom, and you can directly play and watch the effect.

image-20240612141532280

2. Batch Video Splicing

After starting the project, you can find the video splicing area in the upper left corner.

Click on it to enter the page of the batch video splicing tool.

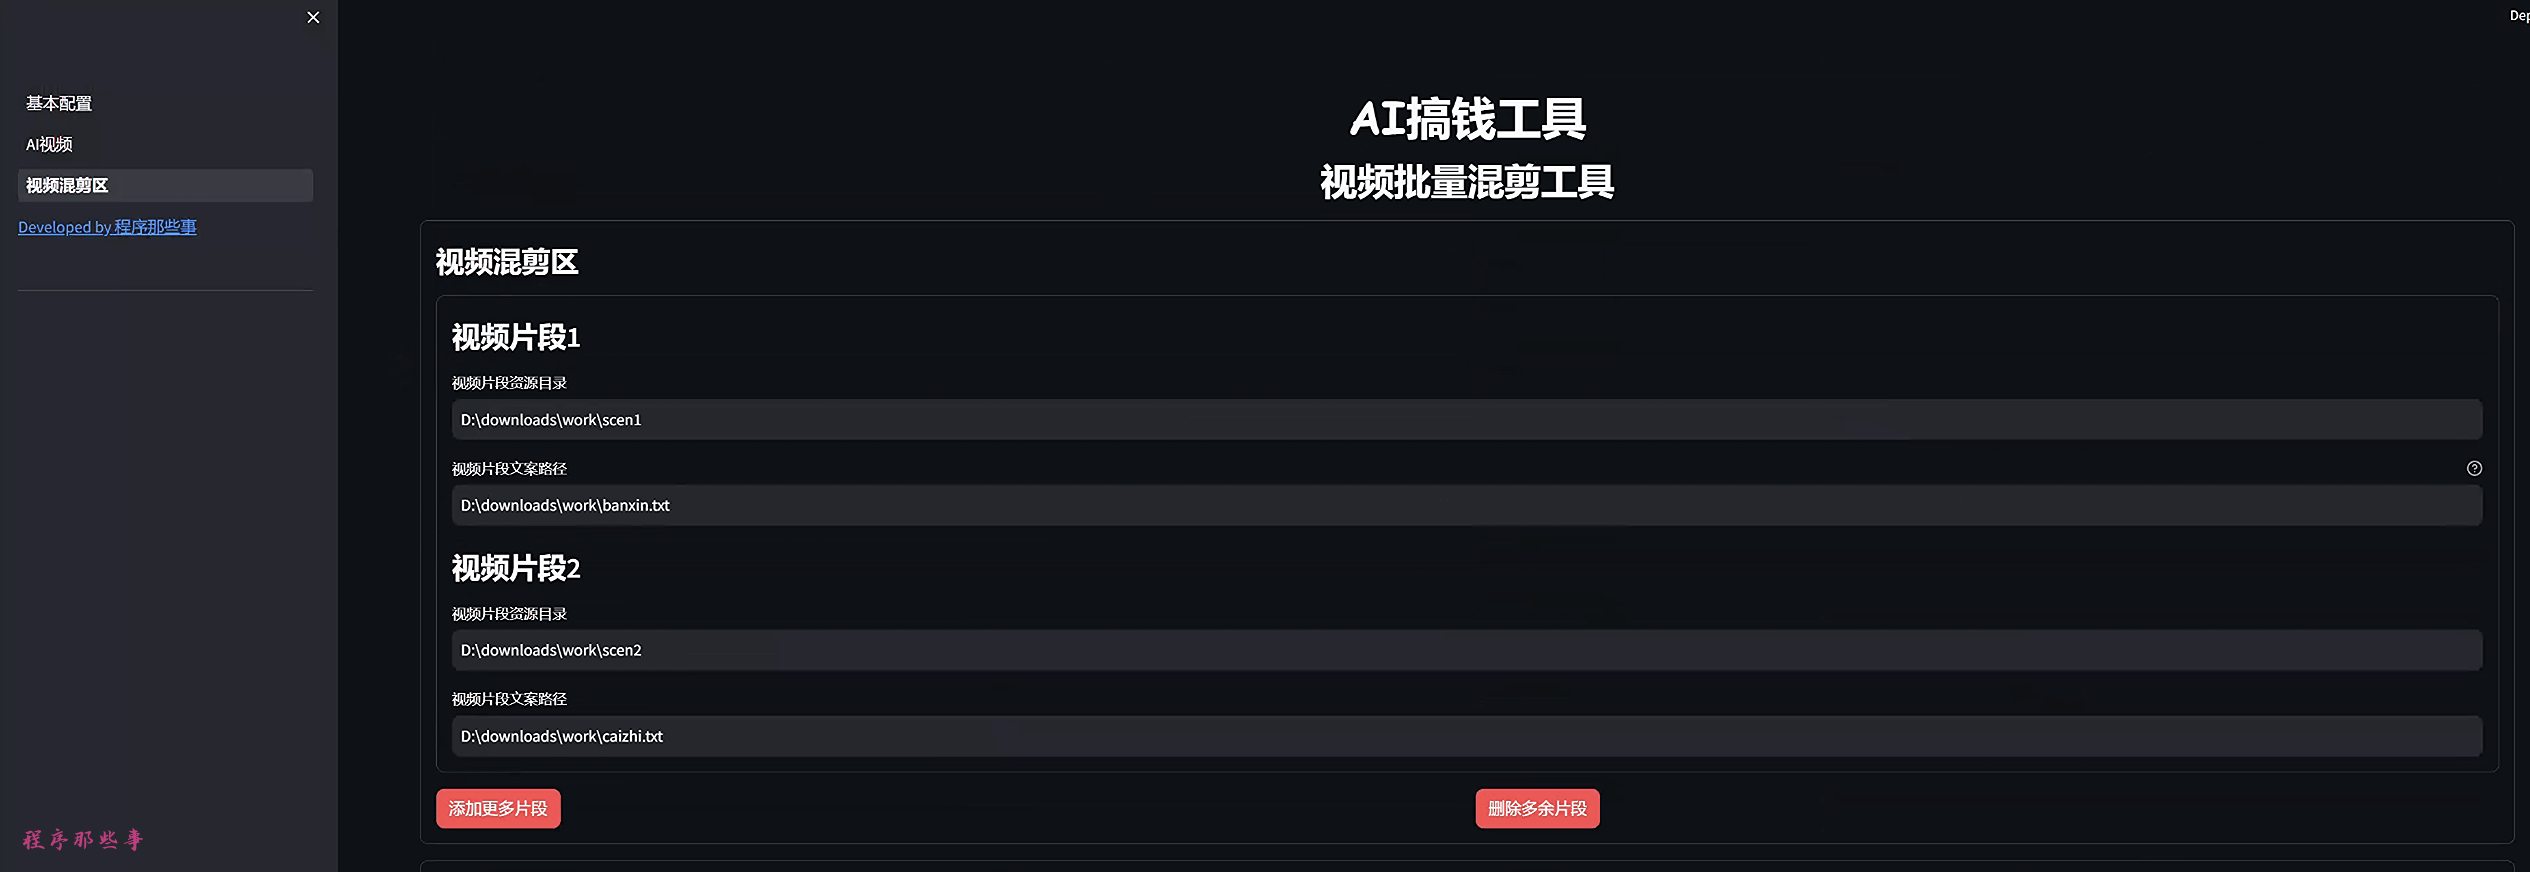
In the video splicing area, we can configure up to 5 video segments.

You can control the number of segments by clicking "Add Segment" or "Delete Segment".

image-20240628093854842

What Are Video Segments?

Some friends might ask, what are video segments?

A long video cannot have only one video theme. For example, the first half of your video may be about the style of clothing, and the second half may be about the material of the clothing.

So, the clothing style is segment 1, and the material is segment 2.

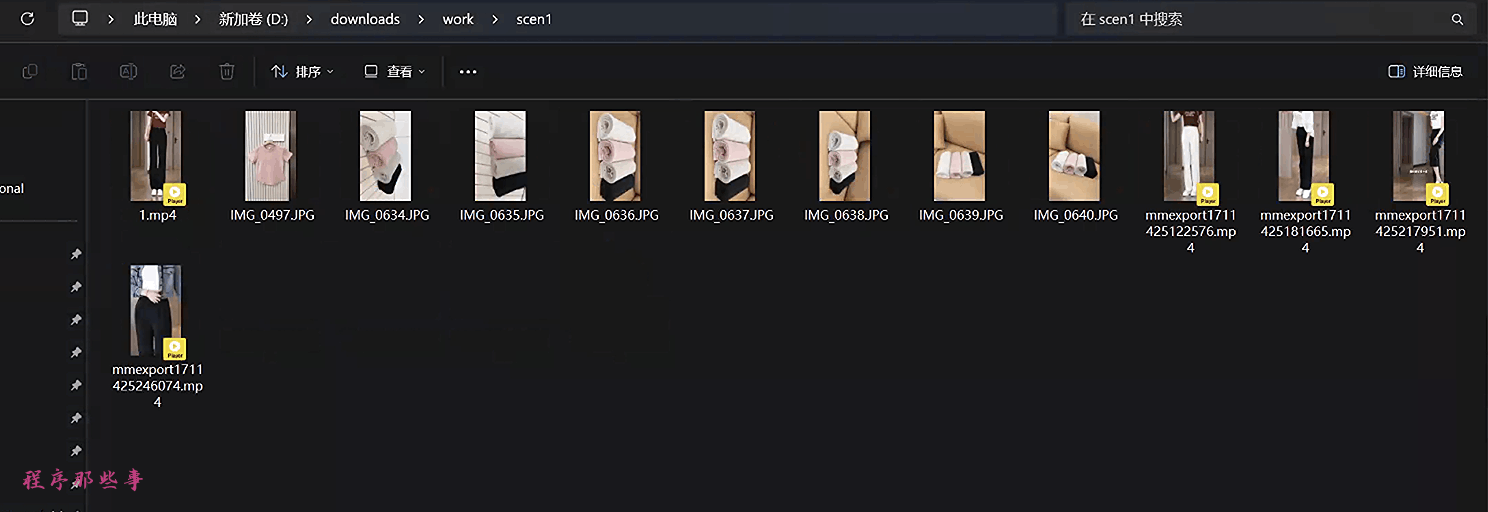
What we need to do is collect material for clothing style, which can be an mp4 video or jpg, png, and other image resources. The resolution should be as high as possible, otherwise the quality of the generated video may not be very good.

Then, put the material for the clothing style in the resource directory of video segment 1.

For example, in the resource directory shown in the image:

d:\downloads\work\scen1

Similarly, we put the material for the clothing material in the resource directory of video segment 2.

As shown below:

image-20240628094702252

What are video resource texts?

Video resource texts are the textual descriptions you need to associate with the video segment.

You can prepare many texts for a segment, and then put these texts in a txt file. One text per line in the txt file.

The system will randomly select a line from the txt file as the final textual description of the video segment.

Below is an example of a text file:

Accurate cutting, smooth lines, the design of this vest perfectly fits the body shape, whether it is loose or slim, it can show your elegant posture.
Our designers perfectly blend classic and modern styles. Every line and every cut is to showcase your unique body shape.
Every precise cut is carefully calculated to create the most suitable style for your body. From the shoulder line to the waist cut, each part showcases your unique style.
Accurate cutting, smooth lines, the design of this vest is intended to make every wearer feel the tailored fit.
Accurate cutting, smooth lines, the design of this vest fits perfectly, showing elegant posture whether it's loose or slim.
Designers blend classic and modern styles, every line and cut showcases a unique body shape.
Every precise cut is carefully calculated to create a style that suits your body shape, showcasing a unique style from the shoulder line to the waist cut.
Accurate cutting and smooth lines, the vest design is aimed at a tailored fit, showcasing the wearer's personal charm.

Configure your video segment with the video resource and resource texts.

Video Dubbing Area

In the video dubbing area, you can select the dubbing language and the corresponding dubbing language. Currently, it supports 100+ dubbing languages.

You can also select different dubbing speeds to support different usage scenarios.

image-20240616220840076

If you are unsure about the dubbing, you can click on "Try to Listen" to listen to the corresponding dubbing voice.

Background Music

The background music is placed in the "bgmusic" directory under the project. You can add background music files to this folder as needed.

image-20240616221041774

You can choose whether to enable background music and the default background music volume.

Video Configuration Area

In the video configuration area, you can choose the video layout: portrait, landscape, or square.

You can choose the video frame rate, video size, and the minimum and maximum length of each video segment.

Most importantly, you can also enable video transition effects. Currently, it supports 30+ video transition effects.

image-20240616221116997

Subtitle Configuration

If you need subtitles, you can click to enable the subtitle option, and set the subtitle font, subtitle font size, and subtitle color, etc.

If you are unsure how to set it, you can choose the default settings.

image-20240616221242812

Final Video Generation

The system currently supports generating up to 100 videos at a time, according to your needs.

image-20240628095137565

Finally, click the "Generate Video" button to generate the video.

The page will show the corresponding progress.

image-20240616221712173

The generated videos will be displayed at the bottom of the page, and you can play them as needed.

If you have generated multiple videos, you can find them in the "final" directory of the project folder.

3. Batch Short Video Upload

Working Principle

The automatic publishing tool is essentially based on the selenium automation framework.

By simulating human click operations, it can complete most tasks that would otherwise require manual operation. This frees up your hands.

Additionally, there are two ways to implement this automation. One is to start a browser while running the program. The other is to attach to an existing browser to operate on its page.

This tool chooses to attach to an existing browser.

This is mainly because some video platforms require scanning a QR code with a mobile phone to log in, and it is difficult to simulate this login process in the program.

Prerequisites

Currently, automatic publishing supports two browsers: Chrome and Firefox. You can choose one according to your needs.

1. Chrome Configuration

The current mainstream browser is undoubtedly Chrome. So, let's first talk about how to support Chrome.

  1. First, you need to download and install Chrome. Remember your version number. You can download Chrome from the official website or from this page ChromeDriver download page.

  2. You need to download the corresponding ChromeDriver that matches your Chrome browser version from the ChromeDriver download page. Make sure you download the version that matches your operating system and Chrome version.

After downloading, unzip the ChromeDriver to a local directory. It's best not to use a directory path with Chinese characters, as it may not run properly.

  1. Start Chrome in debug mode.

If you are using a Mac, you can first set an alias for Chrome:

alias chrome="/Applications/Google\ Chrome.app/Contents/MacOS/Google\ Chrome"

Start Chrome in debug mode:

chrome --remote-debugging-port=9222

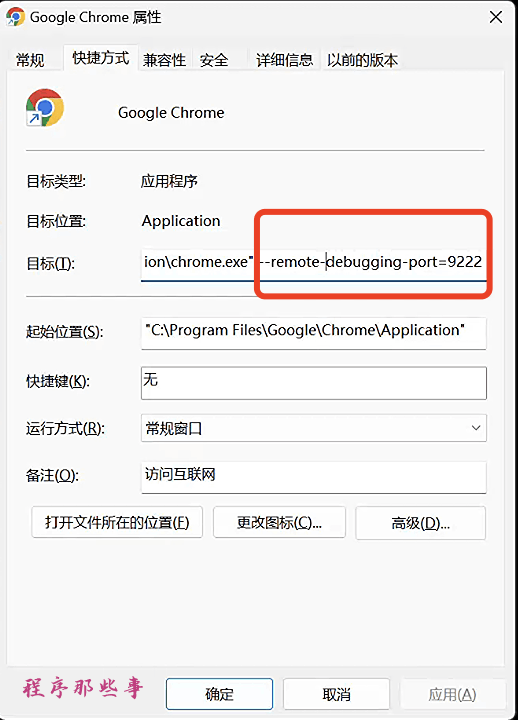
If you are using Windows, you can add the following to the target of the Chrome desktop shortcut:

--remote-debugging-port=9222

image-20240710103643535

Then double-click to open Chrome in debug mode.

2. Firefox Configuration

Apart from Chrome, the most commonly used browser is probably Firefox.

So, we also provide support for Firefox.

To use Firefox, you need to follow these steps:

  1. Download and install Firefox.

  2. Download the geckodriver driver. Download the geckodriver that matches your Firefox browser version. Make sure you download the version that matches your operating system and Firefox version.

After downloading, unzip the geckodriver to a local directory. It's best not to use a directory path with Chinese characters, as it may not run properly.

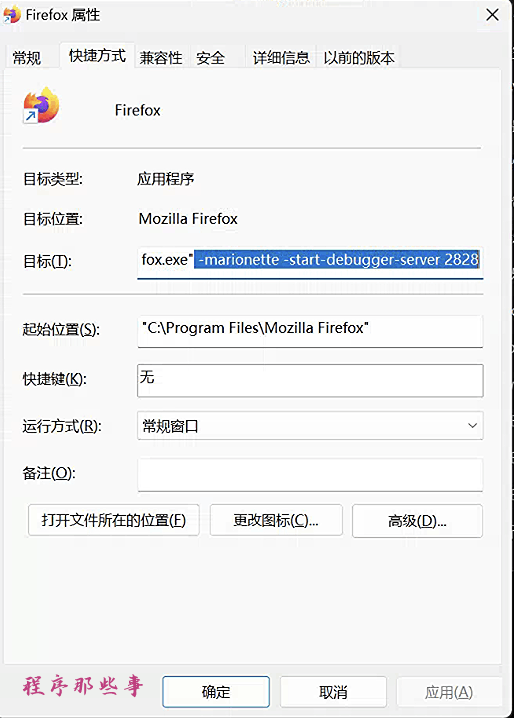
  1. Start Firefox in debug mode:

Similar to Chrome, you need to start Firefox with the following command: -marionette -start-debugger-server 2828

image-20240504120509315

Note: The port here must be 2828 and cannot be customized.

Now, if you open Firefox, you will see that the navigation bar turns red, indicating that you have started remote debugging mode.

image-20240504120607831

Enter about:config to see that the marionette.port port is 2828.

Getting Started

In a Windows environment, simply double-click "start.bat" to start.

In a Mac environment, execute "sh start.sh" in the project root directory.

The browser will automatically open the MoneyPrinterPlus homepage.

image-20240710104233733

Click on the "Video Automatic Publishing Tool" on the left to access the page for the video automatic publishing tool.

You can select the driver type, Chrome or Firefox.

The driver location is the location of the previously downloaded chromedirver or geckodriver.

The video content directory is the directory where your video content is located.

After modifying the video directory, the video files and text files in the video directory will be automatically listed.

The video files are the content you want to publish.

What about the text files?

The text files are the textual content associated with the video.

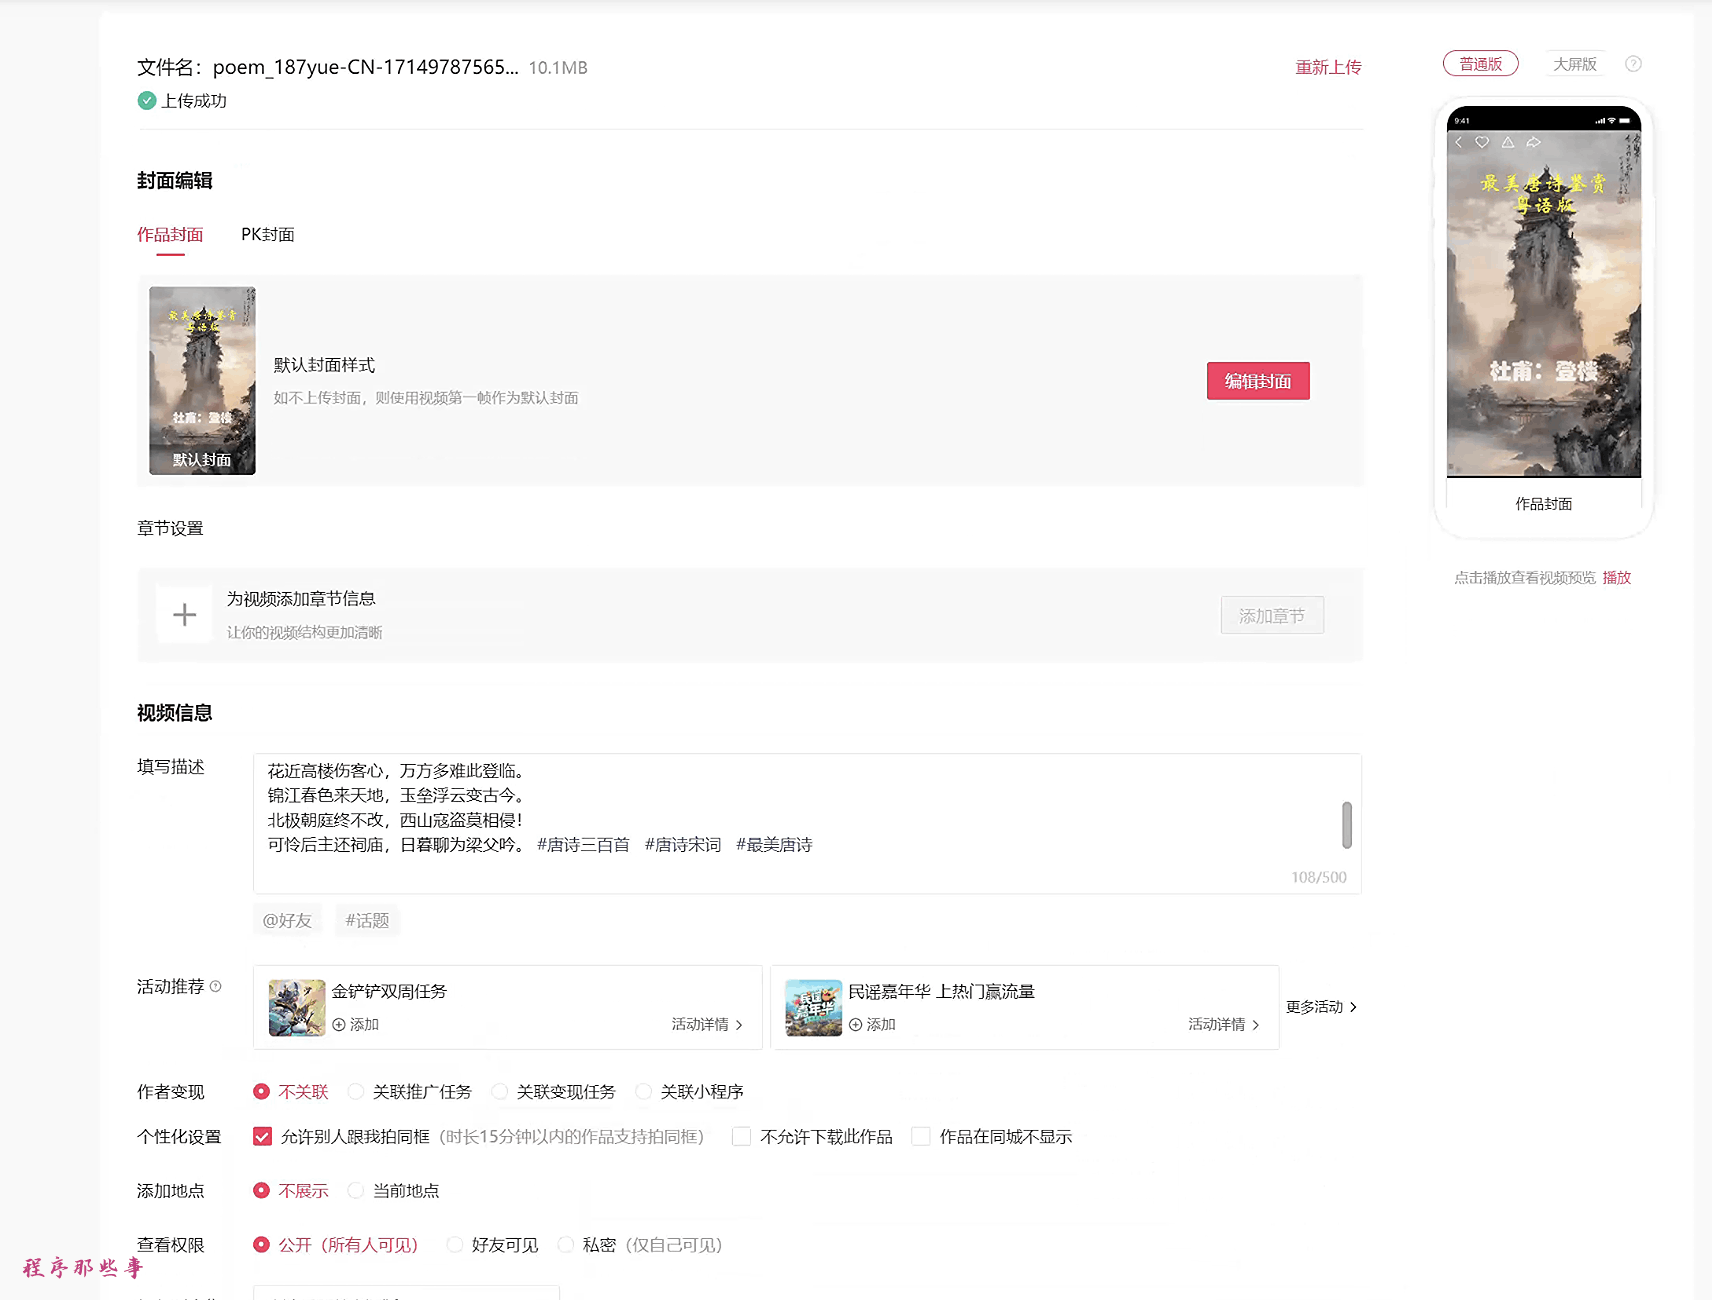
For example, if you want to publish a video about Tang poetry, the corresponding content of the text file would be:

Wang Wei: To Guo Geshi
The high pavilion door is covered in lingering light, with peach and plum trees shading and willow catkins flying.
The sparse bells in the forbidden palace chime late, and the crying birds in the provincial office are rare.
Morning shakes the jade pendants and rushes to the golden palace, while evening offers the heavenly book and bows in the imperial hall.
I want to accompany you without growing old, and I'll lay down my morning attire due to illness.

Remember, the first line must be the title of the video.

The content of the other lines is up to you.

Then, take a look at the following page:

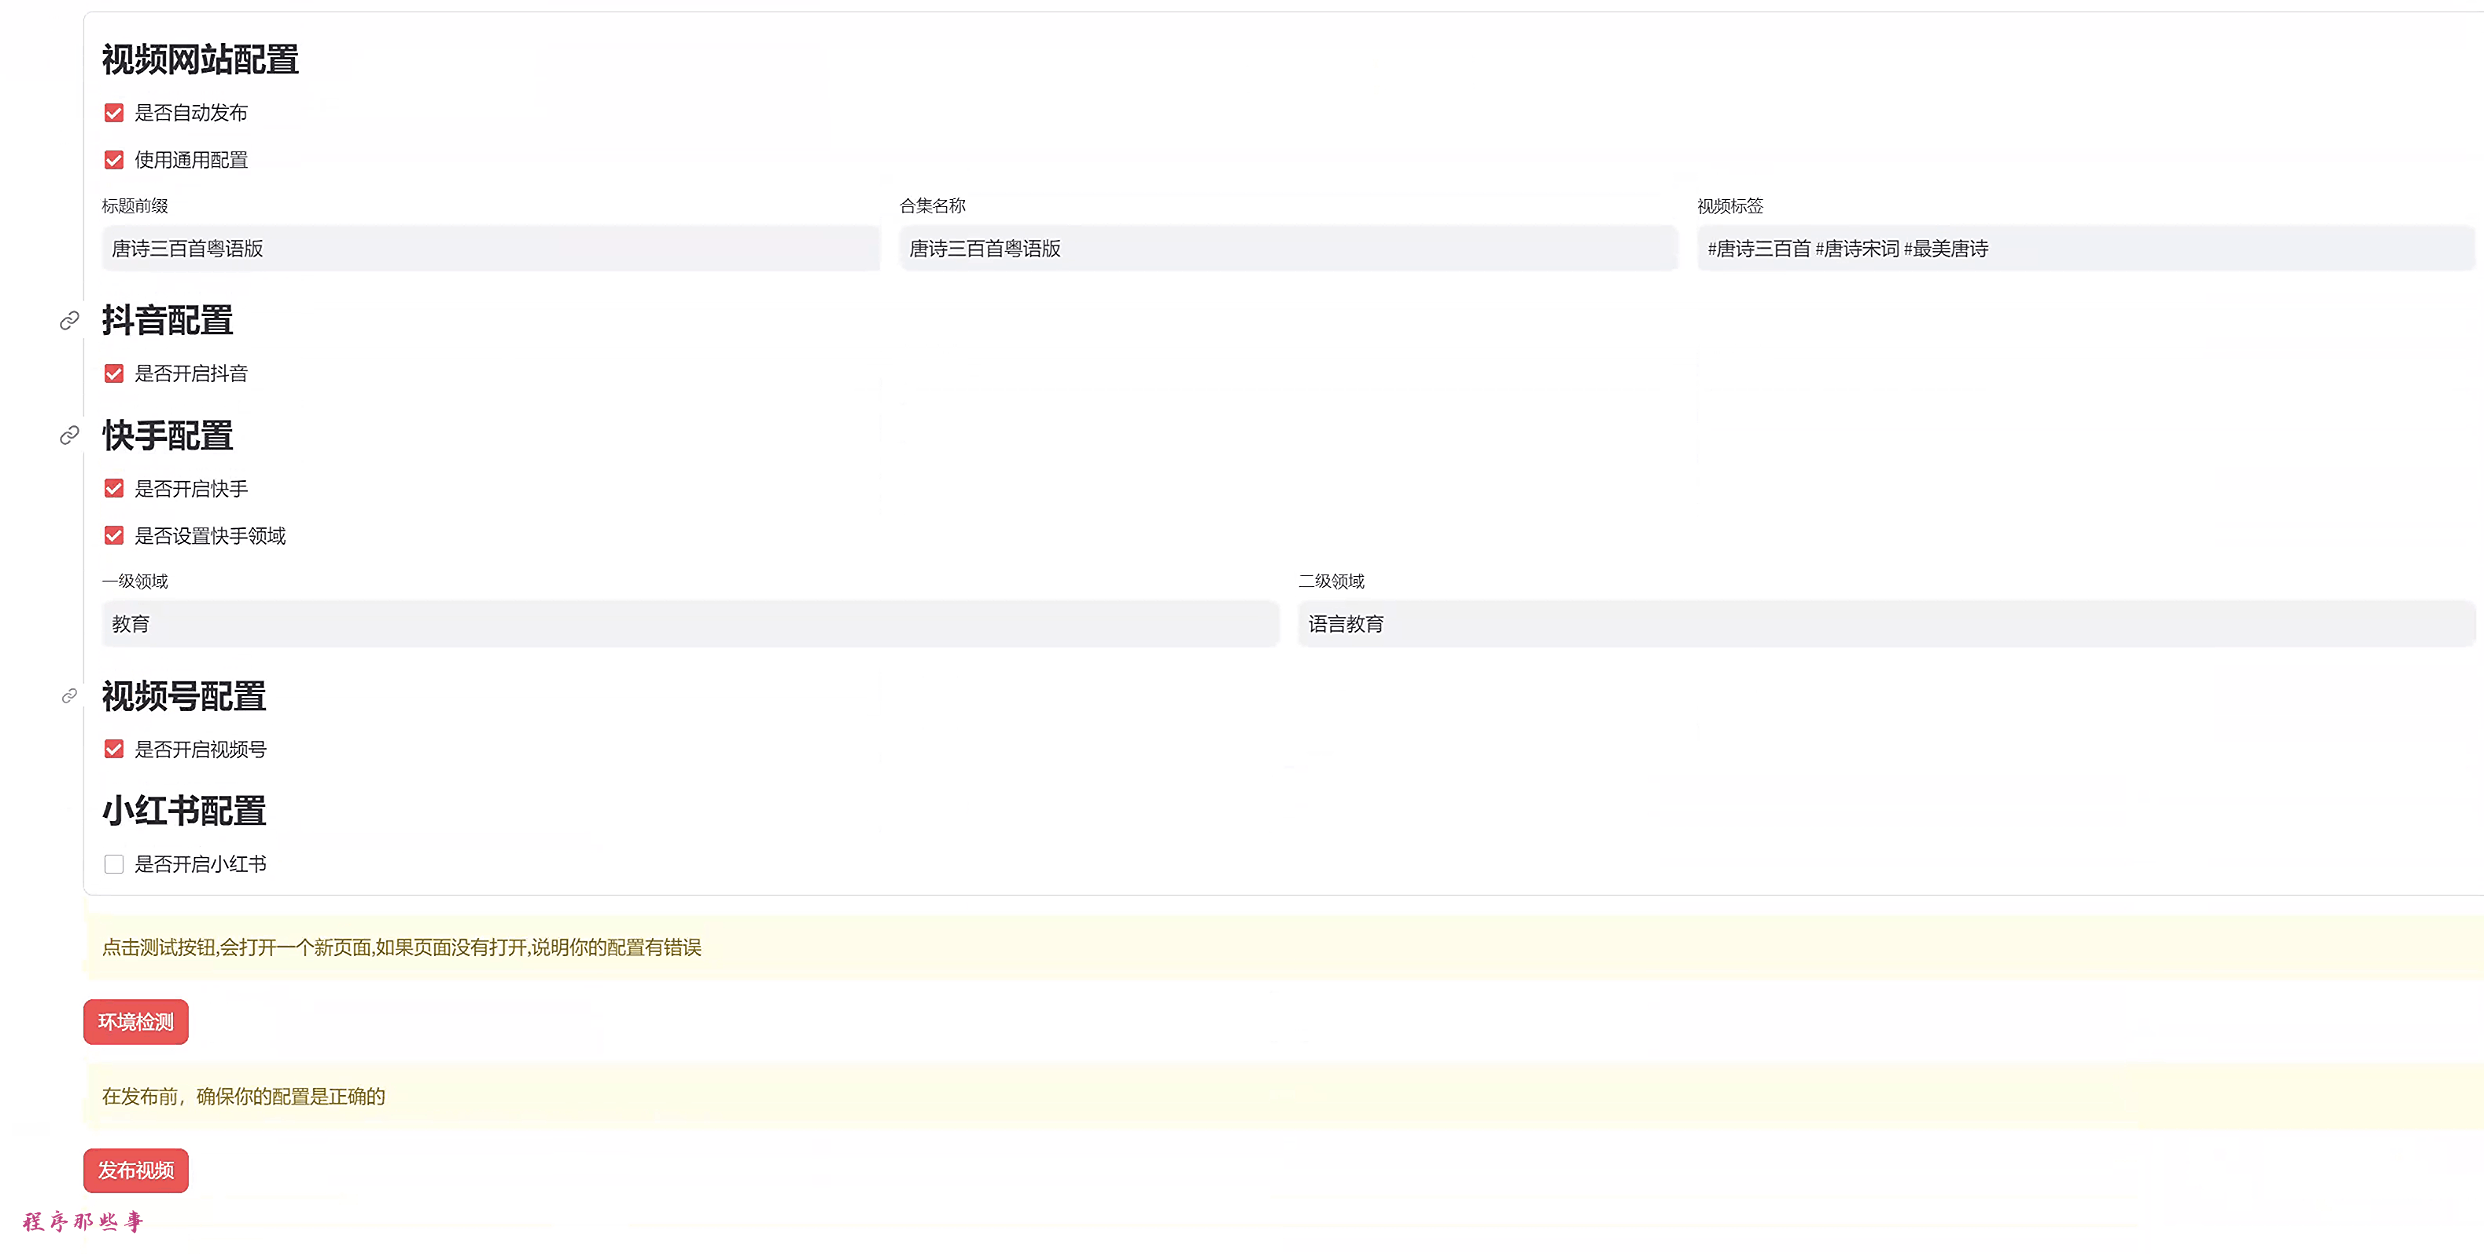
image-20240710104725552

The video site configuration should be quite straightforward, and friends who have been to kindergarten should understand it.

Title Prefix: If you need to add an additional prefix to the video title, you can set it here.

Collection Name: Some video sites require you to select a collection. This is the name of the collection (the program will not create the collection for you, so you need to create it in advance on the website).

Video Tags: It's self-explanatory, it's the tags, separated by spaces.

For Kuaishou, there is an additional field configuration.

You can choose whether to enable Douyin, Kuaishou, Video Number, or Little Red Book.

Environment Check

Next, you can prepare to publish the video.

But before publishing, you can click on "Environment Check".

If your homepage opens automatically, it means your environment configuration is fine. You can go ahead and publish the video.

Publishing Video

Because all video sites require login, you need to open the corresponding site and log in to your account first before clicking the "Publish Video" button.

Once all your accounts are logged in, click the "Publish Video" button.

Start your journey of freedom.

The running interface will look something like this:

image-20240710105336580

Common Issues and Solutions

For friends who encounter problems, you can first check the summary of common issues here to see if you can solve the problem.

Summary of Common Issues

Discussion Group

If anyone has any questions or ideas, feel free to join the group for discussion. Friends who think the project is good can buy the author a cup of tea.

交流群 我的微信