|  | # Lab 6: Configuring VPN connectivity into your private ATP network |
Oracle's dedicated Autonomous Infrastructure and databases are deployed in a private VCN in the Oracle Cloud Infrastructure with no public IP address assigned. Hence to gain connectivity to the databases, a best practice approach is to use a VPN connection.
This lab walks you through the steps to deploy a VPN server in OCI and create an SSL VPN connection between a client machine (your desktop) and the dedicated ATP infrastructure. Once configured, a single VPN server can be shared among multiple users.
To log issues, click here to go to the github Oracle repository issue submission form.
As a network or fleet admin,
- Configure a VPN server in OCI based on OpenVPN software
- Configure your VPN client and connect to VPN Server
- Launch SQL Developer on client and connect to a dedicated ATP instance
- An Oracle Cloud Infrastructure account with privileges to create compute instance and network resources
- A pre-provisioned dedicated autonomous database instance in a private network
- A pre-provisioned Virtual Cloud Network with public and private subnets setup with appropriate security lists. Refer Lab 1
The following illustration shows a network topology that can be used to provide secure access to your dedicated autonomous infrastructure.

-
As shown above, You OCI Virtual Cloud Network (VCN) has two subnets. A private subnet with CIDR 10.0.0.0/24 that hosts your exadata infrastructure and a public subnet with CIDR 10.0.1.0/24 that has public facing web and application servers and also the VPN Server.
-
An internet gateway is attached to the public subnet to allow all resources within that subnet to be accessible over the internet.
-
Security lists have been setup such that tcp traffic into the private exadata subnet is allowed only through hosts in the public subnet. This can be further tightened by allowing traffic from specific hosts and ports.
-
For detailed instructions on network setup for your dedicated autonomous DB infrastructure, refer to Lab 1
-
Login to the Oracle Cloud Infrastructure using your tenancy, userId and password.
Refer to Lab 1 for detailed instructions on logging into your OCI account.
-
Once logged in, Click on Create Instance
- Name your instance and select CentOS7 as your image source
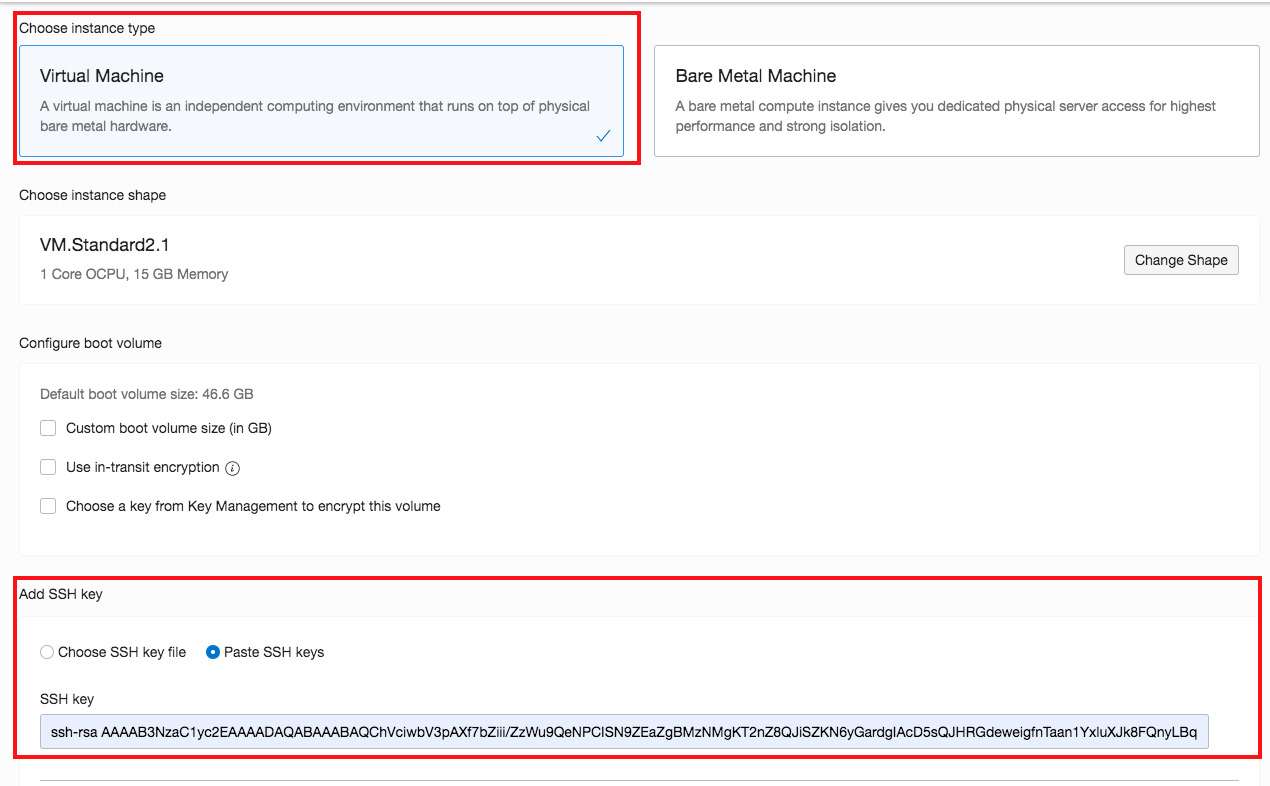
- Select Virtual Machine and add your public SSH key file
- Next, select the network for your VPN Server
- Select the compartment & VCN where your exadata infrastructure is provisioned
- Select the compartment where your public subnet is provisioned
- Pick public subnet from the drop down
Note that while your ATP infrastructure and VPN server are in the same VCN, ATP is in a private subnet while the VPN server is deployed in a public subnet for access over the internet.
- Click Create and within a few mins your CentOS server will be ready with a public IP for ssh access
-
ssh into centOS vm and download the openVPN rpm package
$ ssh opc@O<public_ipAddress_of_your_centOS_VM>$ wget http://swupdate.openvpn.org/as/openvpn-as-2.5.2-CentOS7.x86_64.rpm
-
Use the RPM command to install the package
$ sudo rpm -ivh openvpn-as-2.5.2-CentOS7.x86_64.rpm
-
Change password of OpenVPN Server
$ sudo passwd openvpn -
From your local browser, access the admin UI console of your VPN Server (https://public_ipAddress_of_your_centOS_VM:943/admin), using the password for OpenVPN user
- Once you are logged in, click Network Settings and replace the Hostname or IP address with the public IP of the OpenVPN Server Instance
Save your setting before advancing to the VPN settings page
Click VPN settings and scroll down to the section labeled Routing
Here we configure how traffic from your VPN client (i.e. your personal laptop for example) shoud be NATed and how DNS resolution should occur.
Configure this section as shown in the screenshot below.
- Choose Yes using NAT
- Provide CIDR ranges for your application and exadata subnets
- Pick 'No' for the question - Should client internet traffic be routed through the VPN?
Scroll down and configure the DNS settings as shown below.
- In the Advanced VPN section, ensure that the option Should clients be able to communicate with each other on the VPN IP Network? is set to Yes
Note: Once you have applied your changes, click Save Settings once again. Then, Update Running Server to push your new configuration to the OpenVPN server.
-
Launch your OpenVPN Access Server Client UI at https://Your_VPN_Server_Public_IP:943 and download the OpenVPN client for your platforms.
-
Once the installation process has completed, you can see an OpenVPN icon in your OS taskbar. Right-Click this icon to bring up the context menu to start your OpenVPN connection
-
Click Connect brings up a window asking for the OpenVPN username and password. Enter the credentials for your openvpn user and click Connect to establish a VPN tunnel
You may also setup your VPN server with multiple users. Follow the OpenVPN configuration guide to setup additional users.
Launch SQL Developer and connect using the downloaded credentials wallet as shown below
Note: Your SQL Developer version needs to be 18.3 or higher to connect to a cloud database using a wallet
Follow detailed instructions on downloading your database credentials wallet refer to Lab 4
You may also connect to APEX or SQL Developer Web directly from your local browser. Simply get the URL from the console and launch in a browser window
| [](#) | ## Congratulations! You just configured a secure VPN connection into your private autonomous exadata infrastructure. |


