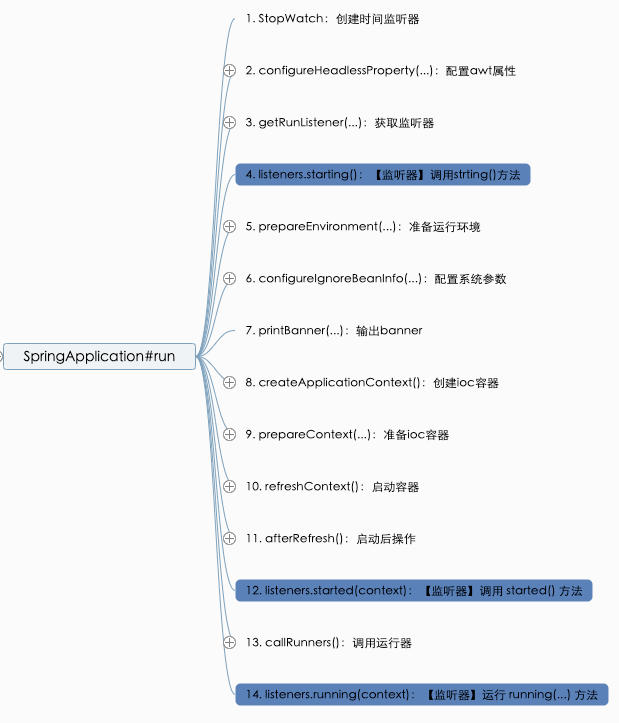
上一篇文章总结 springboot 启动流程如下:
接上文,我们继续分析接下来的步骤。
刷新后的处理方法为 SpringApplication#afterRefresh,内容如下:
protected void afterRefresh(ConfigurableApplicationContext context, ApplicationArguments args) {
}
可以看到,这是一个空方法,springboot 提供的扩展。
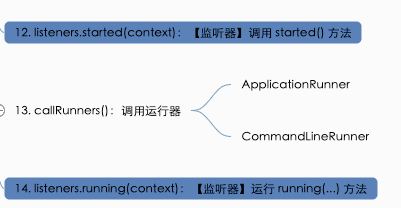
该操作的方法为 listeners.started(context),发布逻辑前面已经分析过,这里就不再分析了。
处理运行器的方法是 SpringApplication#callRunners,代码如下:
private void callRunners(ApplicationContext context, ApplicationArguments args) {
    List<Object> runners = new ArrayList<>();
    // 获取所有的 ApplicationRunner 与 CommandLineRunner
    runners.addAll(context.getBeansOfType(ApplicationRunner.class).values());
    runners.addAll(context.getBeansOfType(CommandLineRunner.class).values());
    // 排序
    AnnotationAwareOrderComparator.sort(runners);
    // 遍历调用
    for (Object runner : new LinkedHashSet<>(runners)) {
        // 调用 ApplicationRunner#run 方法
        if (runner instanceof ApplicationRunner) {
            callRunner((ApplicationRunner) runner, args);
        }
        // 调用 CommandLineRunner#run 方法
        if (runner instanceof CommandLineRunner) {
            callRunner((CommandLineRunner) runner, args);
        }
    }
}

/**
 * 调用 ApplicationRunner#run 方法
 */
private void callRunner(ApplicationRunner runner, ApplicationArguments args) {
    try {
        (runner).run(args);
    }
    catch (Exception ex) {
        throw new IllegalStateException("Failed to execute ApplicationRunner", ex);
    }
}

/**
 * 调用 CommandLineRunner#run 方法
 */
private void callRunner(CommandLineRunner runner, ApplicationArguments args) {
    try {
        (runner).run(args.getSourceArgs());
    }
    catch (Exception ex) {
        throw new IllegalStateException("Failed to execute CommandLineRunner", ex);
    }
}
这两个方法表示,springboot 为我们提供了两个接口:ApplicationRunner 与 CommandLineRunner,我们可以实现它来完成一些操作,应用示例如下:
/**
 * ApplicationRunner 示例
 */
@Component
public class MyApplicationRunner implements ApplicationRunner {
    @Override
    public void run(ApplicationArguments args) throws Exception {
        System.out.println("MyApplicationRunner: hello world");
    }
}

/**
 * CommandLineRunner 示例
 */
@Component
public class MyCommandLineRunner implements CommandLineRunner {
    @Override
    public void run(String... args) throws Exception {
        System.out.println("MyCommandLineRunner: hello world!");
    }
}
这个方法的运行同前面分析的 listeners.starting() 套路一样,这里就不分析了。
好了,本文的分析就到这里了,关于 springboot 的启动流程的分析也到这里了。
本文原文链接:https://my.oschina.net/funcy/blog/4906553 ,限于作者个人水平,文中难免有错误之处,欢迎指正!原创不易,商业转载请联系作者获得授权,非商业转载请注明出处。