This tutorial is from the Hortonworks Sandbox - a single-node Hadoop cluster running in a virtual machine. Download to run this and other tutorials in the series.
This tutorial will enable you to gain a working knowledge of Pig and hands-on experience creating Pig scripts to carry out essential data operations and tasks.
In this tutorial, you will first read in two data files that contain New York Stock Exchange dividend prices and stock prices, and then use these files to perform a number of Pig operations including:
- Define a relation with and without schema
- Define a new relation from an existing relation
- Select specific columns from within a relation
- Join two relations
- Sort the data using 'ORDER BY'
- FILTER and Group the data using 'GROUP BY'
This tutorial was derived from one of the lab problems in the Hortonworks Developer training class. The developer training class covers uses of the tools in the Hortonworks Data Platform and how to develop applications and projects using the Hortonworks Data Platform. You can find more information about the course at Hadoop Training for Developers.
We value your feedback. When you’re done with this tutorial, please tell us what you think by filling out this survey . We really do pay attention and read your comments!
Pig is a high level scripting language that is used with Apache Hadoop. Pig enables data workers to write complex data transformations without knowing Java. Pig's simple SQL-like scripting language is called Pig Latin, and appeals to developers already familiar with scripting languages and SQL.
Pig is complete, so you can do all required data manipulations in Apache Hadoop with Pig. Through the User Defined Functions(UDF) facility in Pig, Pig can invoke code in many languages like JRuby, Jython and Java. You can also embed Pig scripts in other languages. The result is that you can use Pig as a component to build larger and more complex applications that tackle real business problems.
Pig works with data from many sources, including structured and unstructured data, and store the results into the Hadoop Data File System.
Pig scripts are translated into a series of MapReduce jobs that are run on the Apache Hadoop cluster.
You'll need sample data for this tutorial. The data set you will be using is stock ticker data from the New York Stock Exchange from the years 2000-2001. Download this sample data from the following location:
https://s3.amazonaws.com/hw-sandbox/tutorial1/infochimps_dataset_4778_download_16677-csv.zip
The file is about 11 megabytes, and might take a few minutes to download.
Open the folder infochimps_dataset_4778_download_16677 > NYSEand locate the two data files that you will be using for this tutorial:
NYSE\_daily\_prices\_A.csvNYSE\_dividends\_A.csv
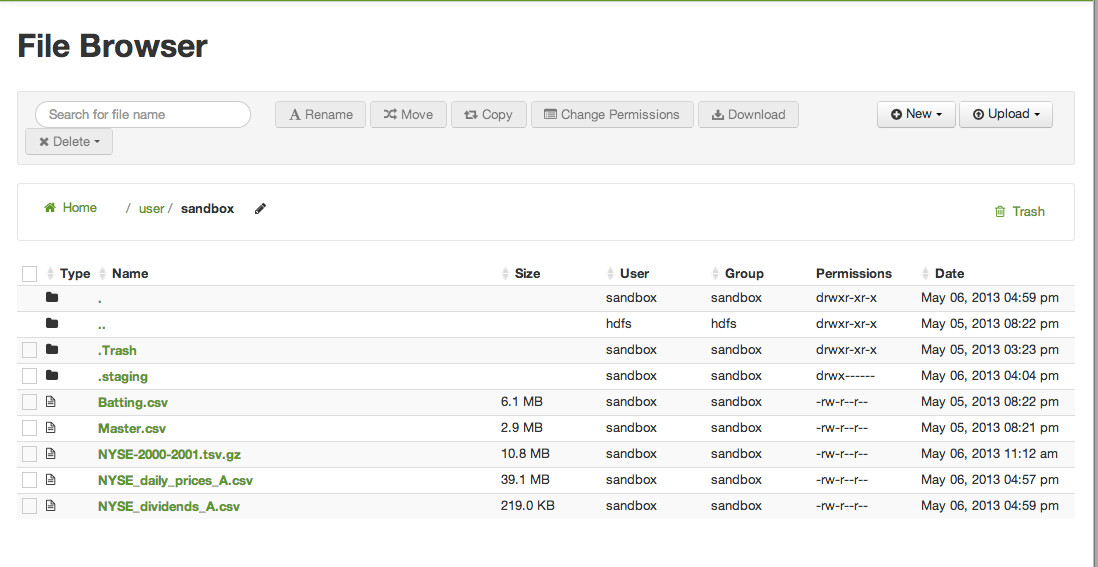
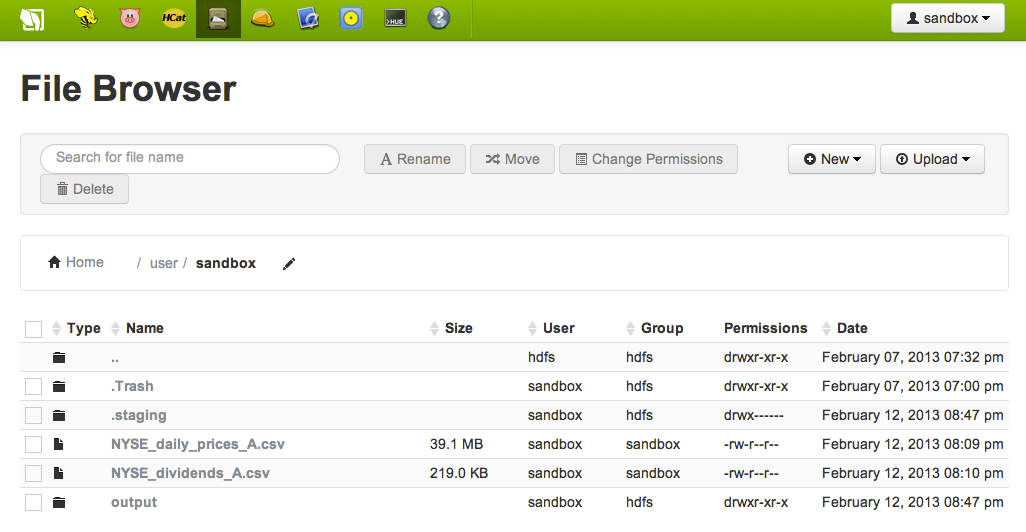
Select the File Browser from the top tool bar. The File Browser allows you to view the Hortonworks Data Platform(HDP) file store. The HDP file system is separate from the local file system.

Click Upload and select Filesto load data to HDFS:

This action brings up the following dialog box:
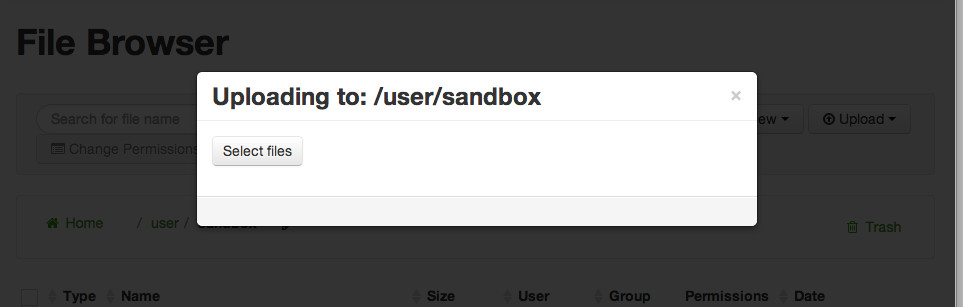
Click Select files, navigate to and select the
NYSE\_daily\_prices\_A.csv file from your computer. Upload the
NYSE\_dividends\_A.csv file in the same way. When finished, notice
that both files are now in HDFS.
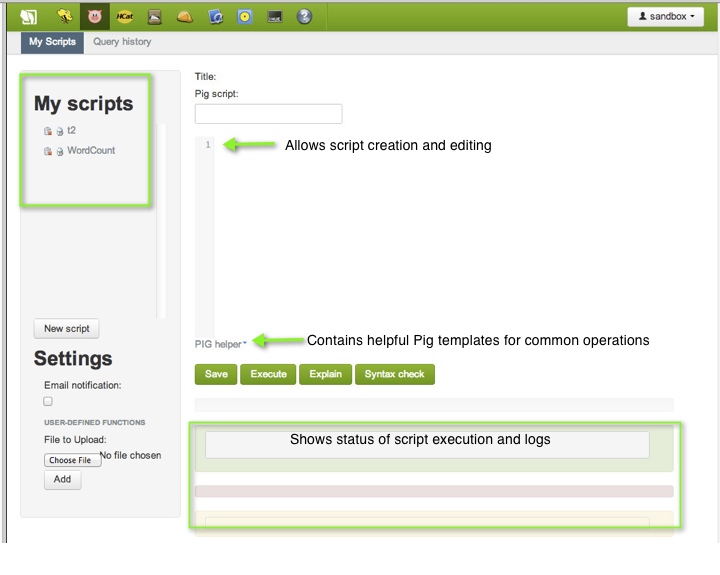
Open the Pig interface by clicking the Pig icon at the top of the screen. On the left pane is a list of your scripts and on the right pane is a composition area for writing and editing scripts.
A special feature of the interface is the PIG helper at the bottom, which provides templates for Pig statements, functions, I/O statements, HCatLoader() and Python user defined functions.
Notice status areas at the bottom of the screen. When you run scripts you can view the results of your script and log files.
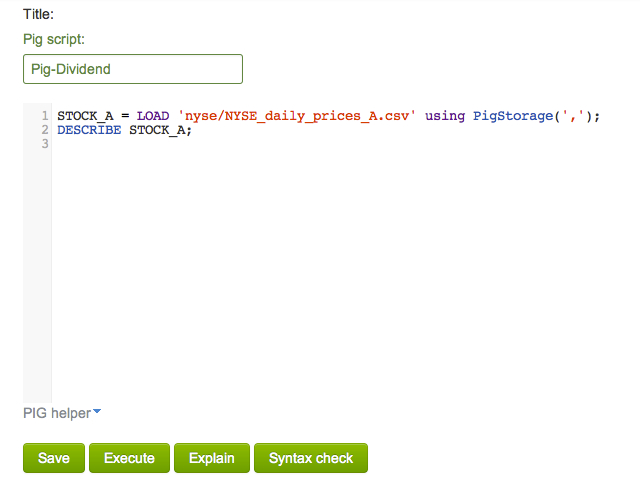
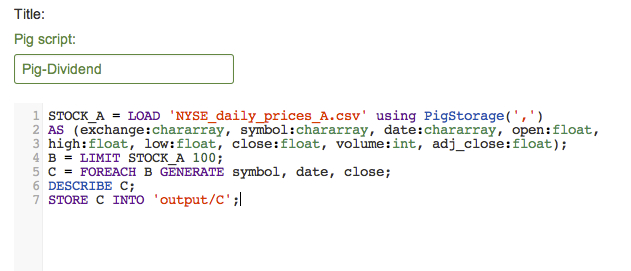
Enter "Pig-Dividend" for the title of your script:

In this step, you will create a script to load the data and define a relation.
- On line 1 define a relation named STOCK_A that represents the NYSE stocks that start with the letter “A”
- On line 2 use the DESCRIBE command to view the STOCK_A relation
The completed code will look like:
STOCK_A = LOAD 'nyse/NYSE_daily_prices_A.csv' using PigStorage(',');
DESCRIBE STOCK_A;
Click the Save button to save your changes to the script. Click Execute to run the script. This action creates one or more MapReduce jobs. After a moment, the script starts and the Execute button changes to a Kill job button in case you want to stop the job.
Below the Execute/Kill job button is a progress bar that shows the job's status. The progress bar can be blue (indicating job is in process), red (job has a problem), or green (job is complete).
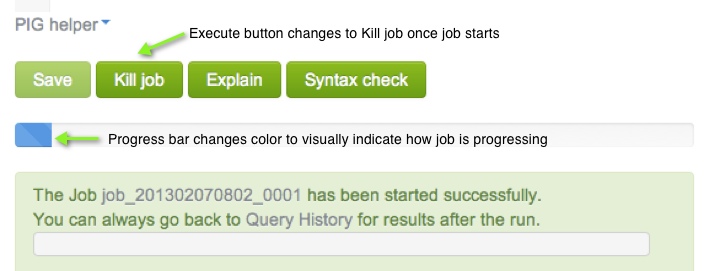
When the job completes, check the results in the green box. You can also download results to your system by clicking the download icon. Notice STOCK_A does not have a schema because we did not define one when loading the data into relation STOCK_A.

Let's use the above code but this time with a schema. Modify line 1 of your script and add the following "AS"" clause to define a schema for the daily stock price data. The complete code will be:
STOCK_A = LOAD 'NYSE_daily_prices_A.csv' using PigStorage(',')
AS (exchange:chararray, symbol:chararray, date:chararray, open:float, high:float, low:float, close:float, volume:int, adj_close:float);
DESCRIBE STOCK_A;

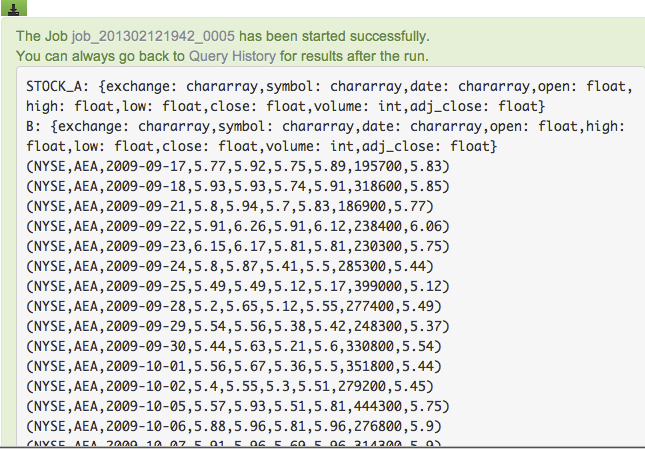
Save and execute the script again. This time you should see the schema for the STOCK_A relation:

You can define a new relation based on an existing one. For example, define the following B relation, which is a collection of 100 entries (arbitrarily selected) from the STOCK_A relation.
Add the following line to the end of your code:
B = LIMIT STOCK_A 100;
DESCRIBE B;

Save and execute the code. Notice B has the same schema as STOCK_A, because B is a subset of A relation.

To view the data of a relation, use the DUMP command.
Add the following DUMP command to your Pig script, then save and execute it again:
Dump B;

The command requires a MapReduce job to execute, so you will need to wait a minute or two for the job to complete. The output should be 100 entries from the contents of NYSE_daily_prices_A.csv (and not necessarily the ones shown below, because again, entries are arbitrarily chosen):
Delete the DESCRIBE STOCK_A, DESCRIBE B, and DUMP B commands from your Pig script; you will no longer need those.
One of the key uses of Pig is data transformation. You can define a new relation based on the fields of an existing relation using the FOREACH command. Define a new relation C, which will contain only the symbol, date and close fields from relation B.
Now the complete code is:
STOCK_A = LOAD 'NYSE_daily_prices_A.csv' using PigStorage(',')
AS (exchange:chararray, symbol:chararray, date:chararray, open:float, high:float, low:float, close:float, volume:int, adj_close:float);
B = LIMIT STOCK_A 100;
C = FOREACH B GENERATE symbol, date, close;
DESCRIBE C;

Save and execute the script and your output will look like the following:

In this step, you will use the STORE command to output a relation into a new file in HDFS. Enter the following command to output the C relation to a folder named output/C (then save and execute):
STORE C INTO 'output/C';
Again, this requires a MapReduce job (just like the DUMP command), so you will need to wait a minute for the job to complete.
Once the job is finished, go to File Browser and look for a newly created folder called "output":
Click on "output" folder. You will find a subfolder named "C".

Click on "C" folder. You will see an output file called "part-r-00000":

Click on the file "part-r-00000". It will show data stored in the file:

In this step, you will perform a join on two NYSE data sets: the daily prices and the dividend prices. Dividends prices are shown for the quarter, while stock prices are represented on a daily basis.
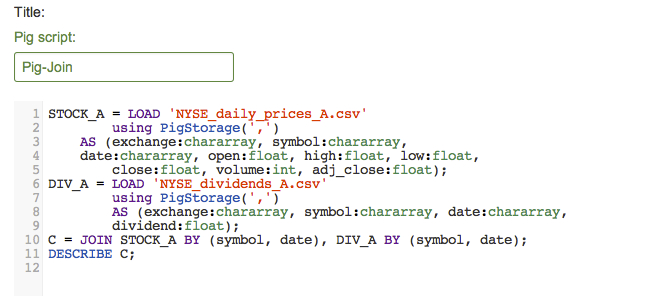
You have already defined a relation for the stocks named STOCK_A. Create a new Pig script named "Pig-Join". Then define a new relation named DIV_A that represents the dividends for stocks that start with an "A", then join A and B by both the symbol and date and describe the schema of the new relation C.
The complete code will be:
STOCK_A = LOAD 'NYSE_daily_prices_A.csv'
        using PigStorage(',')
    AS (exchange:chararray, symbol:chararray,
    date:chararray, open:float, high:float, low:float,
    close:float, volume:int, adj_close:float);
DIV_A = LOAD 'NYSE_dividends_A.csv'
        using PigStorage(',')
    AS (exchange:chararray, symbol:chararray, date:chararray,
    dividend:float);
C = JOIN STOCK_A BY (symbol, date), DIV_A BY (symbol, date);
DESCRIBE C;
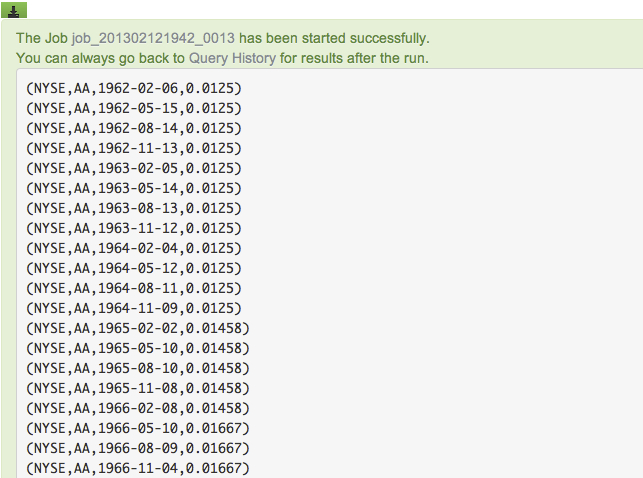
Save the script and execute it. Notice C contains all the fields of both STOCK_A and DIV_A. You can use the DUMP command to see the data stored in the relation C:

Use the ORDER BY command to sort a relation by one or more of its fields. Create a new Pig script named "Pig-sort" and enter the following commands to sort the dividends by symbol then date in ascending order:
DIV_A = LOAD 'NYSE_dividends_A.csv'
    using PigStorage(',')
    AS (exchange:chararray, symbol:chararray, date:chararray,
    dividend:float);
B = ORDER DIV_A BY symbol, date asc;
DUMP B;

Save and execute the script. Your output should be sorted as shown here:
The GROUP command allows you to group a relation by one of its fields. Create a new Pig script named "Pig-group". Then, enter the following commands, which group the DIV_A relation by the dividend price for the "AZZ" stock.
DIV_A = LOAD 'NYSE_dividends_A.csv'
    using PigStorage(',')
    AS (exchange:chararray, symbol:chararray, date:chararray,
    dividend:float);
B = FILTER DIV_A BY symbol=='AZZ';
C = GROUP B BY dividend;
DESCRIBE C;
DUMP C;

Save and execute. Notice that the data for stock symbol "AZZ" is grouped together for each dividend.

Congratulations! You have successfully completed the Using Basic Pig Commands tutorial.
Did you have fun learning about Pig? We have even more fun in our training classes! Join us! Find out more here http://hortonworks.com/hadoop-training/