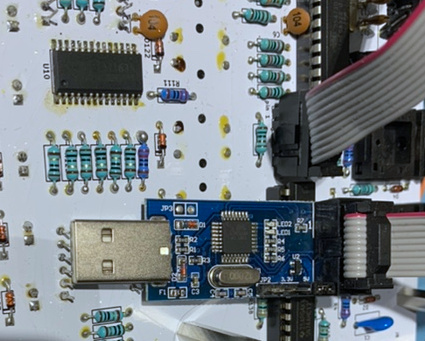
For programming you can use an USBasp. The red wire of the USBasp programmer needs to be connected to the pin 1 location:
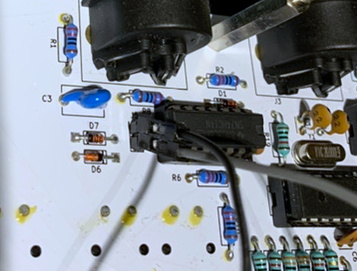
For debugging, there is the jumper J5 near the MIDI connector, to connect a 5V UART receiver. Connect the top pin to GND (black wire in the image) and the bottom pin to the UART RX input (grey wire) :
The Arduino IDE doesn't flash the ATmega fuses, so initially you need to do this from the command line with avrdude like this:
avrdude -cusbasp -p m328 -B 10 -U lfuse:w:0xff:m
The output should look like this:
avrdude: set SCK frequency to 93750 Hz
avrdude: AVR device initialized and ready to accept instructions

Reading | ################################################## | 100% 0.00s

avrdude: Device signature = 0x1e9514 (probably m328)
avrdude: reading input file "0xff"
avrdude: writing lfuse (1 bytes):

Writing | ################################################## | 100% 0.00s

avrdude: 1 bytes of lfuse written
avrdude: verifying lfuse memory against 0xff:
avrdude: load data lfuse data from input file 0xff:
avrdude: input file 0xff contains 1 bytes
avrdude: reading on-chip lfuse data:

Reading | ################################################## | 100% 0.00s

avrdude: verifying ...
avrdude: 1 bytes of lfuse verified

avrdude: safemode: Fuses OK (E:FF, H:D9, L:FF)

avrdude done.  Thank you.
First install the Arduino IDE. It was tested with Arduino 1.8.13. Then add the URL https://mcudude.github.io/MiniCore/package_MCUdude_MiniCore_index.json to "File->Preferences->Settings->Additional Board Manager URLs". Then you can install the new board with "Tools->Board->Boards Manager". Install "MiniCore by MCUdude", tested with version 2.1.0.
For programming you need an USBasp. You need to reduce the clock speed in the file /home/username/bin/arduino-1.8.9/hardware/arduino/avr/programmers.txt, where username is your username (on Linux, on Windows and Mac it might be different, see here). Search for the usbasp.program.extra_params line and add the parameter -B 10. The full line now looks like this:
usbasp.program.extra_params=-Pusb -B 10
Restart the Arduino IDE after changing it.
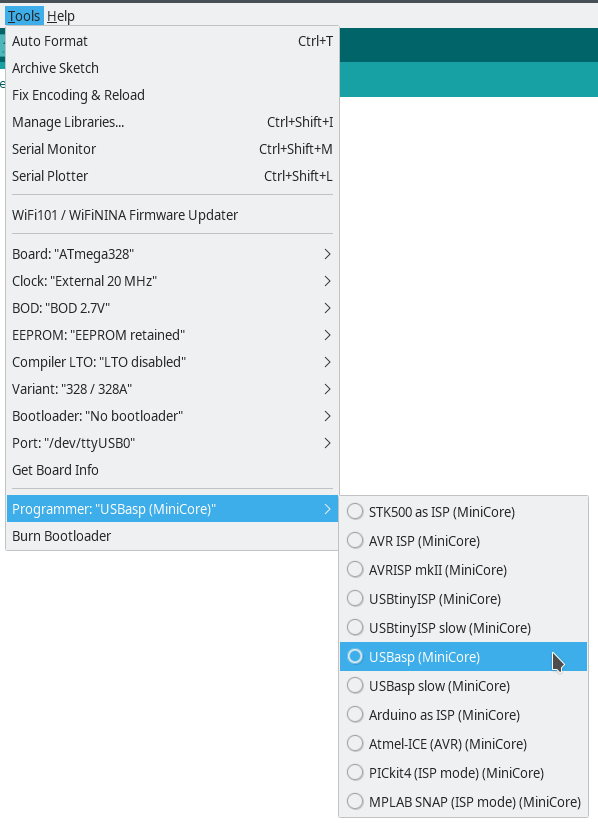
After restart, select the new board: Tools->Board->MiniCore->ATmega328. For flashing the firmware, configure the following settings (Board, Clock, Variant and Bootloader needs to be changed):

Then select your programmer, for example USBasp:
After this you can program the ATmega328 on the board from the Arduino IDE by clicking on the right arrow.