Real time, battery powered, Convolutional Neural Net inferencing on the Movidius NCS and a Raspbery Pi
Video demonstration:
- 1. Introduction
- 1.1 The General Idea
- 2. Pre-Reqs
- 2.1 Installing Tensorflow with GPU support
- 2.1.1 Installing CUDA and cuDNN
- 2.2 Installing TF in a virtual environment
- 2.3 Setting up Pycharm
- 2.1 Installing Tensorflow with GPU support
- 3. Installing the Movidius SDK
- 3.1 Installing OpenCV
- 4. Using The Movidius SDK
- 4.1 generating the inference-only graph
- 4.2 Using the inference-only graph
- 4.2.1 Code that uses the API without a webcam
- 4.2.2 Code that uses the API with a webcam
- 5. Setting up Raspberry Pi and using the NCS
- 5.1 Setting up the Pi
- 5.2 Setting up NCSDK on the Pi
- 5.3 Running an NCS example on the Pi
Edit: This is now 8 months old and counting, which in computer-vision-years is super old. If you're just now geting into this, I sugest checking on Intel's OpenVINO and seeing if it's mature yet. If not, this tutorial is still a good exercise and will teach you a lot about optimizing and deploying models on real hardware.
In this tutorial I’ll be covering the full pipeline on how to use the Movidius Neural Compute Stick(NCS).This covers installation of everything you'll need, training your own convolutional neural network in Tensorflow, and running your trained model on the Movidius NCS and a Raspberry Pi
There are 3 main pieces of code we'll be creating to use the NCS.
- Your training graph/network
- This is the code that trains your Neural Network. It includes things like dropout layers, loss functions, etc..
- Your inference-only graph/network
- This is your training code, minus the dropouts, loss functions, and anything else that is specific to training only.
- Your inference-only code
- This is the code were you load your inference-only graph onto the NCS, and use the Movidius API to do inferencing, along with any other preprocessing you might need to do. This is also where we will be using the webcam.
This all assume that you have a clean install of ubuntu 16.04 installed. No other version will work. If you already have tensorflow and everything else set up, feel free to skip to section 3.
Once you have a working ubuntu 16.04 OS up and running, the first thing to do is install tensorflow. I have installed tensorflow in every single way possible, and this method is by far the most straight forward.
First things first, we have to get our GPU-software set up. This comes in the form of CUDA. See the directions here: https://www.tensorflow.org/install/gpu
The direction in that guide are pretty straight forward, but there are some details to double check. Make sure you install the exact versions specified. Notice that the guide calls for CUDA 9.0, but if you click their link it takes you to 10.0. Version 9.0 can be found here: https://developer.nvidia.com/cuda-90-download-archive
You only need the base-installer
After you’ve run the final command(sudo apt-get install cuda), don’t forget to do the post-installation steps or you will have a bad time: https://docs.nvidia.com/cuda/cuda-installation-guide-linux/index.html#post-installation-actions
Next you need to install cuDNN. It’s pretty straight forward, however you do need to make an account with nvidia. When you eventually get to the download page, be sure to only download the “cuDNN v7.3.1 Runtime Library for Ubuntu16.04 (Deb)”. There’s no need to download the developer library. You can find the install guide here: https://docs.nvidia.com/deeplearning/sdk/cudnn-install/index.html
Next is to run:
export LD_LIBRARY_PATH=$LD_LIBRARY_PATH:/usr/local/cuda/extras/CUPTI/lib64
I recommend adding all of the export commands you encounter to your .bashrc file, which can be found in your home directory.
cd ~
Sudo nano .bashrc
And from there you can paste in all of the exports to the bottom of the file.
Finally, we can now install TF following this tutorial: https://www.tensorflow.org/install/pip
That tutorial is straightforward, and there’s not much you can mess up as long as you follow their instructions.
Congratulations, now we can start playing around with TF.
Next you’re going to want to set up pycharm. I recommend installing it via snap, which is a one line command:
sudo snap install pycharm-community
Then you should be able to launch it from the command line by typing either
Sudo charm
Or
Sudo pycharm-community
Launching pycharm from command line is preferable because it forces pycharm to read your .bashrc file
Next, create a new python project, and try importing tensorflow with
import tensorflow as tf
You should get an error. You need to go to File>Settings. In the tabs to the left, click on Project: YourProjectName and click “project interpreter”. Next click the gear icon and click “add…”. Now select “existing environment” Then click the triple dots button “...” and find the path to where your virtual environment was saved. For me, it was in my downloads folder. Then go into the “bin” folder and scroll down until you see python3. Click “python3” and hit ok. Continue hitting ok and now you should see tensorflow-gpu in your list of packages. You should now be able to import tensorflow. If you get any errors, double check that you added all of your imports to your .bashrc and that you ran pycharm from the command line.
Before we start touching code, we need to install a few more things. We’re going to do the “Basic Installation” but we’re going to enable the virtual environment option: https://movidius.github.io/ncsdk/install.html
Run these 3 commands:
wget https://ncs-forum-uploads.s3.amazonaws.com/ncsdk/ncsdk-02_05_00_02-full/ncsdk-2.05.00.02.tar.gz
tar xvf ncsdk-2.05.00.02.tar.gz
cd ncsdk-2.05.00.02
Before you make install though, you need to open the ncsdk.conf file and adjust the settings.
Your conf file should look like this:
INSTALL_DIR=/opt/movidius
INSTALL_CAFFE=yes
CAFFE_FLAVOR=ssd
CAFFE_USE_CUDA=yes
INSTALL_TENSORFLOW=yes
INSTALL_TOOLKIT=yes
PIP_SYSTEM_INSTALL=yes
VERBOSE=yes
USE_VIRTUALENV=yes
#MAKE_NJOBS=1
Notice that it installs tensorflow. This is fine, because it’s in a virtual environment. The NCSDK needs TF to be installed alongside it, but it’s best to keep each of the instances separate in this case.
Now save your changes and then run
make install
Now if everything goes well, you should be able to use your SDK by following the instructions here:https://movidius.github.io/ncsdk/virtualenv.html
It’s just a one line command to activate the virtual environment
source /opt/movidius/virtualenv-python/bin/activate
This is where you’ll run the SDK tools, which you’ll need later. Also note that it comes with it’s own python interpreter located here: /opt/movidius/virtualenv-python/bin/Python3.5
You’ll need that path when you set up pycharm to work with the Movidius SDK. Luckily, you don’t need both the tensorflow-gpu and movidius SDK virtual environments at the same time, as you’ll see later on.
We have one last thing to install, which is OpenCV. OpenCV isn’t strictly necessary, but if you want to use a webcam, it is required.
In your command line with your Movidius Virtual Environment(VE) activated, run this command:
sudo pip3 install opencv-python
Now we're finally ready to start doing some deep learning.
For this part of the tutorial I’ll be using the classic MNIST example. Specifically I’ll be following this tutorial up to a point: https://movidius.github.io/ncsdk/tf_compile_guidance.html
The mnist_deep.py you’ll be downloading is the equivalent to the classic “hello world!”, but for computer vision. It takes in a 28x28 image of a number, runs it through a series of convolutions, and then runs it through a fully connected layer which outputs a vector of length 10, where each element represents the probability of the corresponding number being in the image.
That tutorial is really informative, and you should now be able to follow it. You’ll need your tensorflow-gpu virtual environment for that tutorial, and then the movidius sdk virtual environment for this next part.
At the end of that tutorial, remember to activate your movidius sdk virtual environment in the command prompt first, before running this command:
mvNCCompile mnist_inference.meta -s 12 -in input -on output -o mnist_inference.graph
After you’ve successfully outputted mnist_inference.graph, next you should check to make sure it’s a good graph by using mvNCCheck: https://movidius.github.io/ncsdk/tools/check.html
It’s basically the same command as before, but with mvNCCheck instead of mvNCCompile
After that, you can profile the network by running mvNCProfile: https://movidius.github.io/ncsdk/tools/profile.html This command will tell you performance information, and will even help you to figure out where bottlenecks in your network are.
Now that we have our graph, we can using the Movidius python API to actually load it onto the stick and start feeding it data. For this part of the tutorial I’ll be following this tutorial: https://movidius.github.io/ncsdk/ncapi/ncapi2/py_api/readme.html
Notice that step 1 is importing the API
from mvnc import mvncapi
If you’re still in the same project from the previous part, you should be getting an error here. What you need to do is go back to File>Settings>Project>Project Interpreter and change it to the location of the movidius SDK virtual environment. This should be located at /opt/movidius/virtualenv-python/bin/
Select Python3 or Python3.5, it doesn’t matter. Now PyCharm should be using the right VE, and you should be able to import mvncapi successfully
From there, the rest of that tutorial teaches you the boiler-plate that you need to get things set up. I’m going to continue with the MNIST example we’ve been working. It’s 99% the same though.
Check out the comments in stick.py to get an understand of what each line of code does. Be sure to run it to verify your setup works
And that’s how you use Movidius Neural Compute stick using the Movidius Python API.
Now we’re going to make a small change to get this example to run with a webcam. Everything else is the same, now it just works with OpenCV and a webcam. Use stick_with_cam.py to test your if you set up OpenCV correctly
And that concludes this part of the tutorial. This shows the end to end pipeline of everything that needs to be done to get real time inferencing on a Movidius NCS.
In this part, we’ll set up the raspberry pi for use with the Movidius NCS.
For this tutorial, you’ll need a Raspberry Pi, a micro SD card, and likely a micro SD card to usb adapter.
Following this tutorial: https://howchoo.com/g/ndg2mtbmnmn/how-to-install-raspbian-stretch-on-the-raspberry-pi
You’re going to download Raspbian Stretch With Desktop from here: https://www.raspberrypi.org/downloads/raspbian/
You’re going to download Etcher from here: https://etcher.io/
Next plug in your micro SD card into your computer, either with a micro SD to SD card adapter, or with whatever adapter you happen to have.
Extract the etcher zip file, and run the app file. Locate the Raspbian Stretch file you downloaded earlier, and load it into etcher. Configure etcher to point to you SD card. Begin the flash. This will take awhile.
After it is done, you can insert the micro SD card into the micro SD slot on the backside of the Pi.
Power on the Pi by plugging a micro usb cable into it that meets the power requirements. Any wall charger to micro usb should work.
Once you plug in the power and immediately start booting to the desktop. If you don’t see anything, plug in an HDMI cable from the Pi to a monitor. You can also hook up the official Raspberry Pi 7in touchscreen display.
Once you can see the desktop, you should connect the Pi to a wireless network. You won’t be able to install the required software without an internet connection
This installation process is almost exactly the same as in section 3. In fact, you can just copy over the NCSDK tar ball from your ubuntu installation if you want.
The first difference is that we do not want to install Caffe with CUDA, so set that to “no”. The last difference is that before you do the make install, follow this tutorial, where it says to increase the swap file size: https://movidius.github.io/ncsdk/install.html
Once you run make install, it will take a very long time.
After it’s done, we need to install OpenCV.
Once again, activate your virtual environment by running
source /opt/movidius/virtualenv-python/bin/activate
After that, you can install opencv with either
Sudo apt-get install python-opencv
Or
Pip3 install opencv-python
I tried installing with pip3, but I got an error. And installing with apt-get installs opencv into python2. But the apt-get method doesn’t throw an error, and my example code works with python2 so we’ll go with python 2 and apt-get.
Now your Raspberry Pi should be fully configured and ready to go. The last thing is copying over the .py file and graph file onto your Pi.
For this part, copy stick_with_cam.py and the graph file onto your raspberry pi, using a USB or something. In the directory that you copy them to, open a command prompt and activate the NCSDK virtual environment. Make sure your webcam and your NCS are plugged in. If you set everything up right, you should be able run
Python2 stick_with_cam.py
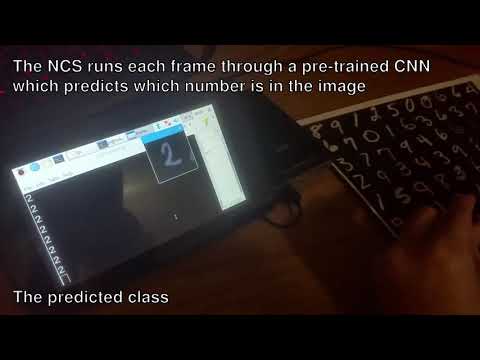
If it runs, you should see a stream of numbers, and a window that shows what your webcam is looking at. If you can see all of this, congratulations, you’re done!