-
Notifications
You must be signed in to change notification settings - Fork 164
Installation_en
Auto-installers are available only on Windows, manual installation is required on Mac OS and Linux.
Download the latest auto-installer on Github Releases, don't download the source code.
After the download is complete, unzip the auto-installer and double-click to open src.exe inside.
At first start, you will enter the installation page.
- Choose your language.
- Select
GlobalunderUpdate. - (Optional) Import settings from old SRC.
- Click the
Installbutton.

Wait for SRC to start.
If you encounter problems here, please take a complete screenshot and report to the developers on Github issues or Discord.

Install an emulator and install Honkai: StarRail on it.
Why use emulators? If you run a bot on the desktop client, game windows must stay at front. I guess you don't wanna baby-sit there without being able to move the mouse and keyboard while running the bot, so use the emulators.
How's the performance? Lme's 8700k+1080ti using MuMu12 emulator with graphic settings very high gets 40 fps. It shouldn't be a problem to run with maximum graphic settings and 60 fps if you have newer PC specs.
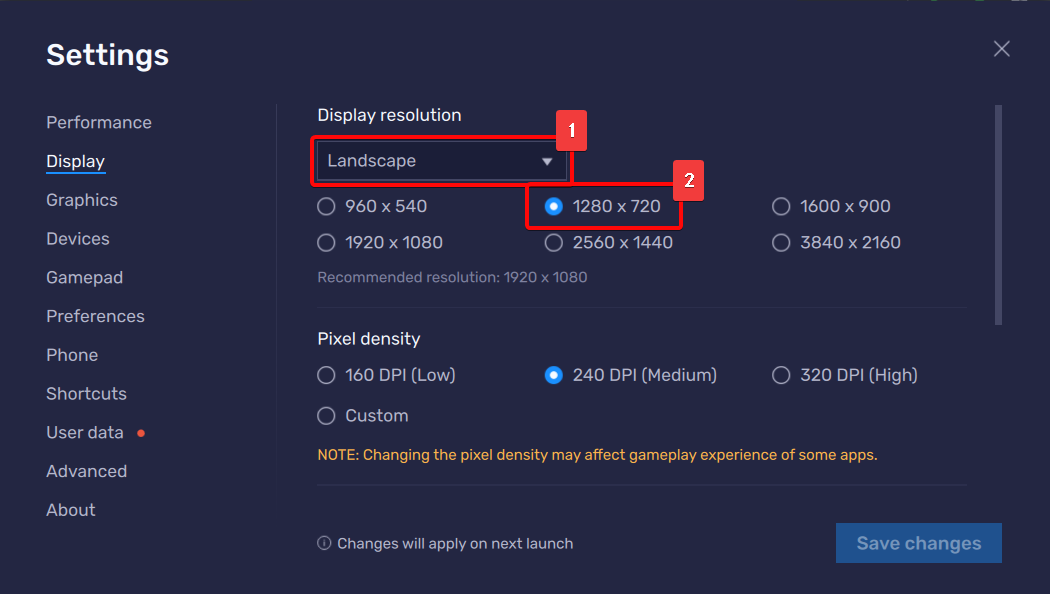
Enter the settings of your emulator:
- Set display mode to
Landscape. - Set resolution to
1280x720.
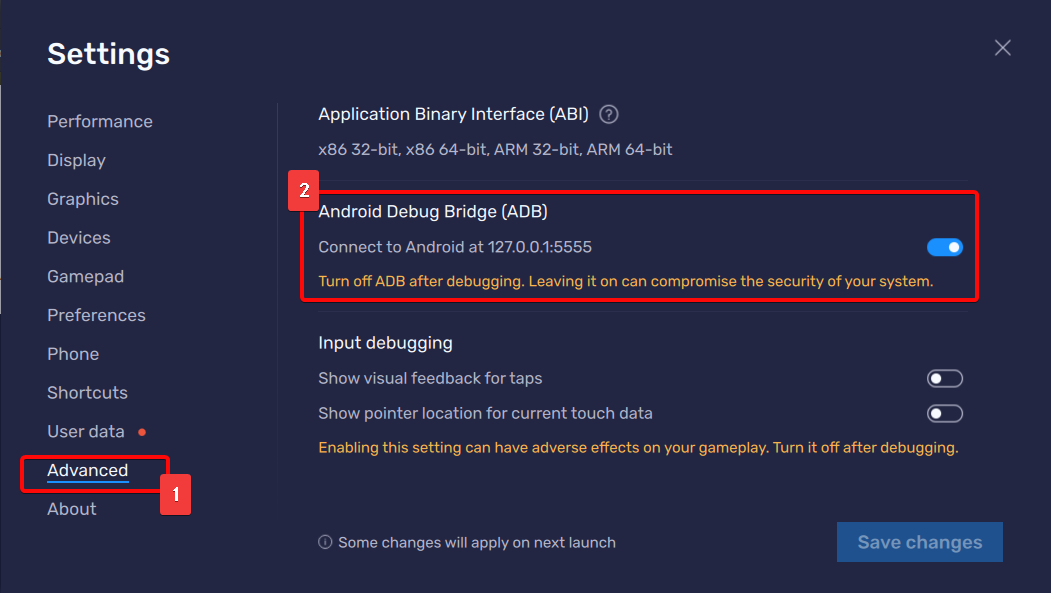
If you are using BlueStacks or LD Player, enable ADB too.
My game died when downloading resources
Restart game client and the remaining resources will continue to be downloaded.
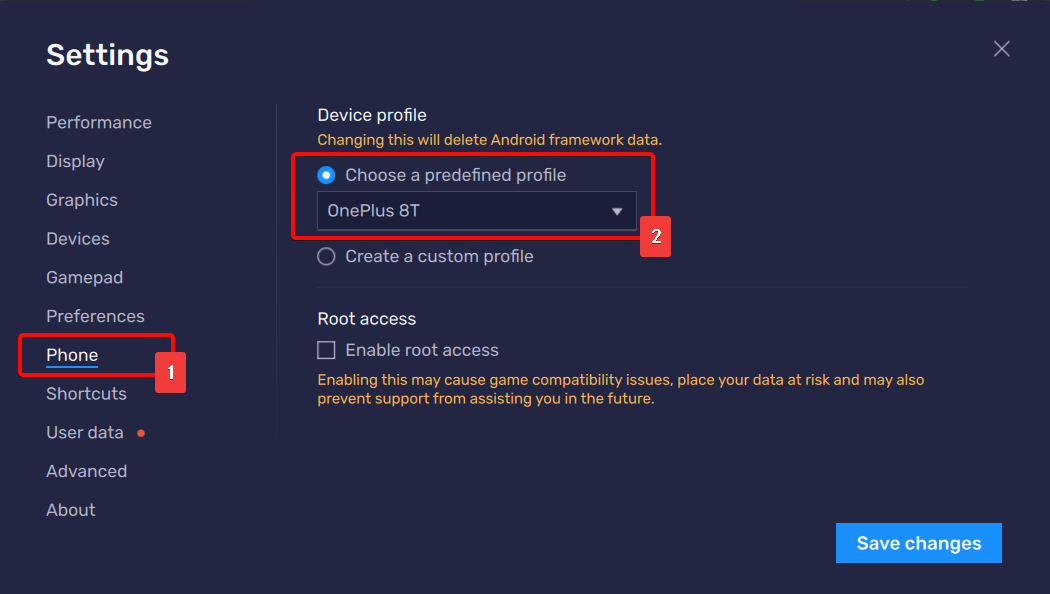
My game died as soon as I opened it
This is because the game client reads the device information and refuses to run on low-end devices. Just change it to a newer phone model in the emulator settings. All major emulators will have such settings.
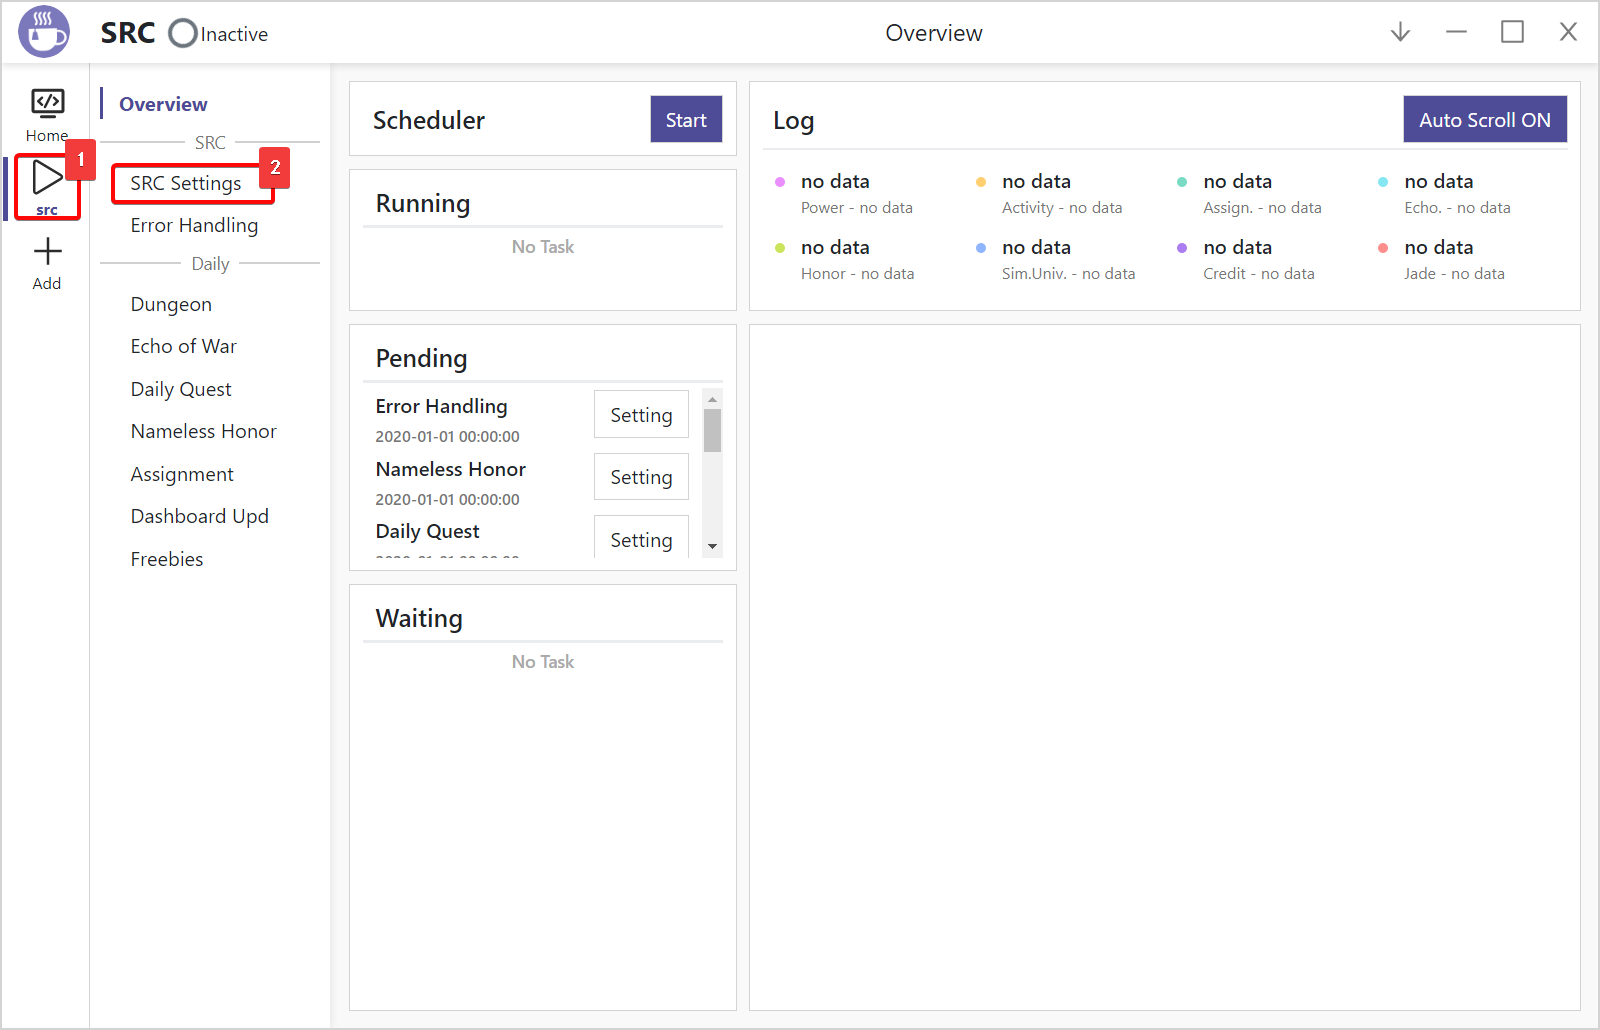
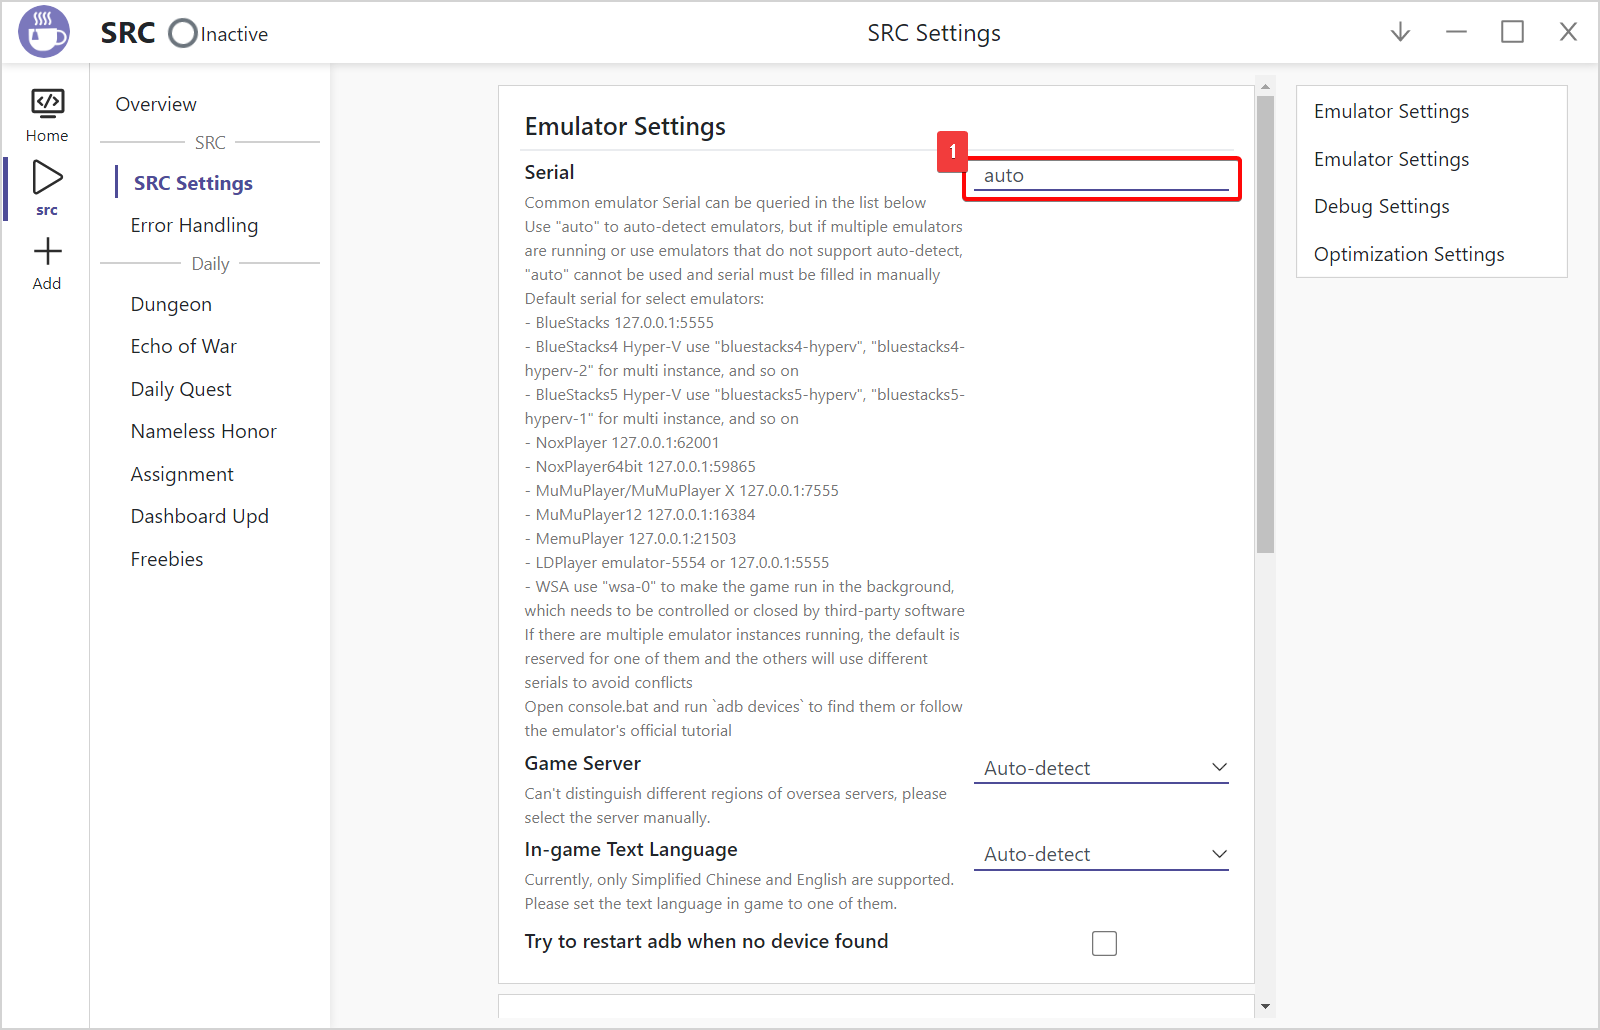
- Select your first SRC instance.
- Select
SRC Settingson sidebar.
- Read the help text, configure
Serial,Game Sever,In-game Text Language.
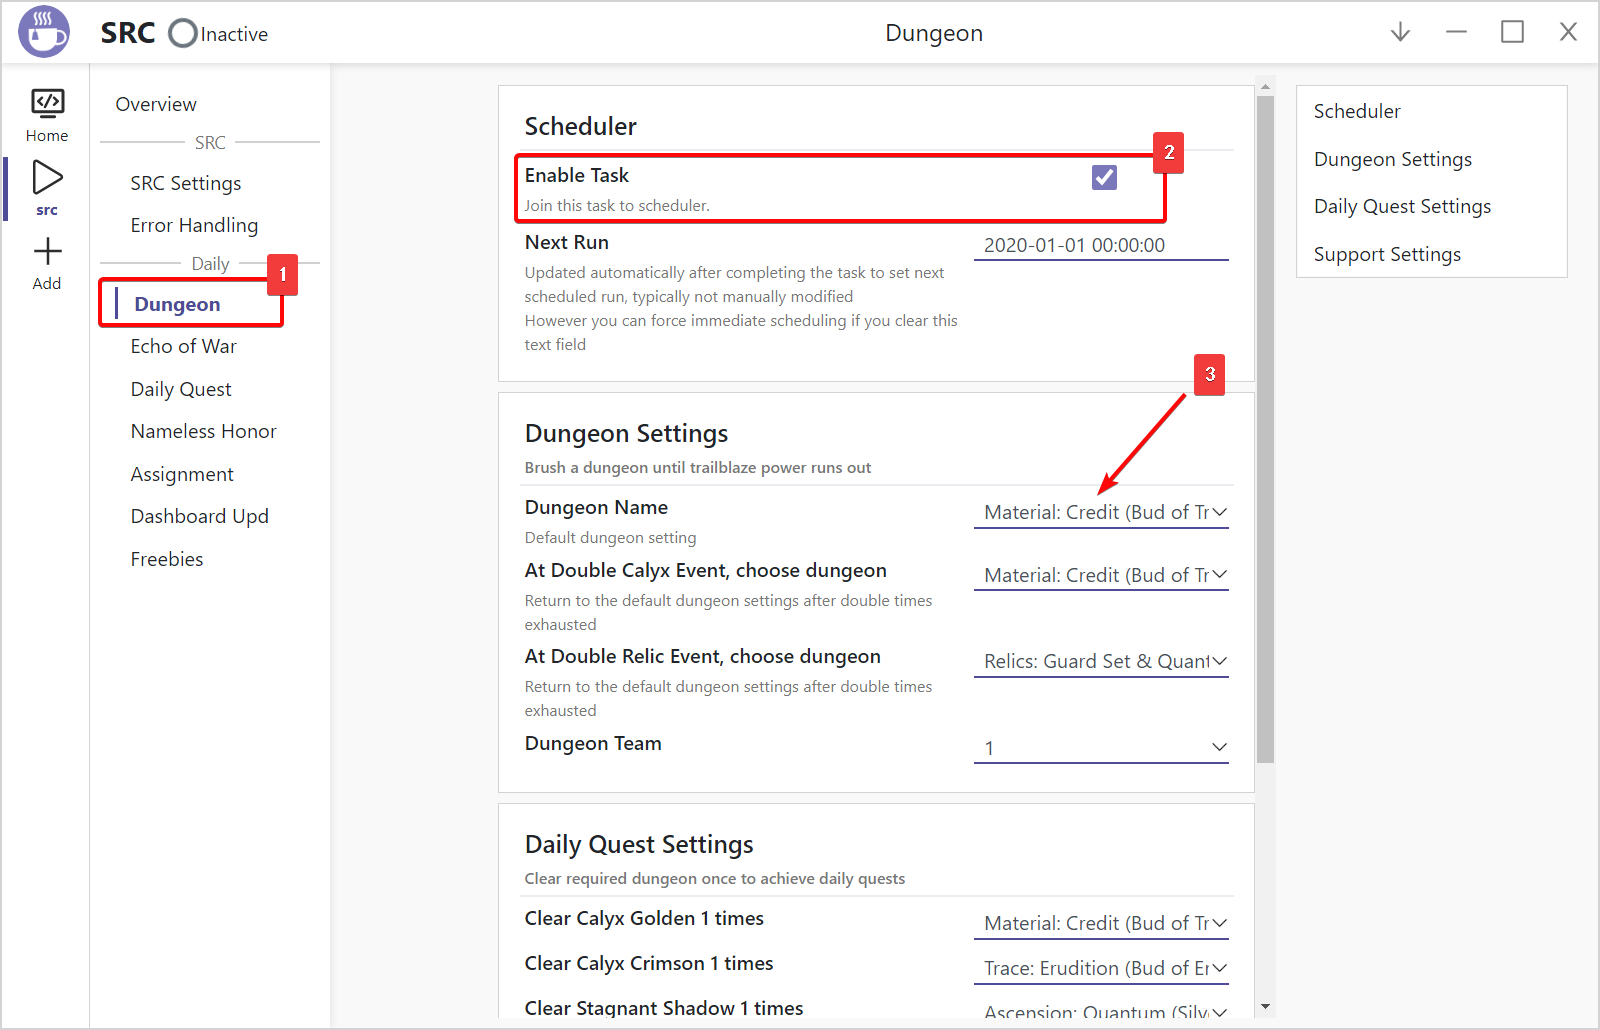
- On the sidebar, select the task you would like to run.
- Enable task.
- Configure task settings.
Tips: You can have multiple tasks enabled, SRC will schedule them automatically.
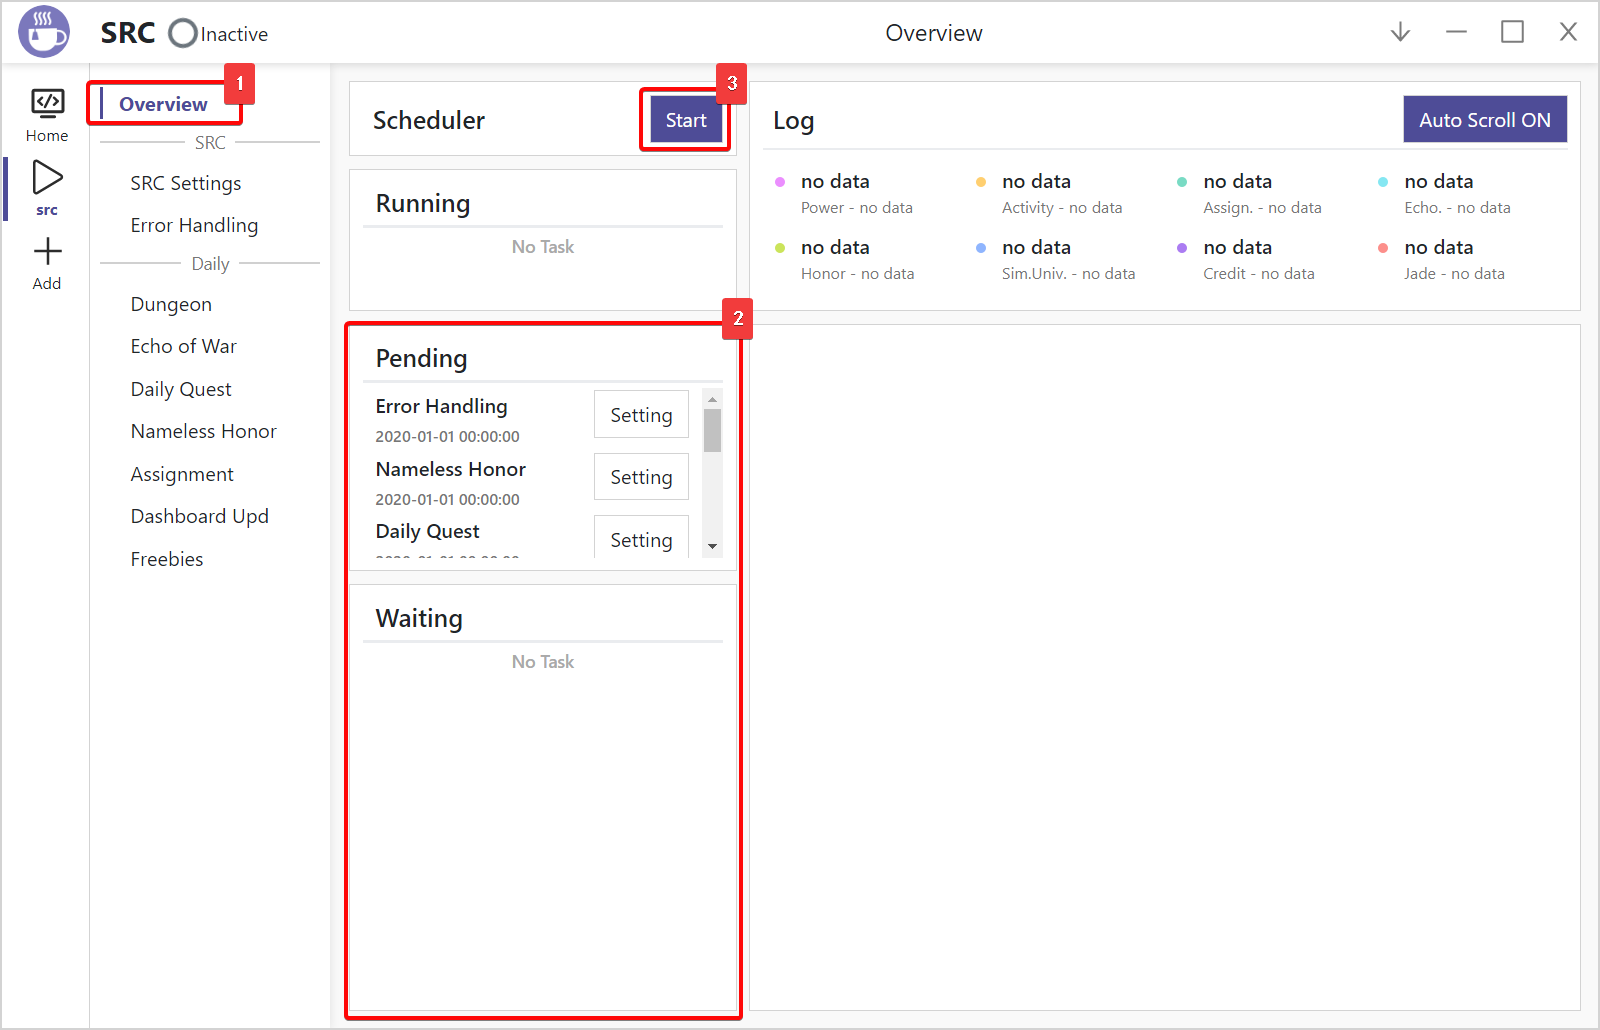
- Select
Overviewon the sidebar - Your tasks enabled will be shown on scheduler queue.
- Click the
Startbutton and scheduler will start running.
Emulators and games are auto launched
With the correct settings, SRC can automatically launch emulators and games, and you don't need to manually launch emulator and login to game before running. Auto emulator launch currently only supports MuMu family and Nox family.
Keep running at background
Keep scheduler running, SRC will auto login and empty stamina once stamina recovers. In order to save resources, it's recommended to set
SRC Settings-Optimization Settings-When Task Queue is EmptytoClose Game.
Note: Manual installation tutorial is suitable for users with programming knowledge. If you don’t know what python, git, and adb are, please use auto-installers.
Clone repository.
git clone https://github.com/LmeSzinc/StarRailCopilot
Enter project directory.
cd StarRailCopilot
Create a python 3.10.10 environment using conda. Let's say the new environment is named src.
Note: We don't maintain dependencies of lower or higher python versions, 3.10.10 is recommended.
conda create -n src python==3.10.10
Activate the environment just created.
conda activate src
After activating a virtual environment, you should have a
(src)prefix on your console like this:
(src) D:\StarRailCopilot>If you don't have a prefix or the prefix is
(base), you failed to activate the environment.
If you are using Windows, install requirements with:
pip install -r requirements.txt
If you are using Mac or Linux, install requirements with:
pip install -r requirements-in.txt
At the environment just activated, launch the GUI backend. (running on port 22367 by default)
python gui.py
Visit 127.0.0.1:22367 in browser.
For atx-agent related errors after starting SRC, please refer here to compile the version needed. For example, set GOARCH=arm64 when compiling on an M series Mac.
After successful compilation, use ADB to push atx-agent to the /data/local/tmp/ directory of the simulator and restart SRC. The issue should be solved after atx-agent successfully installed on the emulator.