Home
Ometria helps the marketing department understand, and better engage with, your customers. This is done through e-mails, and now push notifications. At its core, integrating Ometria in your mobile app is about helping the marketing department do their job.
For this to work optimally, there are two parts to Ometria:
- Getting information about customers (what do they like?)
- Reaching out to customers (say the right thing to the right people)
For your mobile app, this means:
- Tracking customer behaviour through the given events
- Sending and displaying push notifications
The sending and displaying of push notifications is handled by Ometria behind the scenes, and requires little configuration. Tracking customer behaviour, however, needs help from the app developers. That's what most of this document is about.
Obtaining API token information
The easiest way to get Ometria into your iOS project is by using CocoaPods.
- If you are using CocoaPods for the first time, Install CocoaPods using
gem install cocoapodsin terminal. Otherwise, continue to Step 3. - Run
pod setupto create a local CocoaPods spec mirror. - Create a Podfile in your Xcode project directory by running
pod initin your terminal, edit the Podfile generated and add the following line:pod 'Ometria'. - Run
pod installin your Xcode project directory. CocoaPods should download and install the library, and create a new Xcode workspace. Open up this workspace in Xcode or typingopen *.xcworkspacein your terminal.
To benefit from the functionality provided by Ometria, you first have to initialise it. For this, you will be required to fill in the API Token that has been provided in your Ometria account.
The best place to do this is in application(_:didFinishLaunchingWithOptions:).
Initialise the library by first adding import Ometria and then calling Ometria.initialize(apiToken:) with your api token as its argument. Once you've called this method once, you can access your instance throughout the rest of your application with sharedInstance().
Ometria relies on Firebase Cloud Messaging in order to send push notifications to the mobile devices. This is done by adding ‘Firebase/Messaging’ as a dependency of Ometria. When installing the library via CocoaPods you will not have to worry about anything, as it will be automatically installed. If however you added Ometria manually in your project, you will have to install the Firebase SDK separately.
After initialising Ometria, make sure you do the same thing for Firebase Cloud Messaging as well. Once everything is done you will end up with something similar to this:
import Ometria

func application(_ application: UIApplication, didFinishLaunchingWithOptions launchOptions: [UIApplication.LaunchOptionsKey: Any]?) -> Bool {
    Ometria.initialize(apiToken: "OMETRIA_API_TOKEN")
    FirebaseApp.configure()
    return
}
By default, Ometria logs any errors encountered during runtime. You can enable advanced logging if you want more information on what is happening in the background. In order to enable logging, you will be required to add the following line after initialising the library:
Ometria.sharedInstance().isLoggingEnabled = trueTo better understand your users, it is necessary to be aware of their behaviour on your platforms (in this case, the app). Some of that behaviour is automatically detectable, other events need the help of the app developer to track.
Many of these methods have analogous events in a server-to-server API called the "Ometria Data API", and through a separate JavaScript API. If your business already integrates with Ometria in any way, it is very important that the values sent here correspond to those in other integrations!
For example, the customer identified event takes a customer ID: that ID must be the same here as it is in the data API. Not e.g. a firebase ID here, and a Postgres autoincrement ID there. The events are merged on Ometria's side into one big cross-channel view of your customer behaviour, which will otherwise get very messy.
This section is the meat and potatoes of the Ometria SDK integration. The quality of the integration of these events will translate to direct gains for the marketing department. The richer and more accurate the events, the better the marketing team can leverage them into efficient and rewarding customer outreach.
Once the SDK is initialised, you can track an event by calling its dedicated method:
let myItem = OmetriaBasketItem(
        productId: "product-1",
        sku: "sku-product-1",
        quantity: 1,
        price: 12.0)
let myItems = [myItem]
let myBasket = OmetriaBasket(totalPrice: 12.0, currency: "USD", items: myItems)

Ometria.sharedInstance().trackBasketUpdatedEvent(basket: myBasket)An app user has just identified themselves. This basically means: a user has logged in.
trackProfileIdentifiedEvent(customerId: String)Their customer ID being their user ID in your database.
Sometimes a user only supplies their e-mail address, without fully logging in or having an account. In that case, Ometria can do profile matching based on e-mail:
trackProfileIdentifiedEvent(email: String)But having a customerId makes profile matching more robust. It is not mutually exclusive with sending an e-mail event: send either event as soon as you have the information, for optimal integration.
These two events are absolutely pivotal to the functioning of the SDK, so take care to send them as early as possible.
A visitor clicks / taps / views / highlights or otherwise shows interest in a product.
Think for example searching for a term, and selecting one of the product previews from a set of results. Or browsing a category of clothes, and clicking on a specific shirt to see a larger picture. This event is about capturing interest from the visitor for this product.
trackProductViewedEvent(productId: String)A visitor clicks / taps / views / highlights or otherwise shows interest in a product category.
For example, a store sells clothing, and they tap on "Women's Footwear".
trackProductCategoryViewedEvent(category: String)The value is opaque, and is only used to create segments and automation campaigns in the Ometria app. Stick to non-localised, predictable, human readable slugs. E.g. "womens-footwear".
The user has added this product to their wishlist:
trackWishlistAddedToEvent(productId: String)... or removed it:
trackWishlistRemovedFromEvent(productId: String)The user has viewed a dedicated page, screen or modal with the contents of the shopping basket.
trackBasketViewedEvent()The user has changed their shopping basket.
trackBasketUpdatedEvent(basket: OmetriaBasket)This event takes the full current basket as a parameter; not just the updated parts. This is laborious, but it helps recover from lost or out of sync basket events: the latest update is always authoritative.
The order has been completed and paid for.
trackOrderCompletedEvent(orderId: String, basket: OmetriaBasket)trackDeepLinkOpenedEvent(link: String, screenName: String)The user views the "home page" or landing screen of your app.
The user clicks / taps / views / highlights or otherwise shows interest in a product listing. This kind of screen includes search results, listing of products in a group, category, collection or any other screen that presents a list of products.
For example, a store sells clothing, and they tap on "Women's Footwear" to see a list of products in that category.
Another exmple: they search for "blue sweater" and see a list of products in that category.
Concretely, this event should at least be triggered on:
- search results
- category lists
- any similar such screen
Tracking a user's independent screen views helps us track engagement of a user with the app, as well as where they are in a journey. An analogous event on a website would be to track independent page views.
The common ecommerce screens all have their own top-level event: basket viewed, list of products viewed, etc. However, your app may have a specific type of page that is useful for marketers to track engagement of. Imagine a type of promotion, where viewing the screen indicates interest in the promotion, which marketing might later want to follow up on. To track these custom screens, use the Screen Viewed event:
trackScreenViewedEvent(screenName: String, additionalInfo: [String: Any])Your app may have specific flows or pages that are of interest to the marketing department. They may want to send an e-mail or notification to any user who e.g. signed up for a specific promotion, or interacted with a button or specific element of the app. If you send a custom event corresponding to that action, they will be able to trigger what's called an "automation campaign" on it.
Check with the marketing team about the specifics, and what they might need. Especially if they're already using Ometria for e-mail, they will know about automation campaigns and custom events.
trackCustomEvent(customEventType: String, additionalInfo: [String: Any])An object that describes the contents of a shopping basket.
-
currency: (String, required) - A string representing the currency in ISO currency format. e.g."USD","GBP" -
price: (float, required) - A float value representing the pricing. -
items: (Array[OmetriaBasketItem]) - An array containing the item entries in this basket.
An object representing one entry of a particular item in a basket. It can have its own price and quantity based on different rules and promotions that are being applied.
-
productId: (String, required) - A string representing the unique identifier of this product. -
sku: (String, optional) - A string representing the stock keeping unit, which allows identifying a particular item. -
quantity: (Int, required) - The number of items that this entry represents. -
price: (Float, required) - Float value representing the price for one item. The currency is established by the OmetriaBasket containing this item
For the record, here are the events that are automatically tracked by the SDK. Linking and initialising the SDK is enough to take advantage of these; no further integration is required.
- Application Installed - The app was just installed. Usually can't be sent when the app is actually installed, but instead only sent the first time the app is launched.
- Application Launched - Someone has just launched the app.
- Application Foregrounded - The app was already launched, but it was in the background. It has just been brought to the foreground.
- Application Backgrounded - The app was in active use and has just been sent to the background.
- Push Token Refreshed - The push token generated by Firebase has been updated.
- Notification Received - A Push notification was received by the system.
- Notification Interacted - The user has just clicked on / tapped on / opened a notification.
- Error Occurred - An error occurred on the client side. We try to detect any problems with actual notification payload on our side, so we don't expect any errors which need to be fed back to end users.
In order to reduce power and bandwidth consumption, the Ometria library doesn’t send the events one by one, unless you request it to do so. Instead, it composes batches of events that are sent periodically to the backend, during application runtime. You can request the library to send all remaining events to the backend whenever you want, by calling:
Ometria.sharedInstance().flush()The library will automatically call this method every time the application is brought to foreground or sent to background.
You can completely clear all the events that have been tracked and not yet flushed. In order to do so you simply have to call the following method:
Ometria.sharedInstance().clear()Ometria has the potential of providing personalized remote notifications for your mobile application, but in order to do so, it needs to be properly set up. To benefit from its full potential you need to cover the following steps:
- Enable your app to receive push notifications by creating an appId and enabling the push notifications entitlement.
- Setup a Firebase account and connect it to Ometria.
- Enable Cloud Messaging on your Firebase account and provide your application’s SSL push certificate.
- Configure push notifications in your application.
- Add a Notification Service Extension to your app in order to enable receiving rich content notifications.
If you reached this section, we assume that you have already configured both the Ometria SDK, and Firebase. Once you managed to properly create or modify your application to support push notifications, you can move on to configure everything in your AppDelegate like so:
#import UserNotifications

@UIApplicationMain
class AppDelegate: UIResponder, UIApplicationDelegate, UNUserNotificationCenterDelegate {

    func application(_ application: UIApplication, didFinishLaunchingWithOptions launchOptions: [UIApplication.LaunchOptionsKey: Any]?) -> Bool {
        Ometria.initialize(apiToken: "OMETRIA_API_TOKEN")
        FirebaseApp.configure()
        configurePushNotifications()

        return true
    }

    func configurePushNotifications() {
        UNUserNotificationCenter.current().delegate = self
        let authOptions: UNAuthorizationOptions = [.alert, .badge, .sound]
        UNUserNotificationCenter.current().requestAuthorization(options: authOptions) {
            [weak self] (granted, error) in

            print("Permission granted: \(granted)")
            guard granted else { return }
            self?.getNotificationSettings()
        }
        UIApplication.shared.registerForRemoteNotifications()
    }

    func getNotificationSettings() {
        UNUserNotificationCenter.current().getNotificationSettings { settings in
            print("Notification settings: \(settings)")
            guard #available(iOS 12.0, *), settings.authorizationStatus == .provisional ||
            settings.authorizationStatus == .authorized else {
                return
            }

            DispatchQueue.main.async {
                UIApplication.shared.registerForRemoteNotifications()
            }
        }
    }

    func application(_ application: UIApplication, didRegisterForRemoteNotificationsWithDeviceToken deviceToken: Data) {
        print("Reaching Did register for remote notifications")
        // handle your own device token handling here
    }

    func userNotificationCenter(_ center: UNUserNotificationCenter, didReceive response: UNNotificationResponse, withCompletionHandler completionHandler: @escaping () -> Void) {
        print("Reaching Did receive notification response")
        // handle how your app reacts to receiving a push notification while it is running in foreground
    }

    func userNotificationCenter(_ center: UNUserNotificationCenter, willPresent notification: UNNotification, withCompletionHandler completionHandler: @escaping (UNNotificationPresentationOptions) -> Void) {
        print("Reaching Will present notification")
        // handle how you want your notification to be presented while the app is running in foreground
    }
}
The Ometria SDK will automatically source all the required tokens, and provide them to the backend. This way your app will start receiving notifications from Ometria, although handling those notifications while the app is running in foreground is up to you.
Starting with iOS 12.0, Apple enabled regular applications to receive and display notifications that contain media content such as images. Ometria uses these feature to further enhance your application, but it requires you to add a new target extension that intercepts all push notifications containing 'mutable-content: 1' in the payload.
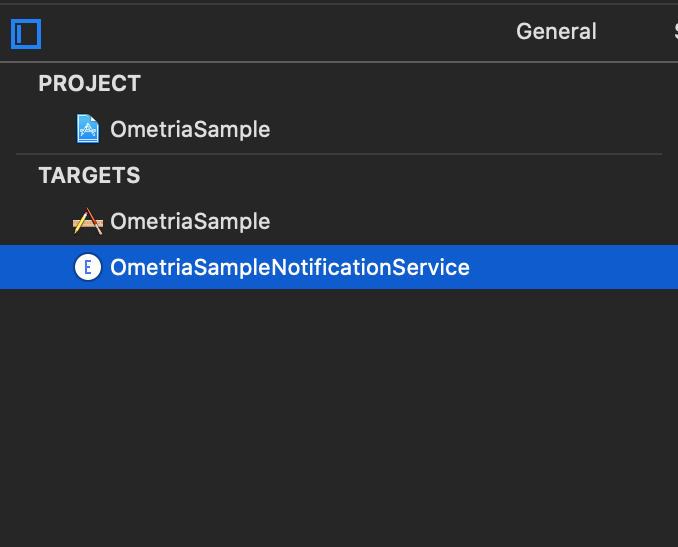
To do so you simply have to go to File → New → Target, and select Notification Service Extension and select Next.

You will then be able to see a new item in your target list.
You will then need to make sure that the Ometria SDK is also available to this new target. To accomplish this you will have to update your podfile to include your newly added target and specify Ometria as a dependency just like you did with the app.
If you try to run pod install and then build the extension, you will get some compilation errors. Since we are trying to run Ometria on an extension, there are several methods in the SDK that are not supported, although not being used. In order to silence those errors and get everything functional you will have to update your podfile ending up with something like this:
 platform :ios, '10.0'

target 'OmetriaSample' do
  use_frameworks!

  pod 'Ometria', :path => '../../SDK'

  target 'OmetriaSampleNotificationService' do
    pod 'Ometria', :path => '../../SDK'
  end

  end

post_install do |installer|
  installer.pods_project.targets.each do |target|
    if target.name == 'Ometria'
      target.build_configurations.each do |config|
        config.build_settings['APPLICATION_EXTENSION_API_ONLY'] = 'No'
      end
    end
  end
end
Once you have done this, you will once again be able to run your application and the extension you have just created.
To finalize the implementation and allow Ometria to intercept notifications, open the NotificationService class and replace the content with the following:
import UserNotifications
import Ometria

class NotificationService: OmetriaNotificationServiceExtension {

}
Now you are able to receive notifications from Ometria and you are also to see the images that are attached to your notifications.