-
Notifications
You must be signed in to change notification settings - Fork 26
SA Tools Hub
The following guide is an overview for the new project management tool, the SA Tools Hub, and how it works. The hope is that this tool will make it easier to proceed with making mods in the future, and offer a much more user friendly experience when trying to work with the tools overall.
Note: This page is still in the process of being updated. Some images may not exactly match the current look of the program.
Below you'll find a Table of Contents to help you navigate this page.
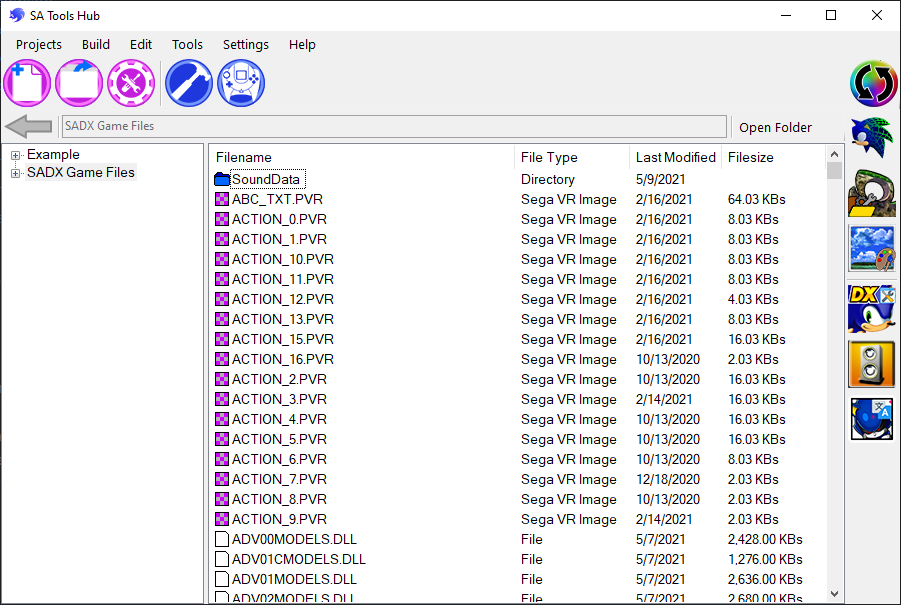
The SA Tools Hub is a single program that aims to offer user a one stop shop for managing projects and opening tools that are in the SA Tools suite. The following couple of steps will walk you through all of the available features in the Tools Hub. In each section, you'll find a brief description of the associated buttons followed by a table with descriptions for each option, the icon (if applicable), and associated keyboard shortcut (if applicable).
If you're simply looking to get started on a project, please go to the Creating A Project section of this page.
The tool is located in the root of the SA Tools 7z download. It's under the name SAToolsHub.exe.
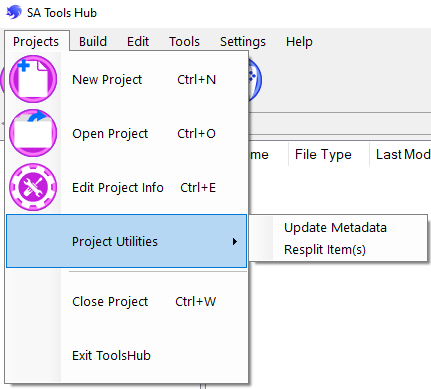
The Projects Menu is all of the basic options pertaining to projects.
| Option | Description | Icon | Shortcut |
|---|---|---|---|
| New Project | Creates a new project. |  |
Ctrl + N |
| Open Project | Opens a *.sap Project File. |  |
Ctrl + O |
| Edit Project Info | Opens editor for the project's mod.ini (if applicable). |  |
Ctrl + E |
| Project Utilities>Update Metadata | Updates SAMDL metadata attributes. | N/A | N/A |
| Project Utilities>Resplit Item(s) | Resplits items. See Resplit Menu | N/A | N/A |
| Close Project | Closes the open project. | N/A | Ctrl + W |
| Exit ToolsHub | Closes the SA Tools Hub and any open projects. | N/A | N/A |
This feature will update the metadata used by SAMDL for loading a project's model files. When using the feature, it may look like the program has frozen on occassion. Please be patient while it updates all the data.
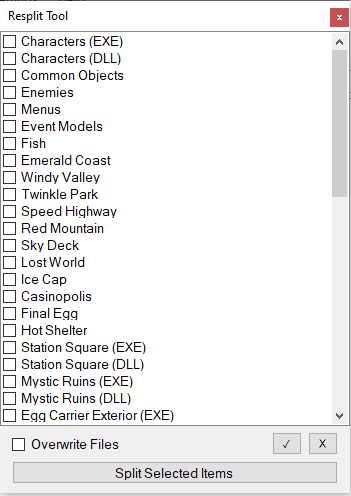
The Resplit Menu is here if you need to resplit data for a project. This feature is useful for resplitting a data set in the event is has been updated or if you need to repair/replace files from a prior split.
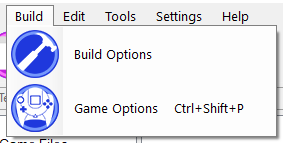
The Build Menu is how you build a mod or access the run options for the game. Please be aware this option is only available for PC games.
| Option | Description | Icon | Shortcut |
|---|---|---|---|
| Build Options | Opens the Build Mod features. |  |
N/A |
| Game Options | Opens a window to run the Mod Manager or the game. |  |
Ctrl + Shift + P |
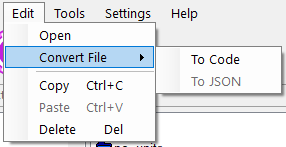
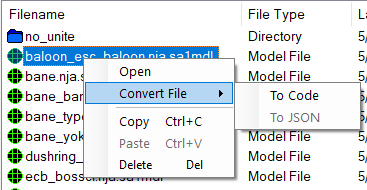
The Edit and Context menus are identical. The Edit Menu is always located in the Menu Bar at the top of the program window. The Context Menu will appear when you right click on an item (or items) in the folder/file viewer. You can find more info on this in the Navigation section.
| Option | Description | Shortcut |
|---|---|---|
| Open | Opens the selected item in its respective program. If the file is not an SA Tools specific file, it will open in its respective program on the computer. | N/A |
| Convert>To Code | Converts the selected file to a code file. These are output to the generated Code Folder in the project folder. | N/A |
| Convert>To JSON | Converts *.saanim (only these files) to *.json files that are located in the same directory as the *.saanim file. | N/A |
| Copy | Copies the selected files to the clipboard. | Ctrl + C |
| Paste | Pastes the selected files to the clipboard. | Ctrl + P |
| Delete | Deletes the selected files. | Del |
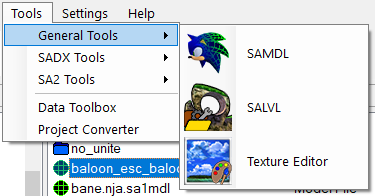
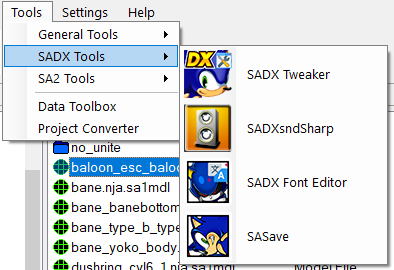
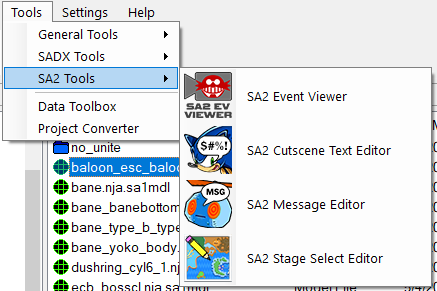
These are quick access links to the additional tools that are found in the SA Tools suite. In the Tools Menu, you will always have access to all other tools.
The shortcuts for the tools on the right side of the program window will update depending on what game the opened project is for. Shortcut buttons to SAMDL, SALVL, and the Texture Editor will always be available.
| Option | Description | Icon |
|---|---|---|
| General Tools>SAMDL | Opens the model viewer. |  |
| General Tools>SALVL | Opens the level viewer/editor. |  |
| General Tools>Texture Editor | Opens the texture archive editor. |  |
| SADX Tools>SADX Tweaker | Opens SADX Tweaker. |  |
| SADX Tools>SADXsndSharp | Opens SADX Sound Archive editor. |  |
| SADX Tools>SADX Font Editor | Opens SADX Font Editor. |  |
| SADX Tools>SASave | Opens SA Save File editor. |  |
| SA2 Tools>SA2 Event Viewer | Opens SA2 Event Viewer. |  |
| SA2 Tools>SA2 Cutscene Text Editor | Opens SA2 Text Editor for Cutscenes. |  |
| SA2 Tools>SA2 Message Editor | Opens SA2 Message Editor. |  |
| SA2 Tools>SA2 Stage Select Editor | Opens SA2 Stage Select Editor. |  |
| Data Toolbox | Opens the all in one Toolbox with a variety of features. | N/A |
| Project Converter | Opens the conversion tool creating *.sap files for old style mod projects | N/A |

This menu is for various settings pertaining to the Tools Hub.
| Option | Description | Icon |
|---|---|---|
| Check for Updates | Runs the update checker. |  |
| Check on Startup | Checkbox. Enables automatic update checking on program start. | N/A |
| Update Frequency | Enabled if Check on Startup enabled. Sets the frequency that the program will check for updates on program start. | N/A |
This menu contains various web links to helpful resources or additional tools. Please see the Helping Hand section for more information on all of these options plus additional info on reaching out for assistance.
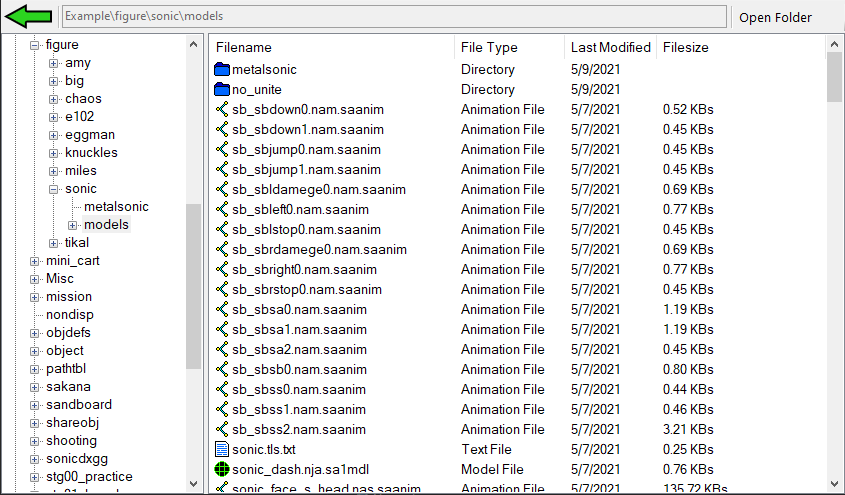
Built into the SA Tools Hub is a set of navigation options to view the files and folders located in your project and in the related game's game files.
On the left is the folder tree that shows all folder trees in both directories. Simply click on which one you want to open it in the menu on the right.
On the right are all of the files and folders in the selected directory. You can double click on folders to navigate through them on this side of the program. Additionally, you can double click on any item to open it.
On top of these two views are two buttons plus a text box, found above, indicating which folder you are in.
The  button will take you back to the parent directory of the directory you are currently in. The
  button will open the folder in your respective folder exploring app, e.g. Windows Explorer on a Windows PC.
Creating a project with the SA Tools Hub is a fairly hassle free process. It also keeps your game folder from getting cluttered with projects! So let's dive into creating a project and let you get started on making mods.
The first step will be to press the New Project  button. This will open the New Project tool window.
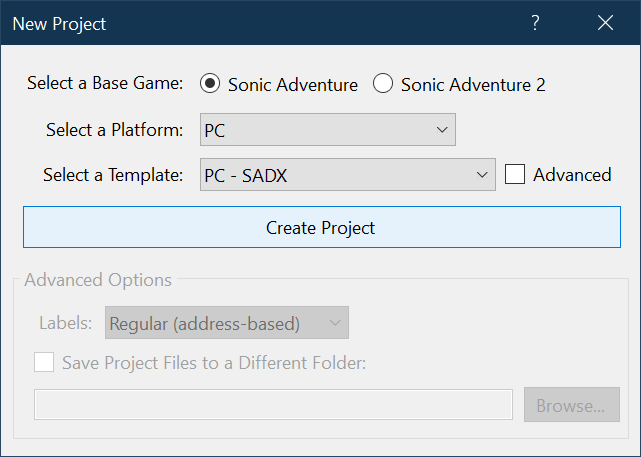
Select the base game and the platform, then pick the template using the "Select a Template" dropdown. At the moment the following platforms and games are supported:
-
PC Templates:
- Sonic Adventure DX (US 2004 port only, the Steam version is NOT supported)
- SA2 (2012, Steam)
-
Dreamcast Templates:
- Sonic Adventure (v1.005 - NTSC-U Final with animated title screen)
- Sonic Adventure: AutoDemo
- Sonic Adventure 2 (v1.008 - NTSC-J and NTSC-U Final)
- Sonic Adventure 2: The Trial (v1.001)
-
Gamecube Templates:
- Sonic Adventure DX (Final)
- Sonic Adventure DX (Preview Prototype)
- Sonic Adventure DX (Review Prototype)
- Sonic Adventure 2: Battle (NTSC-U)
-
Xbox 360 Templates:
- Sonic Adventure DX (August 01, 2010 pre-release build)
PC templates are the only templates where you can build a mod. The reason we have project templates for non-buildable games is for ease of use on ripping assets from those versions of the games. No more fiddling with using batch files or cumbersome UIs.
For the purpose of this guide, we'll be focusing on making a project for SADX PC.
Once you have selected your project, a window will pop up indicating that a game folder has not been set yet. It will include a file that is used to verify that this is a compatible version of the game for the selected template.
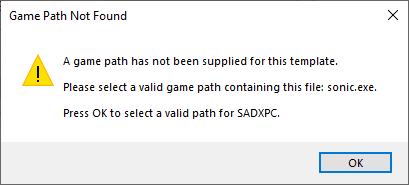
This file will be located in the root folder for the game you are intended to select. This warning will only appear once. After you select a valid game folder, the template will save the game folder for all future use.
Upon verification of the game folder, the Create Project button will be active. Before clicking that, let's go over the Save Files to a Different Folder tick box.
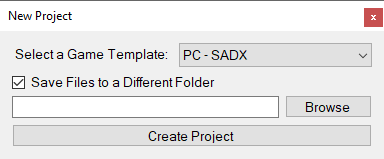
If you tick this box, the text box and Browse buttons will become active. You can use this to select a different location to save the files that are ripped from the game.
If you choose to not use this, the files will be placed in a folder next to where you save your *.sap file. The folder will share the name of the *.sap file.
Once you're settled on which option you want to use for folder placement, press Create Project.
A window will open prompting you to name your *.sap file. Press the save button and the SA Tools Hub will begin creating your project!

It shows what data mapping file is being used on which file as it splits assets out of the related file. The progress bar shows how far along the process is. Please be aware that some of them do take longer than others. SADX PC, for example, takes quite a while to split into raw files as all of the models and animations have been mapped out.
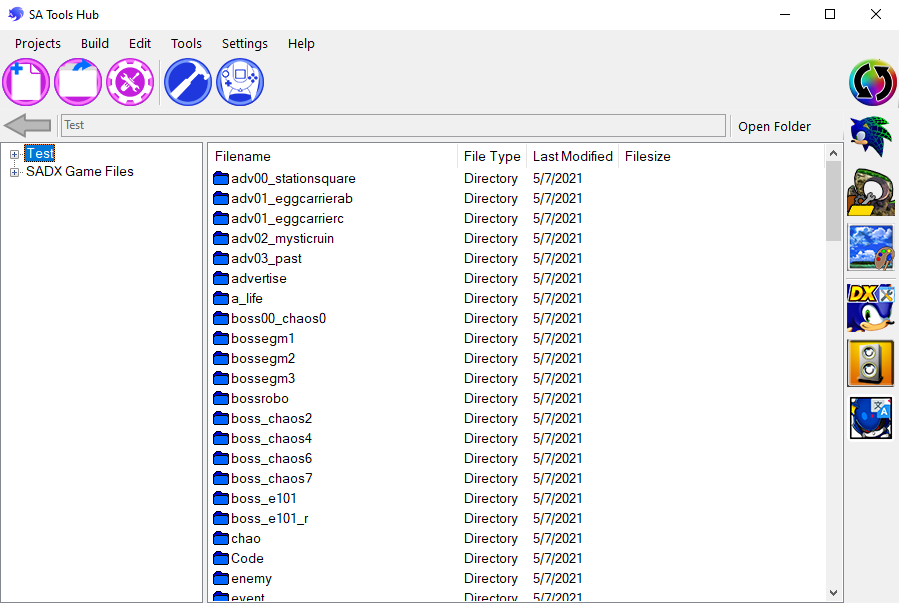
Once your project is finished being created, it will automatically open in the Tools Hub. The right hand tool shortcuts will populate for the appropriate game, and both the project folder and the game's data files will be available to browse in the SA Tools Hub.
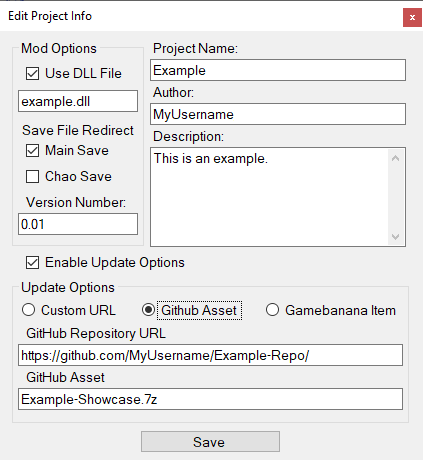
A new mod.ini editor has been implemented into the SA Tools Hub. This editor contains all of the options available for use in a mod's ini file. To access the editor, simply click the Edit Project Info menu button or the Edit Project tool icon.
The following is a breakdown on how to use the editor:
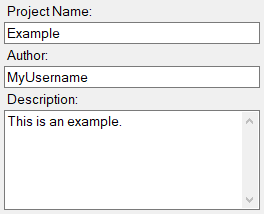
- Title - The title of the mod shown in the ModManager for the respective game.
- Author - The author, or authors, of the mod displayed in the ModManager.
- Description - A description of the mod that displayed in the ModManager.
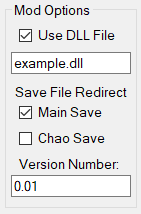
The following options are optional.
- Use DLL File - Tick box that enables the text box below. If enabled, you can type the name of a DLL file to be used with your mod.
-
Save File Redirect
- Main Save - Redirects the game to use a save file supplied by your mod.
- Chao Save - Redirects the game to use a chao save file supplied by your mod.
- Version Number - This sets the version number to be seen in the ModManager.
The following options are optional.
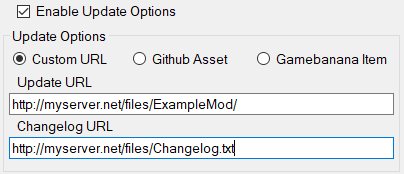
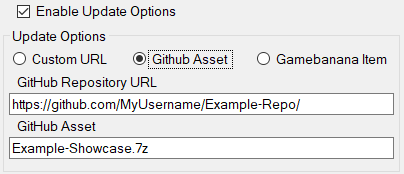
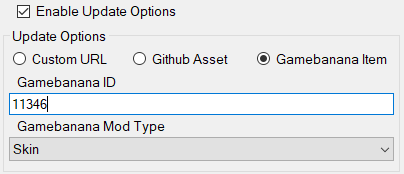
Ticking the tick box for Enable Update Options will enable the options below it in the editor. A breakdown is as follows:
-
Custom URL - Update options setup on a custom URL.
- Update URL - URL to mod files.
- Changelog URL - URL to the changelog for the update.
-
GitHub Asset - Update options for updating directly from a GitHub repo's Release.
- GitHub Repository URL - URL to the Repository on GitHub.
- GitHub Asset - The file to be downloaded, typically a *.7z.
-
GameBanana Item - Update options for updating through a release on GameBanana.
- GameBanana ID - The numerical value assigned to the mod on GameBanana.
- GameBanana Mod Type - Dropdown list of all the categories for mods.
When you're ready to build a mod, click the Build Options menu button or Build Mod icon. This will open the Build options window. With the new split setup the SA Tools are using going forward, you'll be able to select items to build rather than having to have everything build at once. This greatly speeds up building process although it does require you to know which file is found where.

Here's a quick run down of each option does:
| Button | Description |
|---|---|
| Check All | Checks all items in the currently selected tab. |
| Uncheck All | Unchecks all items in the currently selected tab. |
| Manual Build | Opens the Manual Build window with all selected items. |
| Automatic Build | Automatically builds a mod using the selected items. |
It's recommended to use the Automatic Build option when creating a mod unless you are doing a lot of work in code. Below you'll find specifics on the tabs in the build window and information specific to SADX PC and SA2 PC when using the Automatic Build button.
Due to how these games were setup, the options are broken down to EXE and DLL assets. When you tick items and select either the Manual or Automatic Build options, the SA Tools Hub will automatically sort through the project, locate altered files, and build a mod.
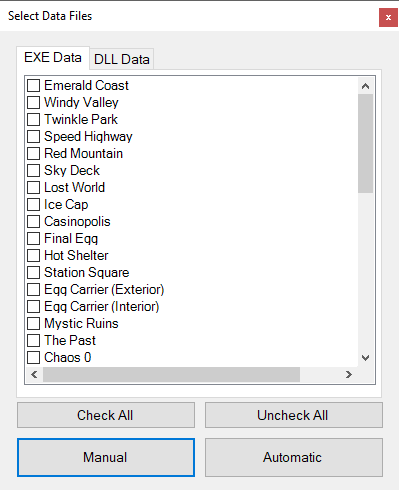
SADX PC uses only the EXE and DLL tabs for its assets. When building a project, it will also copy the system and textures directories located within the project folder. For reference, the system folder is for all external game files except pvmx and Texture Packs. The textures folder is for pvmx and texture pack archives only.
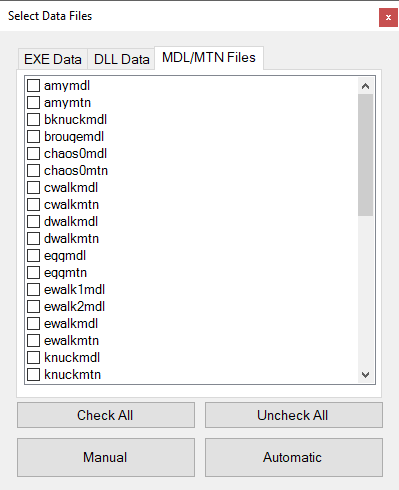
This game has an additional tab for MDL and MTN archives used in the game. The SA Tools Hub will automatically build new archives for the items you selected and copy them with the mod. When building a mod, it will also copy the gd_PC directory in the project folder. For reference, the gd_PC directory is for all external game files.
Once you've built your mod, you'll be able to boot up the game or the ModManager. All you'll have to do is click on the Game Options menu or the Launch Options icon.

Just select what you want to do and press OK. If it detects you are trying to launch either the game or the ModManager but haven't built a mod yet, it will prompt you about building one. Natively, your mod will be added to the end of the mods list. This means all currently active mods you may have enabled will also be enabled when you start the game.
These menu links are here to help with ease of locating helpful information on the web. There are Tool Tips as helpful reminders as well if you hover over these buttons in the SA Tools Hub.


| Option | Description |
|---|---|
| Resources>SA Tools Wiki | Opens this very GitHub Wiki. |
| Resources>Retro's SCHG for SADX | Opens the Community Hacking Guide on Sonic Retro for SADX PC |
| Resources>Retro's SCHG for SA2 | Opens the Community Hacking Guide on Sonic Retro for SA2 PC |
| Resources>SADX Modding Wiki | Opens the SADX Modding Wiki hosted on GitHub. |
| Additional Tools>Blender SA Support Addon | Opens the SA File Addon for Blender hosted on GitHub. |
| Additional Tools>Sonic Audio Tools | Opens the Sonic Audio Tools GitHub with tools for SA2 Audio Formats |
| GitHub Issue Tracker | Opens the Issue Tracker for the SA Tools on GitHub. |
On top of the above links to helpful resources and tools, you can always get extra help in the official x-hax Discord.