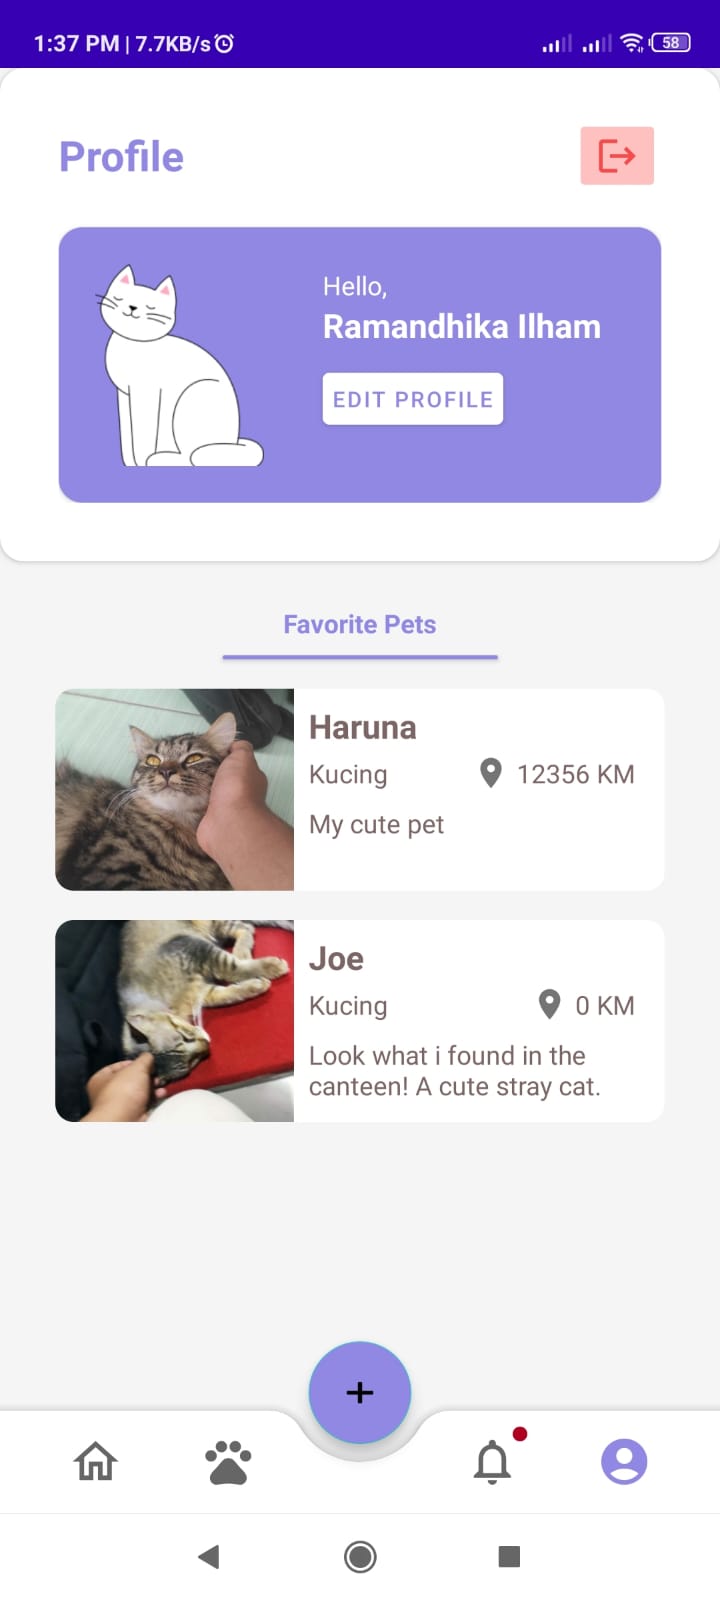
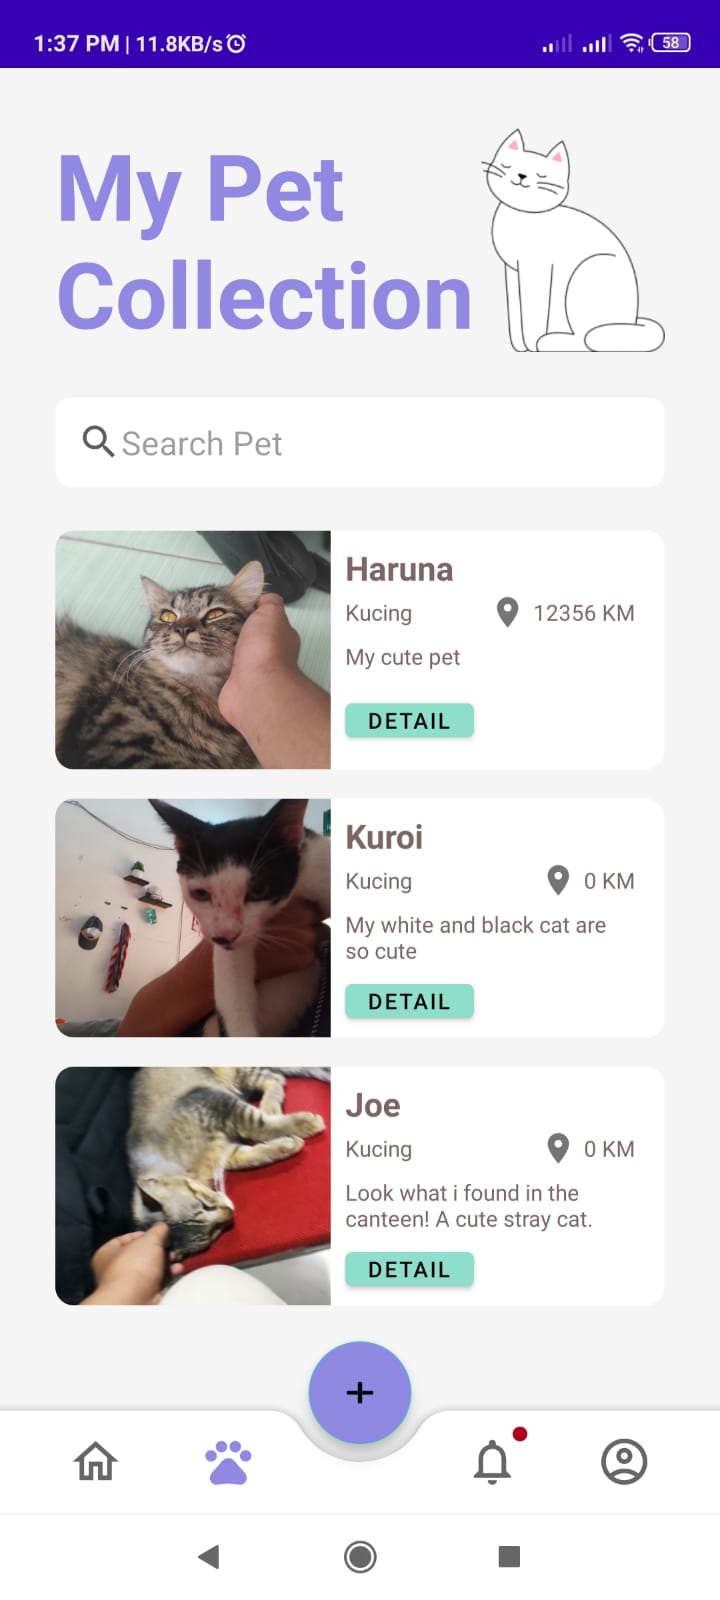
PetMe is a mobile-based platform for users who want to find adopters or animals for adoption. This app provided as a marketplace with various option of animals to explore and find the best fit for users, also assisted wit pet breeds identification to help users identify more of the variety
| Bangkit ID | Name | Learning Path | University | Contact |
|---|---|---|---|---|
| C175BSY3576 | Ramandhika Ilham Pratama | Cloud Computing | STMIK Sinar Nusantara | Github LinkedIn |
| C312BSY3846 | Rio Saputro | Cloud Computing | Sebelas Maret University | Github LinkedIn |
| M312BSY1675 | Aditya Prasetya Nugraha | Machine Learning | Sebelas Maret University | Github LinkedIn |
| M010BSY0955 | Balthasar Toslur Hasaraini Lase | Machine Learning | University of Indonesia | Github LinkedIn |
| M312BSY1691 | Wahyu Heriyanto | Machine Learning | Sebelas Maret University | Github LinkedIn |
| A123BSY2575 | Arbi Julianto | Mobile Development | Politeknik Elektronika Negeri Surabaya | Github LinkedIn |
| A229BSY2114 | Fardan Maula Azizi | Mobile Development | Jenderal Soedirman University | Github LinkedIn |
You can access the Documentation here!
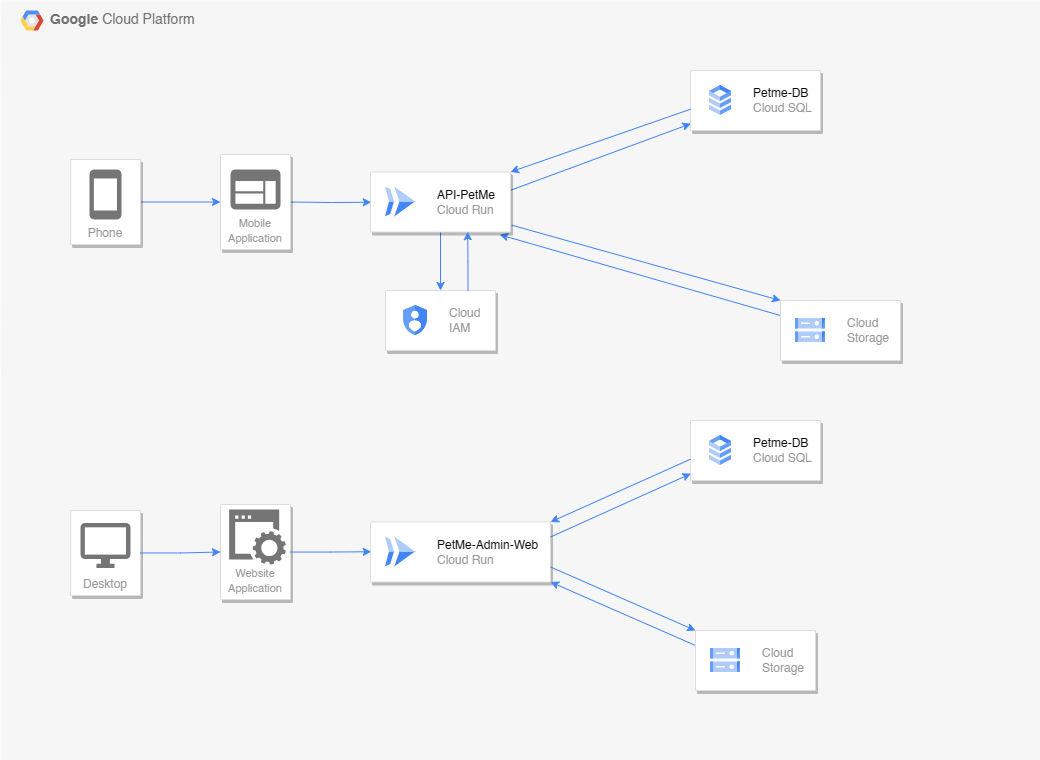
 As depicted in the architectural blueprint, the project leveraged the following cloud services for its infrastructure:
- Cloud Storage, which serves to store container images and assets such as user profile photos and website files.
- Cloud SQL (MySQL), which is used to store application data and handle structured data for applications.
- Cloud Run, which is used to deploy our application API and Website Admin so that it can be accessed by everyone.
Below are the steps to replicate this project.
Clone this repository to your local machine using the following command:
git clone https://github.com/XnoahR/PetMe.git
cd Cloud Computing
cd app
Install the dependencies using the following command:
npm install
Create a database in Cloud SQL, to populate the database we only need to run the program. The program will automatically create a table using Sequelize.
Set up the environment configuration by creating a .env file and adding the database connection variables.
DB_DIALECT=mysql
DB_HOST=<DB_HOSTNAME or CLOUD_SQL_INSTANCE_PUBLIC_IP>
DB_USER=<DB_USER>
DB_NAME=<DB_NAME>
DB_PASSWORD=<DB_PASSWORD>
DB_PORT=3306

NODE_ENV=dev

JWT_SECRET= <JWT_SECRET>
JWT_EXPIRES_IN= <JWT_EXPIRES_IN>
JWT_COOKIE_EXPIRES_IN= <JWT_COOKIE_EXPIRES_IN>


CREDENTIAL_TYPE = <type>
CREDENTIAL_PROJECT_ID = <project_id>
CREDENTIAL_PRIVATE_KEY_ID = <private_key_id>
CREDENTIAL_PRIVATE_KEY = <private_key>
CREDENTIAL_CLIENT_EMAIL = <client_email>
CREDENTIAL_CLIENT_ID = <client_id>
CREDENTIAL_AUTH_URI = <auth_uri>
CREDENTIAL_TOKEN_URI = <token_uri>
CREDENTIAL_AUTH_PROVIDER_X509_CERT_URL = <auth_provider_x509_cert_url>
CREDENTIAL_CLIENT_X509_CERT_URL = <client_x509_cert_url>
CREDENTIAL_UNIVERSE_DOMAIN = <universe_domain>
Start the server using the following command:
npm start
Open http://localhost:3000/ in a web browser and ensure the expected message is displayed.
Once testing is done, stop the server using CTRL+C then press Y.
Test the API using a testing application such as Postman. For documentation, you can refer to the Postman Documentation.
As previously articulated in the context of the cloud architecture, we employed Cloud SQL (MySQL) and Cloud Run. The following are the steps to launch this project in the Cloud.
- Enable the Cloud Build API and Cloud SQL Admin API.
- Open Cloud Shell.
- Clone the repository.
- Create a database in Cloud SQL, to populate the database we only need to run the program. The program will automatically create a table using Sequelize.
- Set up the environment configuration.
- Deploy the application using the following command:
gcloud builds submit --tag gcr.io/PROJECT-ID/IMAGE-NAME
gcloud run deploy --image gcr.io/PROJECT-ID/IMAGE-NAME --platform managed
Access your deployed application by opening https://<your_application_url> in a web browser.
To replicate this project on your local machine, follow these steps:
-
Clone the repository:
git clone https://github.com/XnoahR/PetMe.git
-
Navigate to the project directory:
cd Cloud Computing
cd admin
-
Install the dependencies:
composer install
-
Configure the environment variables:
- Create a
.envfile in the root directory. - Add the necessary environment variables, such as database connection details, API keys, etc.
- Create a
-
Generate the application key:
php artisan key:generate
-
Migrate the database:
php artisan migrate
-
Start the development server:
php artisan serve
-
Open your web browser and visit
http://localhost:8000to view the application.
To deploy this project on Google Cloud Run using Cloud Build, follow these steps:
-
Create a Dockerfile in the root directory of your project with the following content:
# Use an official PHP runtime as the base image
FROM php:8.2-apache

WORKDIR /app

# Install system dependencies
RUN apt-get update && apt-get install -y \
    git \
    curl \
    libpng-dev \
    libonig-dev \
    libxml2-dev \
    zip \
    unzip \
    default-mysql-client

RUN docker-php-ext-install pdo_mysql

# Install Composer
RUN curl -sS https://getcomposer.org/installer | php -- --install-dir=/usr/local/bin --filename=composer

# Copy the entire application to the WORKDIR
COPY . .

# Install PHP dependencies
RUN composer install

# Generate application key
RUN if [ -f ".env.example" ]; then cp .env.example .env; fi
RUN php artisan key:generate

# Fill database details in .env file
RUN sed -i 's/DB_HOST=127.0.0.1/DB_HOST=YOUR_HOST/' .env
RUN sed -i 's/DB_PORT=3306/DB_PORT=3306/' .env
RUN sed -i 's/DB_DATABASE=laravel/DB_DATABASE=YOUR_DATABASE/' .env
RUN sed -i 's/DB_USERNAME=root/DB_USERNAME=YOUR_USERNAME/' .env
RUN sed -i 's/DB_PASSWORD=/DB_PASSWORD=YOUR_PASSWORD/' .env
RUN sed -i 's/APP_ENV=local/APP_ENV=production/' .env

CMD php artisan serve --host=0.0.0.0 --port=8080
-
Build the Docker image using Cloud Build:
gcloud builds submit --tag gcr.io/PROJECT-ID/petme
-
Deploy the Docker image to Cloud Run:
gcloud run deploy --image gcr.io/PROJECT-ID/petme --platform managed
Replace
PROJECT-IDwith your actual Google Cloud project ID. -
Follow the prompts to select the project, region, and service name.
-
Once the deployment is complete, you will receive a URL where your application is accessible.


