Google Calendar is a time-management and scheduling calendar service developed by Google. It lets users to organize their schedule and share events with others.This connector provides the capability to programmatically manage events and calendars. For more information about configuration and operations, go to the module.
- googleapis.gcalendar - Perform Google Calendar related operations programmatically
The Google Calendar Connector provides the capability to manage events and calendar operations. It also provides the capability to support service account authorization that can provide delegated domain-wide access to the GSuite domain and support admins to do operations on behalf of the domain users.
This module supports Google Calendar API V3.
To utilize the Calendar connector, you must have access to the Calendar REST API through a Google Cloud Platform (GCP) account and a project under it. If you do not have a GCP account, you can sign up for one here.
In order to use the Google Calendar connector, you need to first create the Calendar credentials for the connector to interact with Calendar.
-
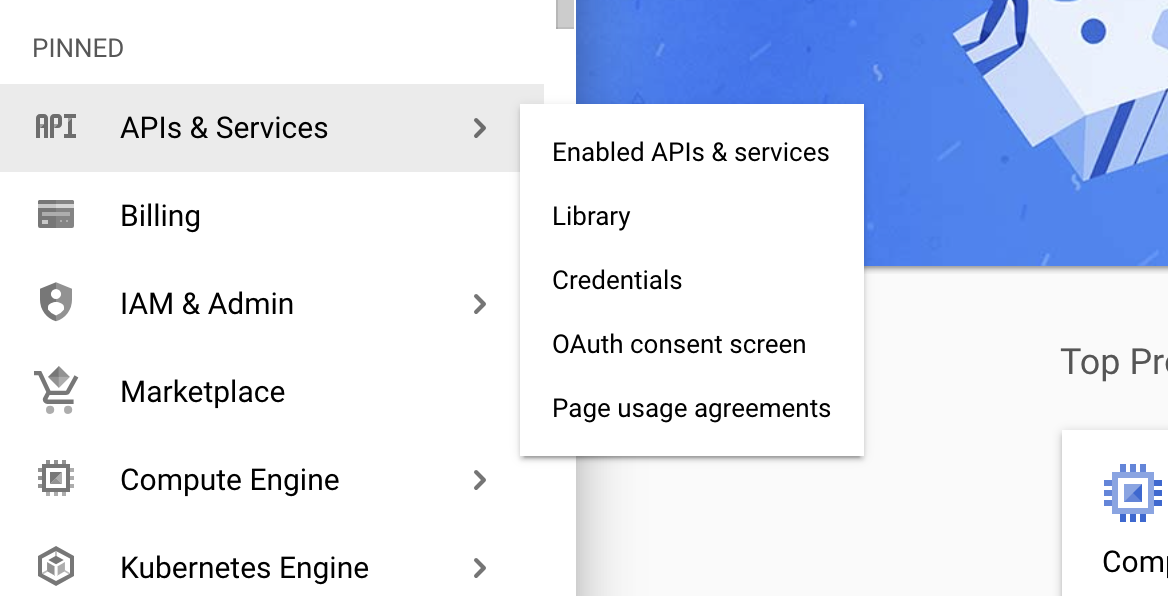
Open the Google Cloud Platform console.
-
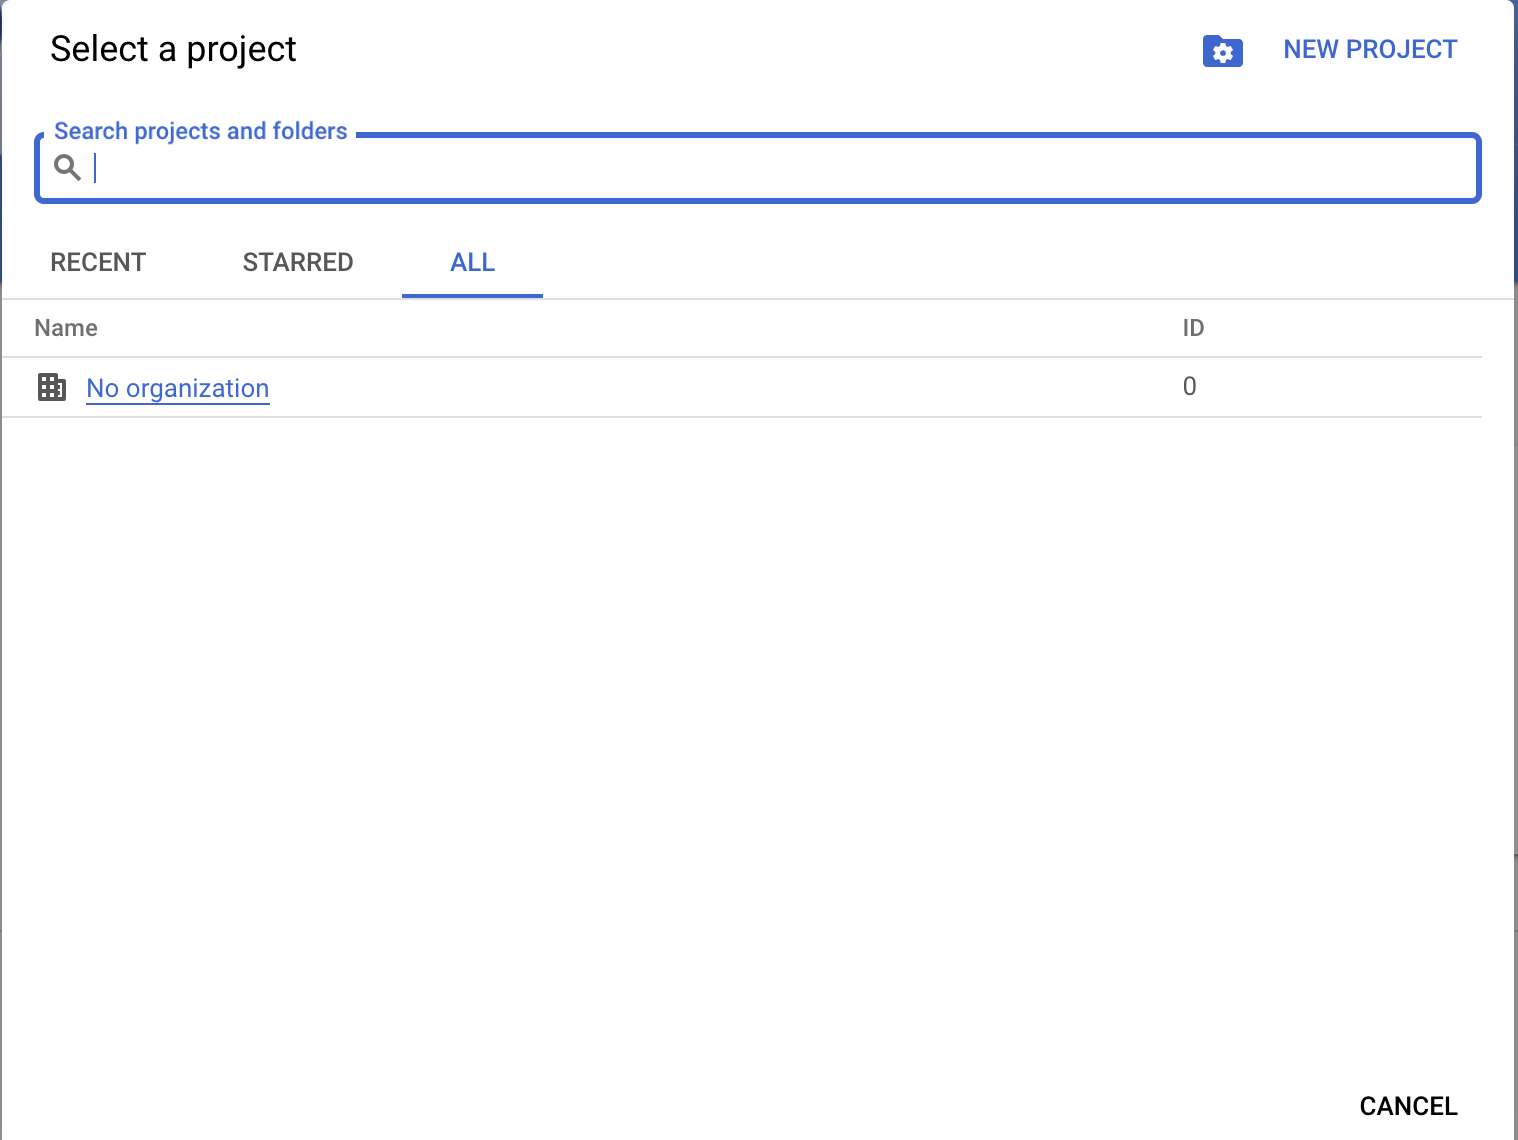
Click on the project drop-down menu and either select an existing project or create a new one for which you want to add an API key.
-
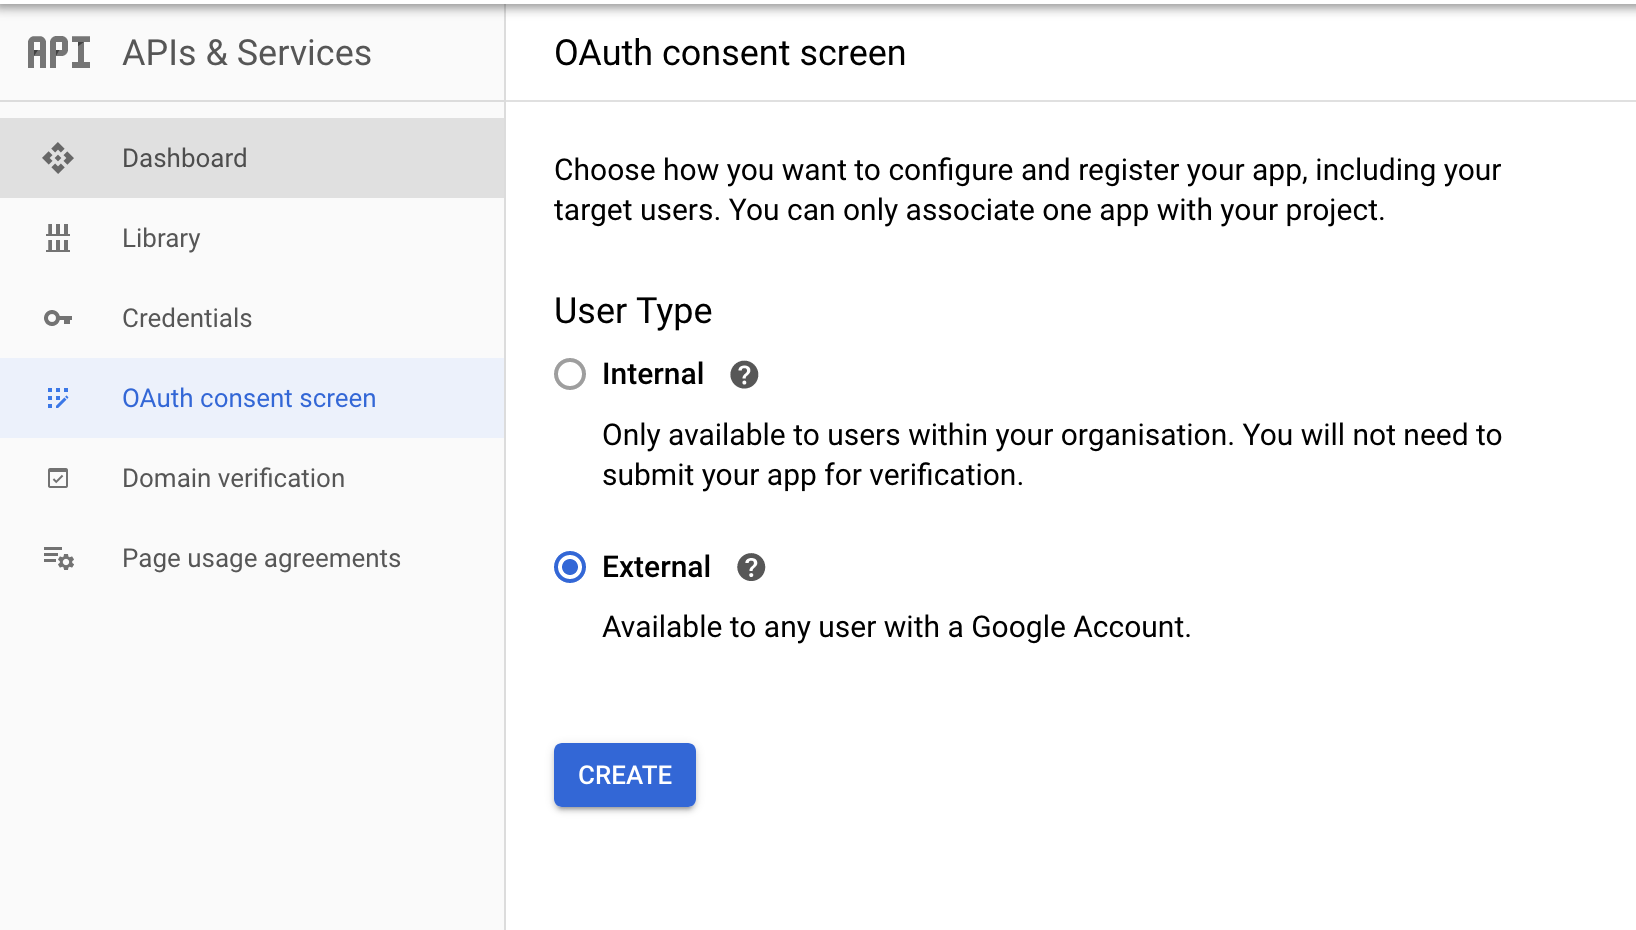
Click on the OAuth consent screen tab in the Google Cloud Platform console.
-
Provide a name for the consent application and save your changes.
-
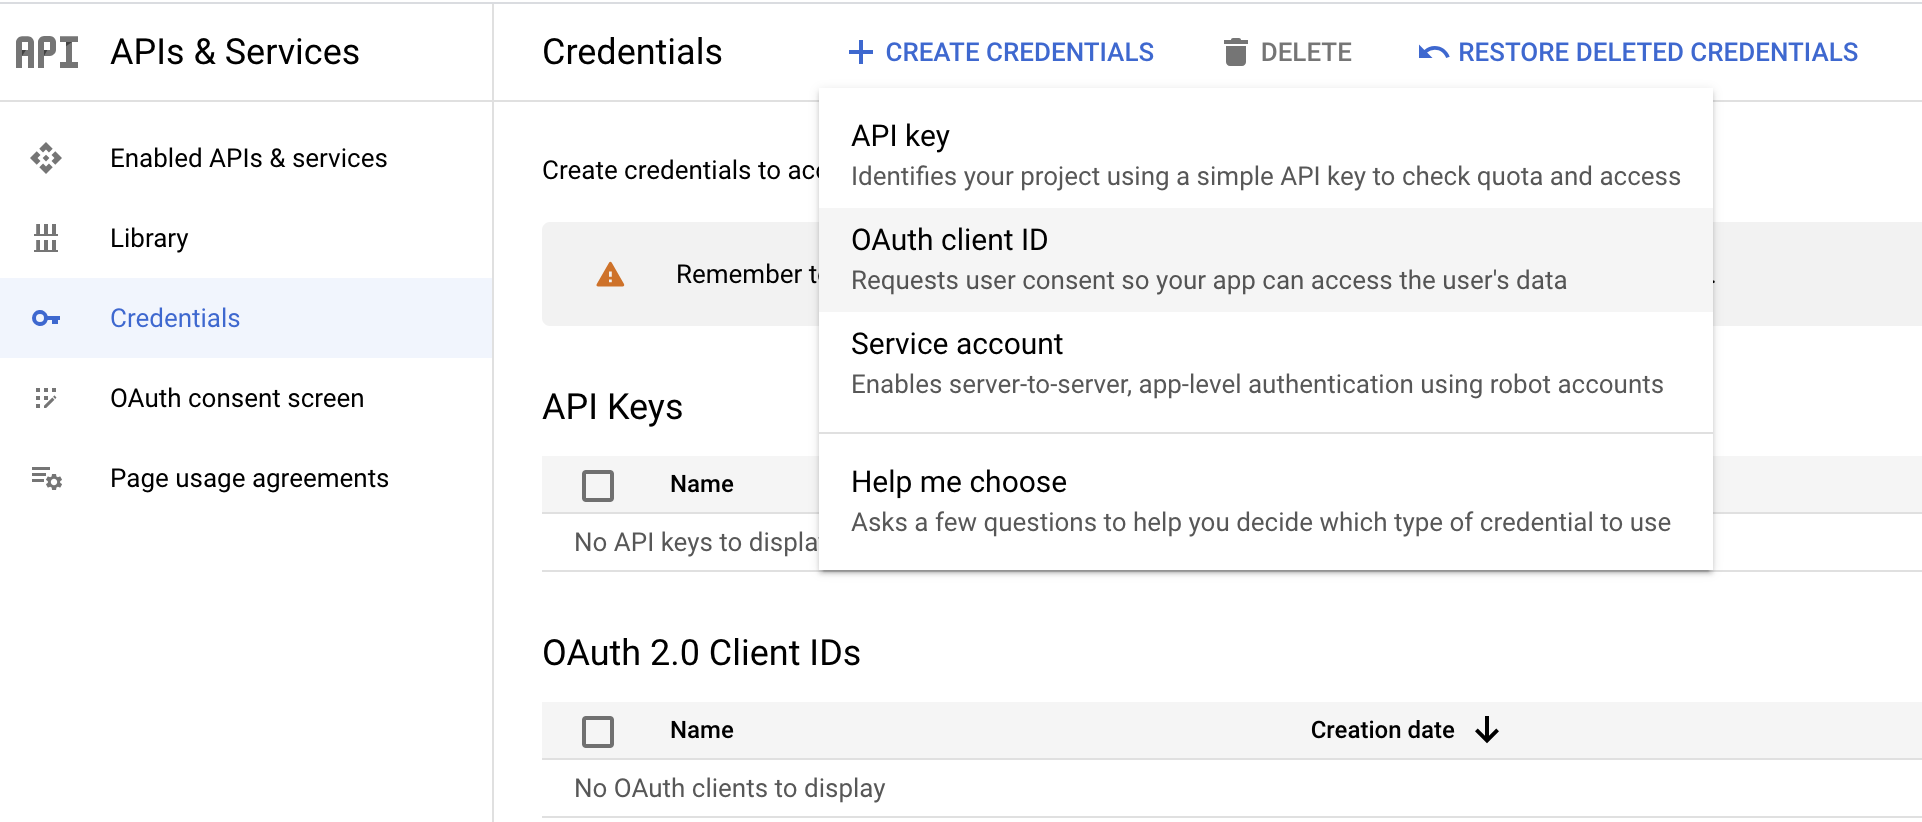
Navigate to the Credentials tab in your Google Cloud Platform console.
-
Click Create credentials and from the dropdown menu, select OAuth client ID.
-
You will be directed to the OAuth consent screen, in which you need to fill in the necessary information below.
Field Value Application type Web Application Name CalendarConnector Authorized redirect URIs https://developers.google.com/oauthplayground -
After filling in these details, click Create.
-
Make sure to save the provided Client ID and Client secret.
Note: It is recommended to use the OAuth 2.0 playground to obtain the tokens.
-
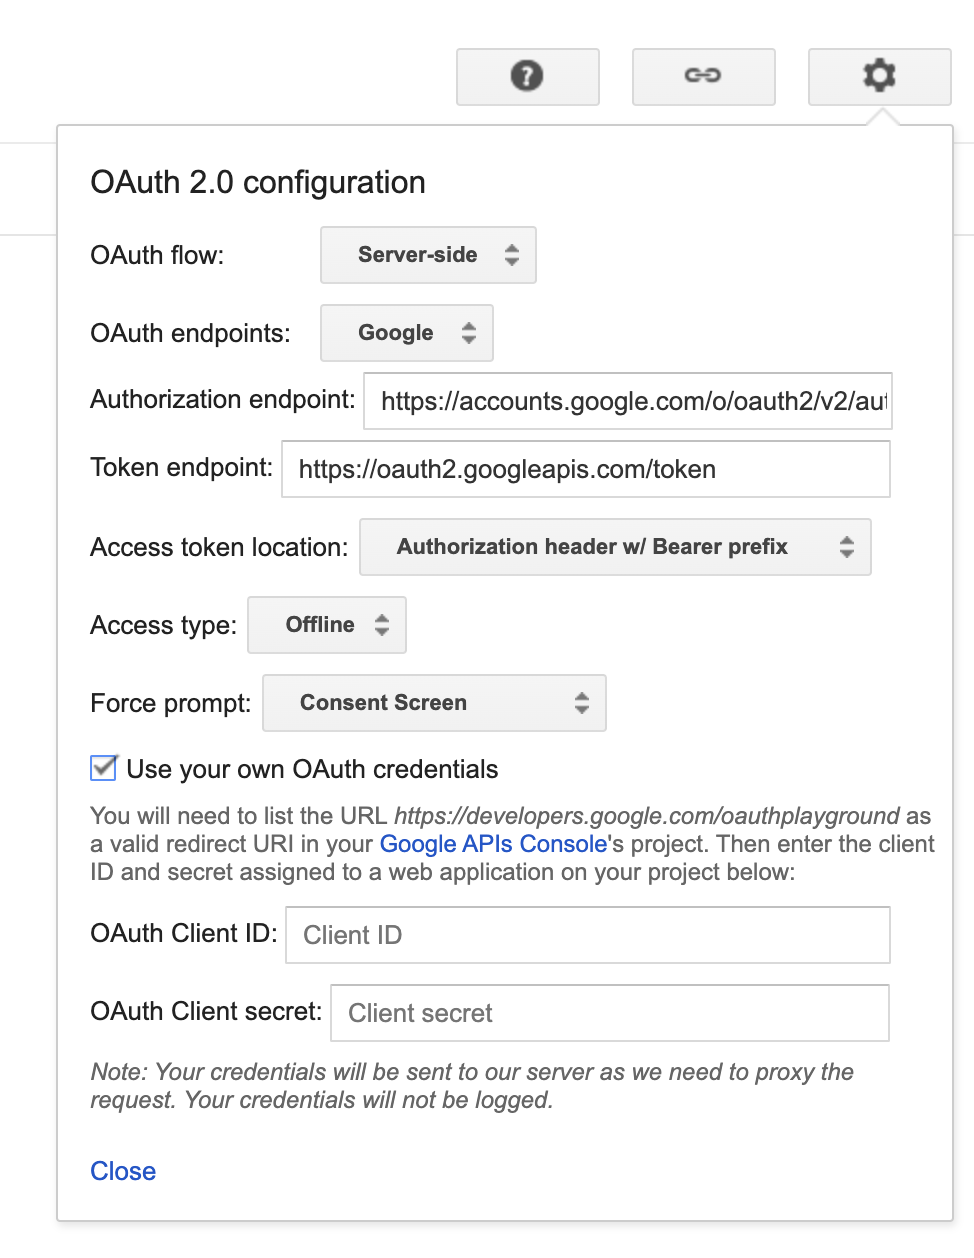
Configure the OAuth playground with the OAuth client ID and client secret.
-
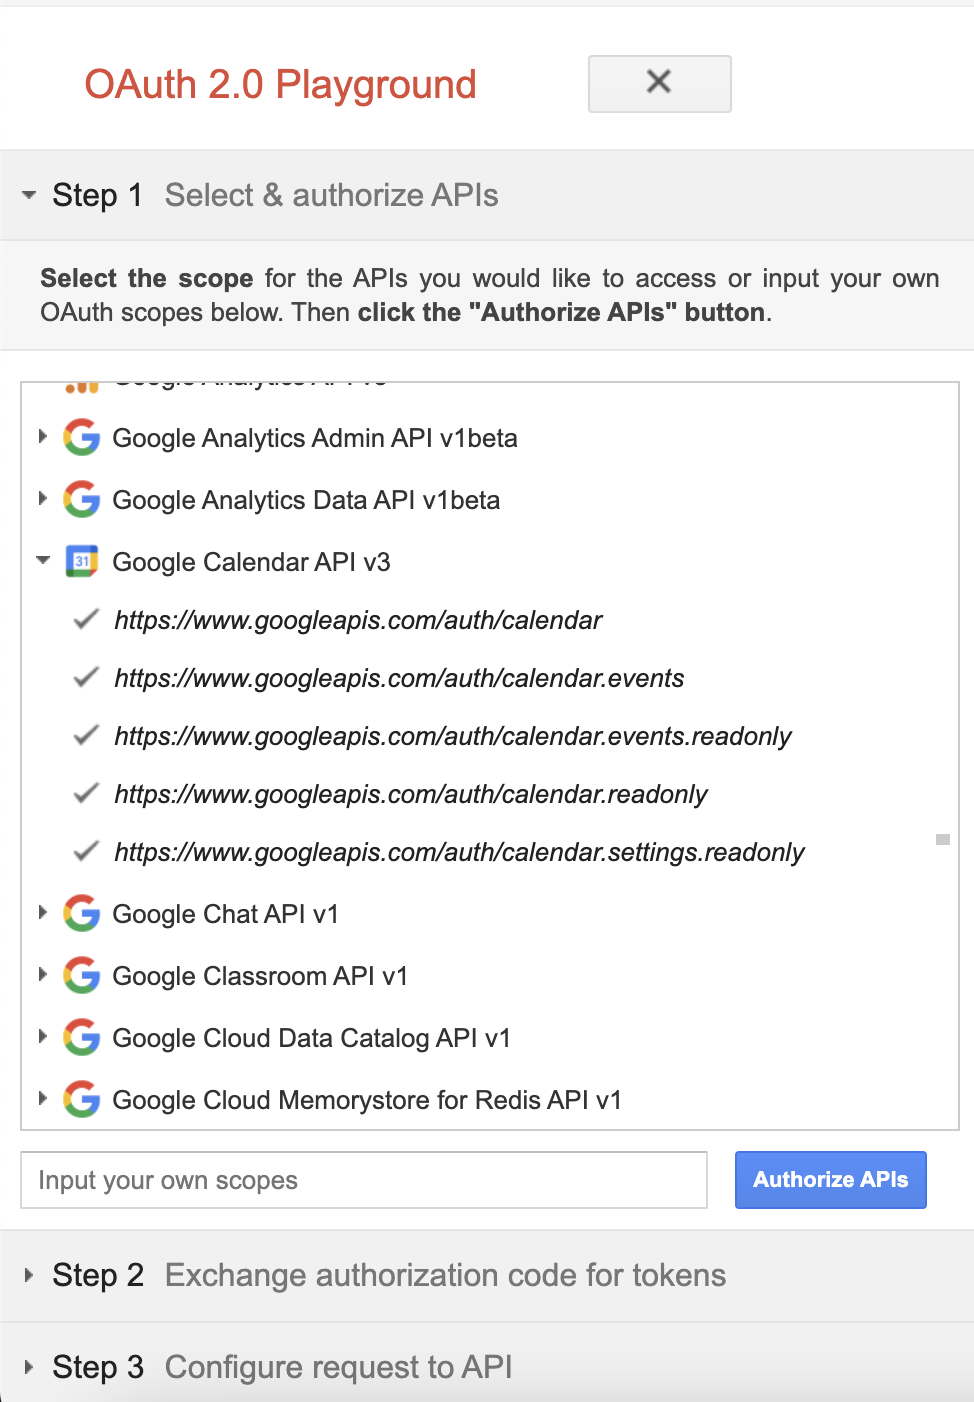
Authorize the Calendar APIs.
-
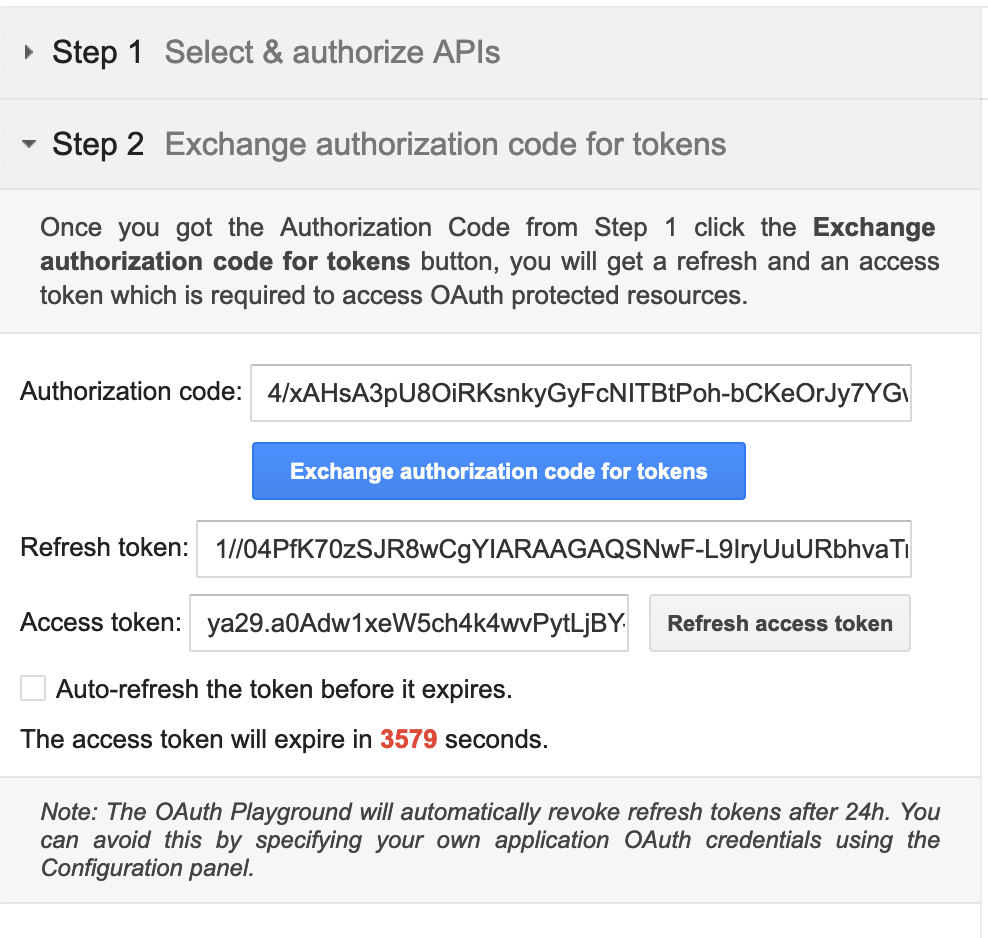
Exchange the authorization code for tokens.
To use the Google Calendar connector in your Ballerina project, modify the .bal file as follows:
Import the ballerinax/googleapis.gcalendar module.
import ballerinax/googleapis.gcalendar;Create a gcalendar:ConnectionConfig with the obtained OAuth2.0 tokens and initialize the connector with it.
configurable string clientId = ?;
configurable string clientSecret = ?;
configurable string refreshToken = ?;
configurable string refreshUrl = ?;

gcalendar:Client calendar = check new ({
   auth: {
      clientId,
      clientSecret,
      refreshToken,
      refreshUrl
   }
});You can now utilize the operations available within the connector.
public function main() returns error? {
   gcalendar:Client calendar = ...//

   // create a calendar
   gcalendar:Calendar calendar = check calendar->/calendars.post({
      summary: "Work Schedule"
   });

   // quick add new event
   string eventTitle = "Sample Event";
   gcalendar:Event event = check calendar->/calendars/[calendarId]/events/quickAdd.post(eventTitle);
}Use the following command to compile and run the Ballerina program.
bal runThe Google Calendar connector provides practical examples illustrating usage in various scenarios. Explore these examples, covering use cases like creating calendar, scheduling meeting events, and adding reminders.
- Project management with Calendar API This example shows how to use Google Calendar APIs to efficiently manage work schedule of a person. It interacts with the API for various tasks related to scheduling and organizing work-related events and meetings.
- Work schedule management with Calendar API This example shows how to use Google Calendar APIs to managing personal project schedule and collaborating with team members.
For comprehensive information about the connector's functionality, configuration, and usage in Ballerina programs, refer to the Google Calendar connector's reference guide in Ballerina Central.
The Issues and Projects tabs are disabled for this repository as this is part of the Ballerina library. To report bugs, request new features, start new discussions, view project boards, etc., visit the Ballerina library parent repository.
This repository only contains the source code for the package.
-
Download and install Java SE Development Kit (JDK) version 17. You can download it from either of the following sources:
Note: After installation, remember to set the
JAVA_HOMEenvironment variable to the directory where JDK was installed. -
Download and install Ballerina Swan Lake.
-
Download and install Docker.
Note: Ensure that the Docker daemon is running before executing any tests.
-
Generate a Github access token with read package permissions, then set the following
envvariables:export packageUser=<Your GitHub Username> export packagePAT=<GitHub Personal Access Token>
Execute the commands below to build from the source.
-
To build the package:
./gradlew clean build
-
To run the tests:
./gradlew clean test -
To build the without the tests:
./gradlew clean build -x test -
To debug package with a remote debugger:
./gradlew clean build -Pdebug=<port>
-
To debug with Ballerina language:
./gradlew clean build -PbalJavaDebug=<port>
-
Publish the generated artifacts to the local Ballerina central repository:
./gradlew clean build -PpublishToLocalCentral=true
-
Publish the generated artifacts to the Ballerina central repository:
./gradlew clean build -PpublishToCentral=true
As an open source project, Ballerina welcomes contributions from the community.
For more information, go to the contribution guidelines.
All contributors are encouraged to read the Ballerina Code of Conduct.
- Discuss code changes of the Ballerina project in [email protected].
- Chat live with us via our Discord server.
- Post all technical questions on Stack Overflow with the #ballerina tag.


