![]()
![]()

![]()
Twitter(X) is a widely-used social networking service provided by X Corp., enabling users to post and interact with messages known as "tweets".
The ballerinax/twitter package offers APIs to connect and interact with Twitter(X) API endpoints, specifically based on Twitter(X) API v2.
To use the Twitter connector, you must have access to the Twitter API through a Twitter developer account and a project under it. If you do not have a Twitter Developer account, you can sign up for one here.
-
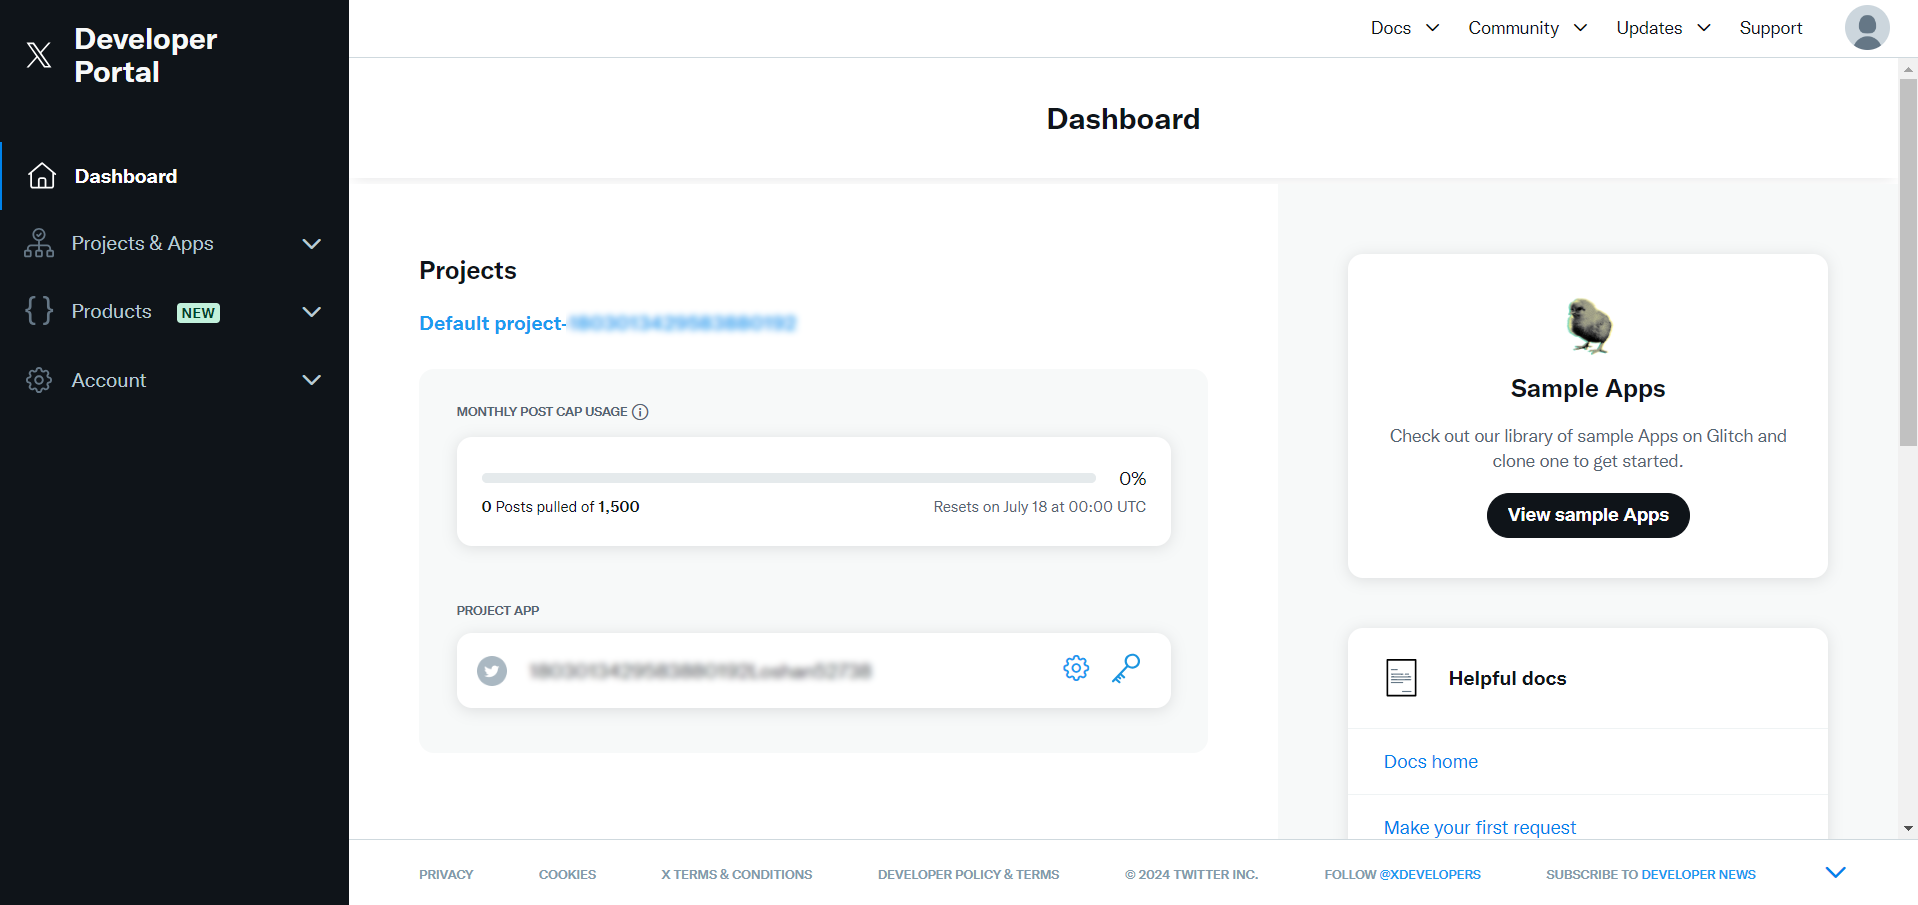
Open the Twitter Developer Portal.
-
Click on the "Projects & Apps" tab and select an existing project or create a new one for which you want API Keys and Authentication Tokens.
-
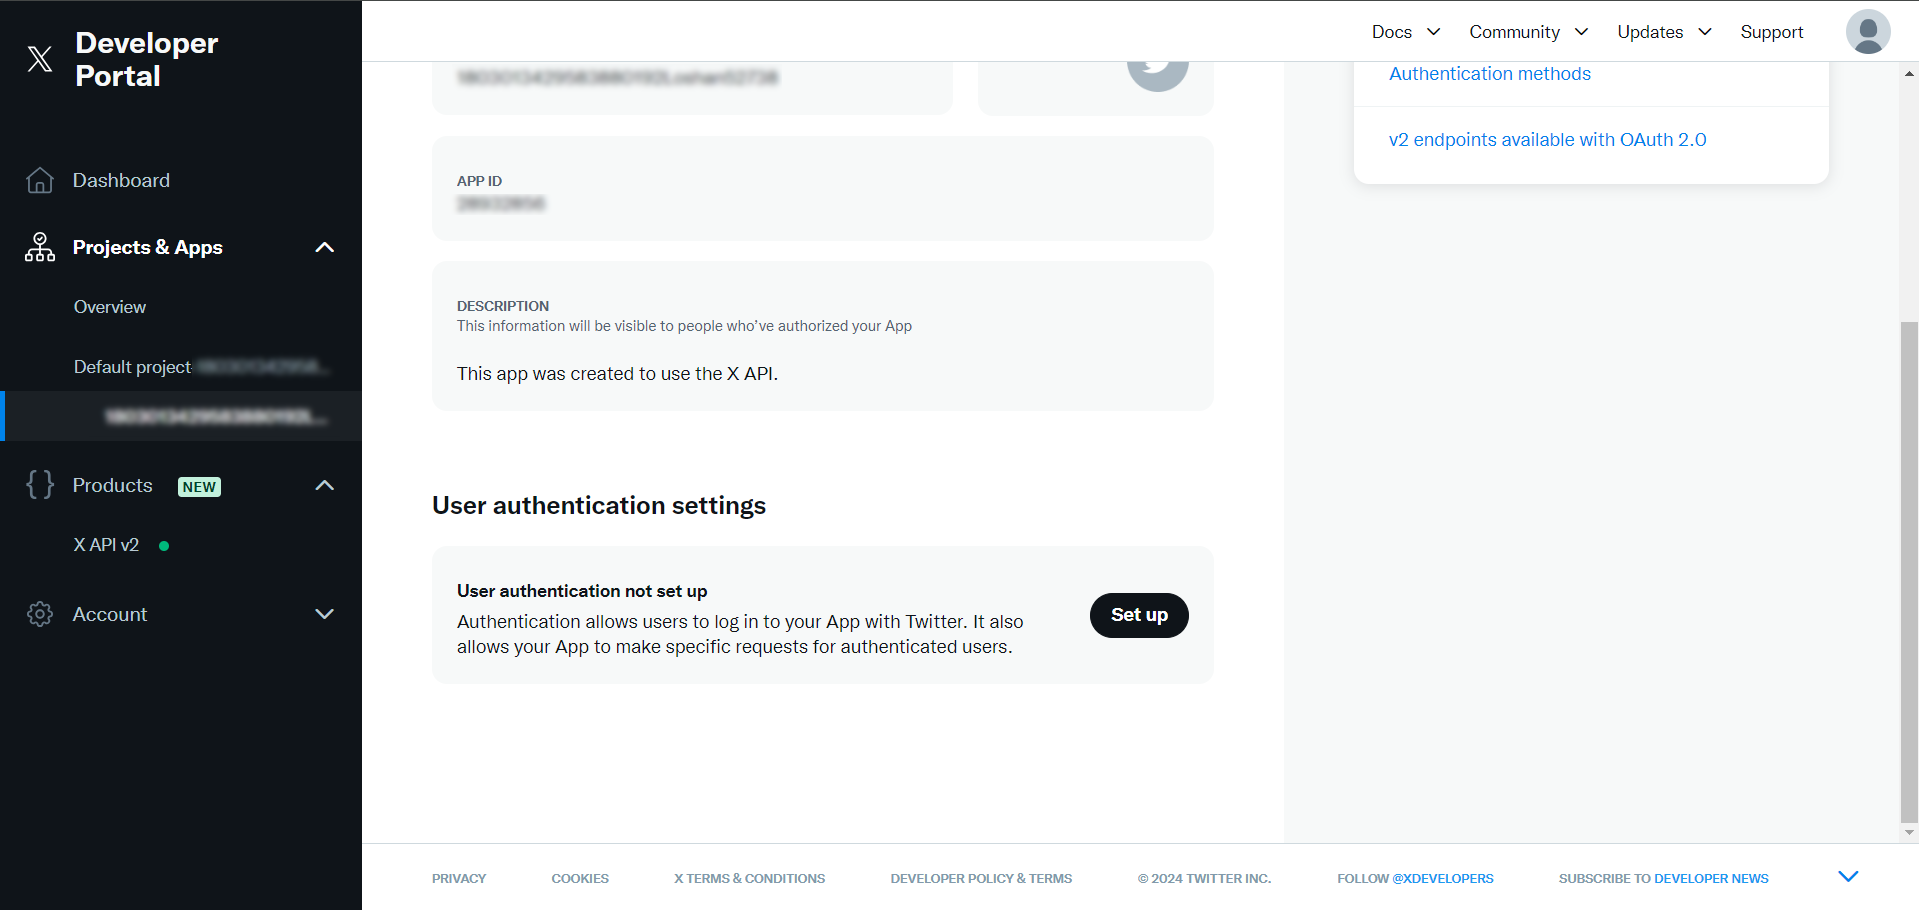
Scroll down and Click on the Set up button to set up user authentication.
-
Complete the user authentication setup.
-
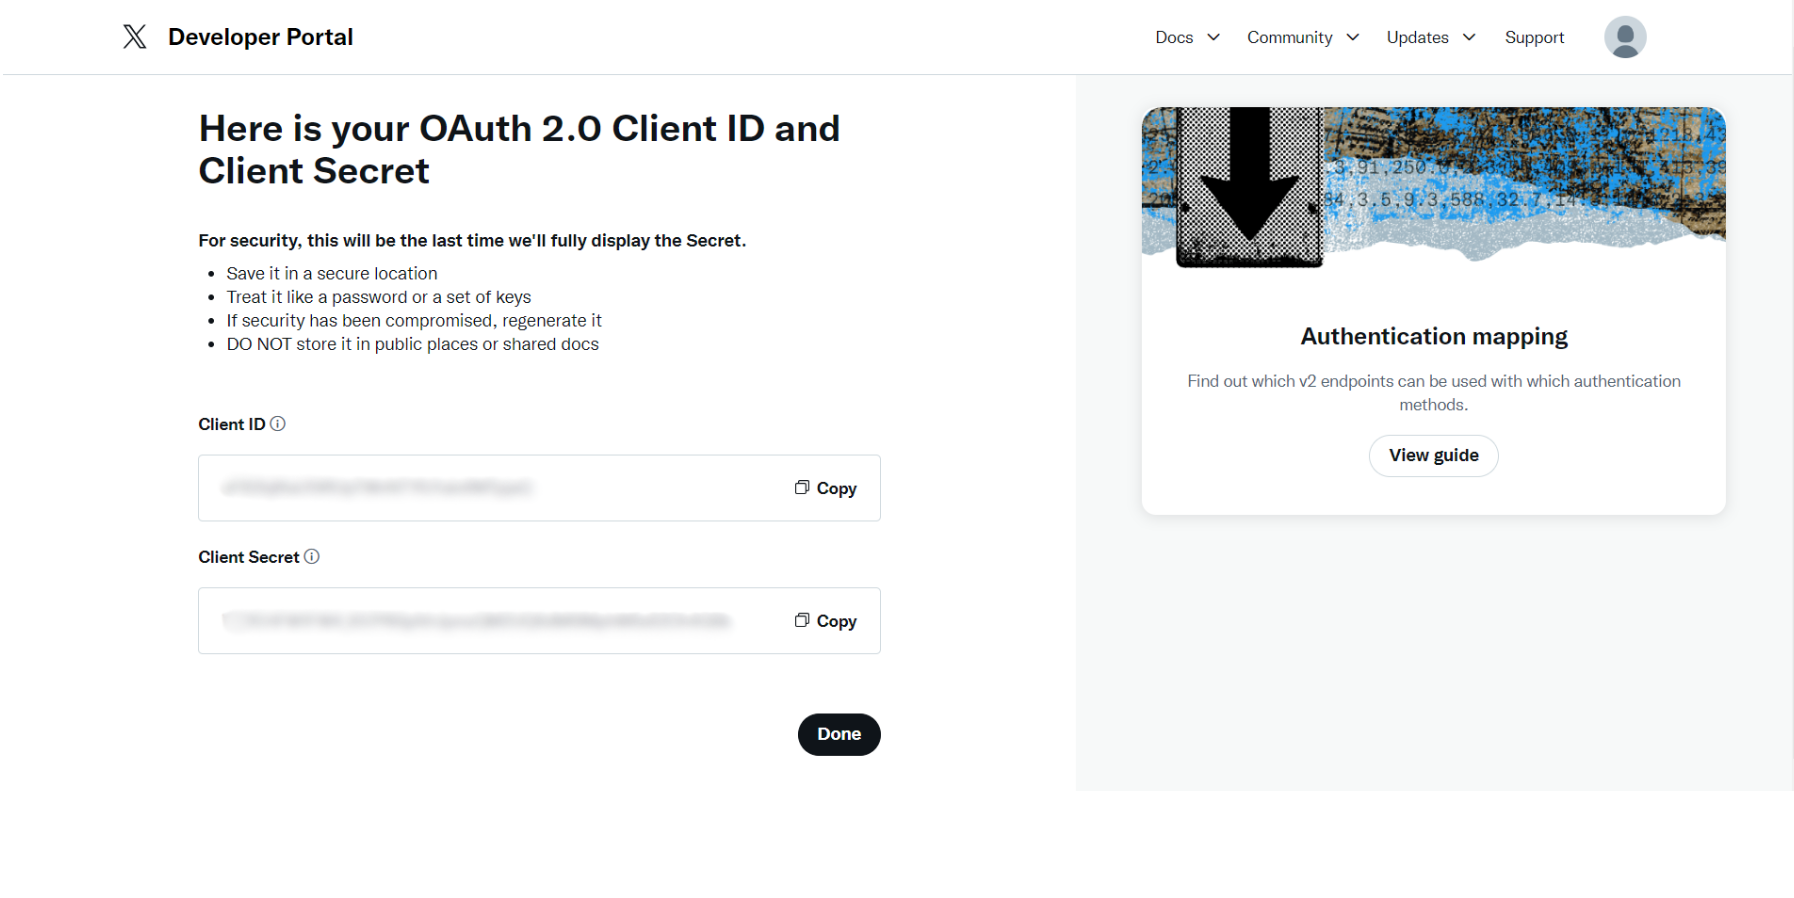
After completing the setup, you will be provided with your client Id and client secret. Make sure to save the provided client Id and client secret.
Before proceeding with the Quickstart, ensure you have obtained the Access Token using the following steps:
-
Create an authorization URL using the following format:
https://twitter.com/i/oauth2/authorize?response_type=code&client_id=<your_client_id>&redirect_uri=<your_redirect_uri>&scope=tweet.read%20tweet.write%20users.read%20follows.read&state=state&code_challenge=<your_code_challenge>&code_challenge_method=plainReplace
<your_client_id>,<your_redirect_uri>, and<your_code_challenge>with your specific values. Make sure to include the necessary scopes depending on your use case.Note: The "code verifier" is a randomly generated string used to verify the authorization code, and the "code challenge" is derived from the code verifier. These methods enhance security during the authorization process. In OAuth 2.0 PKCE, there are two methods for creating a "code challenge":
-
S256: The code challenge is a base64 URL-encoded SHA256 hash of a randomly generated string called the "code verifier".
-
plain: The code challenge is the plain code verifier string itself.
Example authorization URL:
https://twitter.com/i/oauth2/authorize?response_type=code&client_id=asdasASDas21Y0OGR4bnUxSzA4c0k6MTpjaQ&redirect_uri=http://example&scope=tweet.read%20tweet.write%20users.read%20follows.read&state=state&code_challenge=D601XXCSK57UineGq62gUnsoasdas1GfKUY8QWhOF9hiN_k&code_challenge_method=plainNote: By default, the access token you create through the OAuth 2.0 Flow, as used here, will only remain valid for two hours. There is an alternative way that does not invalidate the access token after 2 hours. To do this, refer to Obtain access token under offline.access.
-
-
Copy and paste the generated URL into your browser. This will redirect you to the Twitter authorization page.

-
Once you authorize, you will be redirected to your specified redirect URI with an authorization code in the URL.
Example:
http://www.example.com/?state=state&code=QjAtYldxeTZITnd5N0FVN1B3MlliU29rb1hrdmFPUWNXSG5LX1hCRExaeFE3OjE3MTkzODMzNjkxNjQ6MTowOmFjOjENote: Store the authorization code and use it promptly as it expires quickly.
-
Use the obtained authorization code to run the following curl command, replacing
<your_client_id>,<your_redirect_url>,<your_code_verifier>, and<your_authorization_code>with your specific values:- Linux/MacOS:
curl --location "https://api.twitter.com/2/oauth2/token" \
--header "Content-Type: application/x-www-form-urlencoded" \
--data-urlencode "code=<your_authorization_code>" \
--data-urlencode "grant_type=authorization_code" \
--data-urlencode "client_id=<your_client_id>" \
--data-urlencode "redirect_uri=<your_redirect_url>" \
--data-urlencode "code_verifier=<your_code_verifier>"
- Windows:
curl --location "https://api.twitter.com/2/oauth2/token" ^
--header "Content-Type: application/x-www-form-urlencoded" ^
--data-urlencode "code=<your_authorization_code>" ^
--data-urlencode "grant_type=authorization_code" ^
--data-urlencode "client_id=<your_client_id>" ^
--data-urlencode "redirect_uri=<your_redirect_url>" ^
--data-urlencode "code_verifier=<your_code_verifier>"
This command will return the access token necessary for API calls.
{ "token_type":"bearer", "expires_in":7200, "access_token":"VWdEaEQ2eEdGdmVSbUJQV1U5LUdWREZuYndVT1JaNDddsdsfdsfdsxcvIZGMzblNjRGtvb3dGOjE3MTkzNzYwOTQ1MDQ6MTowOmF0Oj", "scope":"tweet.write users.read follows.read tweet.read" } -
Store the access token securely for use in your application.
Note: We recommend using the OAuth 2.0 Authorization Code with PKCE method as used here, but there is another way using OAuth 2.0 App Only OAuth 2.0 App Only. Refer to this document to check which operations in Twitter API v2 are done using which method: API reference.
To use the Twitter connector in your Ballerina application, update the .bal file as follows:
Import the twitter module.
import ballerinax/twitter;- Create a
Config.tomlfile and, configure the obtained credentials in the above steps as follows:
token = "<Access Token>"- Create a
twitter:ConnectionConfigwith the obtained access token and initialize the connector with it.
configurable string token = ?;

final twitter:Client twitter = check new({
    auth: {
        token
    }
});Now, utilize the available connector operations.
public function main() returns error? {
    twitter:TweetCreateResponse postTweet = check twitter->/tweets.post(
        payload = {
            text: "This is a sample tweet"
        }
    );
}bal runThe Twitter connector provides practical examples illustrating usage in various scenarios. Explore these examples, covering the following use cases:
-
Direct message company mentions - Integrate Twitter to send direct messages to users who mention the company in tweets.
-
Tweet performance tracker - Analyze the performance of tweets posted by a user over the past month.
The Issues and Projects tabs are disabled for this repository as this is part of the Ballerina library. To report bugs, request new features, start new discussions, view project boards, etc., visit the Ballerina library parent repository.
This repository only contains the source code for the package.
-
Download and install Java SE Development Kit (JDK) version 17. You can download it from either of the following sources:
Note: After installation, remember to set the
JAVA_HOMEenvironment variable to the directory where JDK was installed. -
Download and install Ballerina Swan Lake.
-
Download and install Docker.
Note: Ensure that the Docker daemon is running before executing any tests.
-
Export Github Personal access token with read package permissions as follows,
export packageUser=<Username>
export packagePAT=<Personal access token>
Execute the commands below to build from the source.
-
To build the package:
./gradlew clean build
-
To run the tests:
./gradlew clean test -
To build the without the tests:
./gradlew clean build -x test -
To run tests against different environment:
./gradlew clean test -Pgroups=<Comma separated groups/test cases>
-
To debug package with a remote debugger:
./gradlew clean build -Pdebug=<port>
-
To debug with the Ballerina language:
./gradlew clean build -PbalJavaDebug=<port>
-
Publish the generated artifacts to the local Ballerina Central repository:
./gradlew clean build -PpublishToLocalCentral=true
-
Publish the generated artifacts to the Ballerina Central repository:
./gradlew clean build -PpublishToCentral=true
As an open source project, Ballerina welcomes contributions from the community.
For more information, see the Contribution Guidelines.
All contributors are encouraged to read the Ballerina Code of Conduct.
- Discuss about code changes of the Ballerina project via [email protected].
- Chat live with us via our Discord server.
- Post all technical questions on Stack Overflow with the #ballerina tag.