Component developed by using the amazing development template [blueprint][blueprint].
Warning ! this repo is not longer maintained, please consider switch tho the new one : https://github.com/dadge/awesome_thermostat
This custom component for Home Assistant is an upgrade of the generic thermostat which handles presets mode in a very simple way.
Basically, the generic thermostat handle two preset mode : AWAY and NONE. When AWAY mode is set, the thermostat will set the tempaerature with the away temperature defined in the yaml configuration. When NONE is selected, the temperature set is saved. Every time you set the mode as NONE, the temperature will be automatically set with the saved value. If you want to change the saved value, set the mode to NONE, set the deisred temperature, and that's it.
Define by default all the modes defined in the climate specs : https://developers.home-assistant.io/docs/core/entity/climate#presets The simple thermostat reproduce the behavior of the mode NONE in generic thermostat and extend it to all the modes :
- Pick a mode
- Set a temperature
- That's it ! The temperature is saved for this mode.
- Reproduce the previous step to update the temperatures / set other modes
- This implementstion can override or superseed the core generic thermostat
- Install HACS. That way you get updates automatically.
- Add this Github repository as custom repository in HACS settings.
- search and install "Simple Thermostat" in HACS and click
install. - Modify your
configuration.yamlas explain below. - Restart Home Assistant.
- Using the tool of choice open the directory (folder) for your HA configuration (where you find
configuration.yaml). - If you do not have a
custom_componentsdirectory (folder) there, you need to create it. - In the
custom_componentsdirectory (folder) create a new folder calledsimple_thermostat. - Download all the files from the
custom_components/simple_thermostat/directory (folder) in this repository. - Place the files you downloaded in the new directory (folder) you created.
- Modify your
configuration.yamlas explain below - Restart Home Assistant
In the following examples we are assuming that you know how to configure a generic thermostat (if not please have a look at : https://www.home-assistant.io/integrations/generic_thermostat/ ) and we will just highlight the differences in the configuration to apply.
climate:
  - platform: simple_thermostat
    name: Study
    heater: switch.study_heater
    target_sensor: sensor.study_temperature
If you had already configure a generic thermostat the onli changes you have to do are the following :
- platform must be changed from generic_thermostat to simple_thermostat
- away_temp must be removed
In order to enjoy the full power of simple thermostat, I invite you to use it with https://github.com/nielsfaber/scheduler-component Indeed, the schdeuler component porpose a management of the climate base on the preset modes. This feature has limited interest with the generic thermostat but it becomes highly powerfull with Simple thermostat :
Starting here, I assume you have installed Simple Thermostat and Scheduler Component.
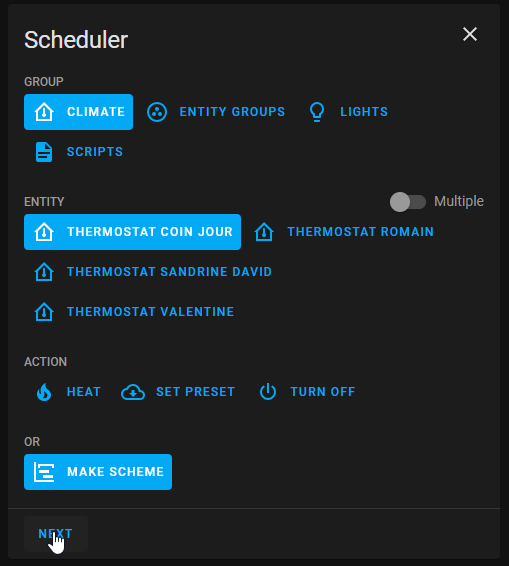
In Scheduler, add a schedule :
Choose "climate" group, choose one (or multiple) entity/ies, select "MAKE SCHEME" and click next : (it is possible to choose "SET PRESET", but I prefer to use "MAKE SCHEME")
Set your mode scheme and save :
In this example I set ECO mode during the night and the day when nobody's at home BOOST in the morning and COMFORT in the evening.
I hope this example helps you, don't hesitate to give me your feedbacks !
If you want to contribute to this please read the Contribution guidelines


