Hurl.nvim is a Neovim plugin designed to run HTTP requests directly from `.hurl` files. Elevate your API development workflow by executing and viewing responses without leaving your editor.
- 🚀 Execute HTTP requests directly from
.hurlfiles. - 👁🗨 Multiple display modes for API response: popup or split.
- 🌈 Highly customizable through settings.
Add the following configuration to your Neovim setup with lazy.nvim:
{
  "jellydn/hurl.nvim",
  dependencies = {
      "MunifTanjim/nui.nvim",
      "nvim-lua/plenary.nvim",
      "nvim-treesitter/nvim-treesitter"
  },
  ft = "hurl",
  opts = {
    -- Show debugging info
    debug = false,
    -- Show notification on run
    show_notification = false,
    -- Show response in popup or split
    mode = "split",
    -- Default formatter
    formatters = {
      json = { 'jq' }, -- Make sure you have install jq in your system, e.g: brew install jq
      html = {
        'prettier', -- Make sure you have install prettier in your system, e.g: npm install -g prettier
        '--parser',
        'html',
      },
    },
  },
  keys = {
    -- Run API request
    { "<leader>A", "<cmd>HurlRunner<CR>", desc = "Run All requests" },
    { "<leader>a", "<cmd>HurlRunnerAt<CR>", desc = "Run Api request" },
    { "<leader>te", "<cmd>HurlRunnerToEntry<CR>", desc = "Run Api request to entry" },
    { "<leader>tm", "<cmd>HurlToggleMode<CR>", desc = "Hurl Toggle Mode" },
    { "<leader>tv", "<cmd>HurlVerbose<CR>", desc = "Run Api in verbose mode" },
    -- Run Hurl request in visual mode
    { "<leader>h", ":HurlRunner<CR>", desc = "Hurl Runner", mode = "v" },
  },
}
When configuring nvim-treesitter add hurl to the ensure_installed list of
parsers.
Simple demo in split mode:
Note
I frequently utilize the nightly version of Neovim, so if you encounter any issues, I recommend trying that version first. I may not have the time to address problems in the stable version. Your contributions via pull requests are always welcome.
hurl.nvim seamlessly integrates with environment files named vars.env to manage environment variables for your HTTP requests. These environment variables are essential for customizing your requests with dynamic data such as API keys, base URLs, and other configuration values.
You can specify the name of the environment file in your hurl.nvim configuration. By default, hurl.nvim looks for a file named vars.env, but you can customize this to any file name that fits your project's structure.
Here's how to set a custom environment file name in your hurl.nvim setup:
require('hurl').setup({
  -- Specify your custom environment file name here
  env_file = {
      'hurl.env',
  },
  -- Other configuration options...
})The plugin searches for a vars.env (env_file config) in multiple locations to accommodate various project structures and ensure that environment-specific variables for your HTTP requests are easily accessible. The search occurs in the following order:
-
Current File's Directory: The directory where the current file is located. This is particularly useful for projects where environment variables are specific to a particular module or component.
-
Specific Directories in Project: The plugin scans predefined directories within the project, which are commonly used for organizing different aspects of a project:
src/: The source code directory.test/andtests/: Directories typically used for test scripts.server/: If your project includes a server component, this directory is checked.src/tests/andserver/tests/: These are checked for environment variables specific to tests within the respectivesrcandserverdirectories.
-
Intermediate Directories from Git Root to Current File: If the project is a git repository, the plugin identifies the root of the repository and then searches for
vars.envin every directory on the path from this root to the current file's directory. This feature is particularly useful in monorepo setups or large projects, where different modules or packages may have their own environment variables.
By checking these locations, the plugin ensures a comprehensive search for environment variables, catering to a wide range of project structures and setups.
To change the environment file name, use the HurlSetEnvFile command followed by the new file name. You can have multiple variable files by having comma-separated values.
- Ensure that the new environment file exists in the directories where the plugin searches for it, as outlined in the File Location section.
- This change will apply globally for the current session of Neovim. If you restart Neovim, it will revert to the default
vars.envunless you change it again.
Check out the following demos to see hurl.nvim in action:
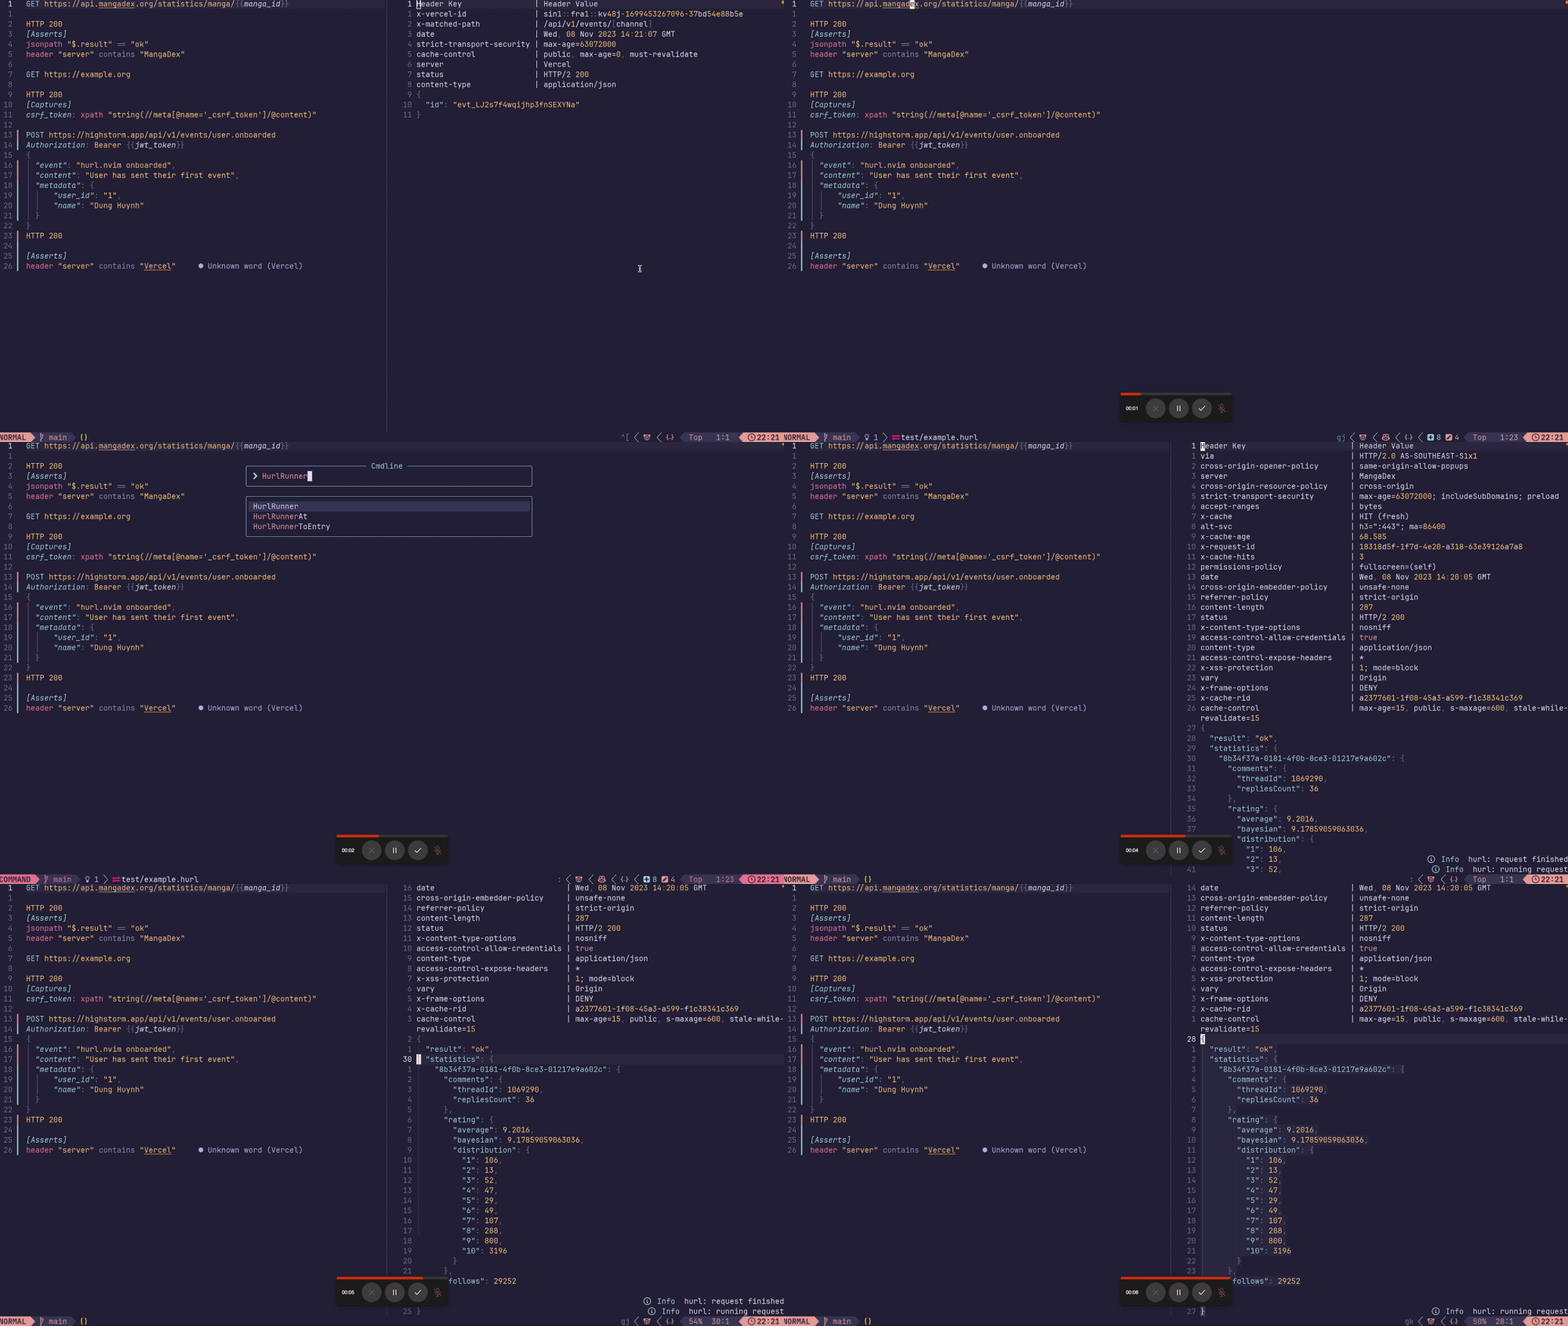
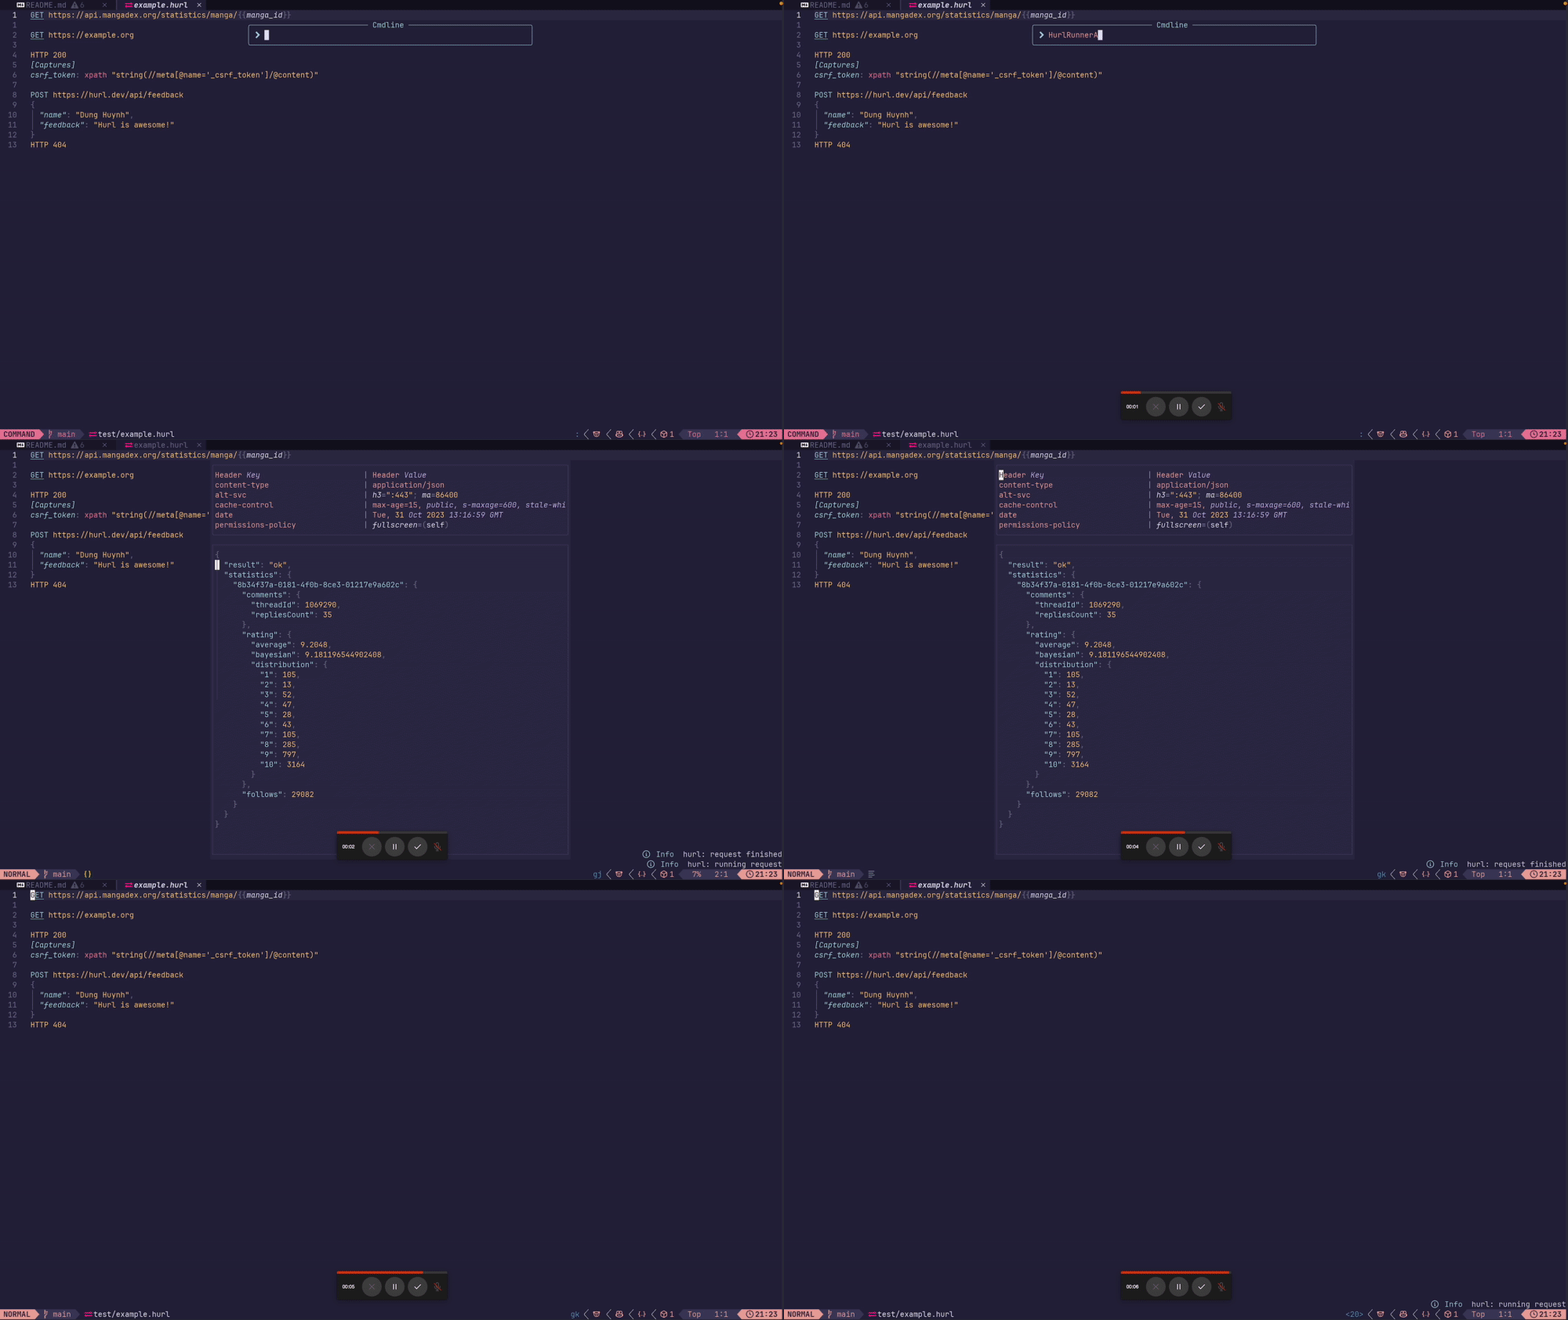
Run the entire file by pressing <leader>A or run HurlRunner command.
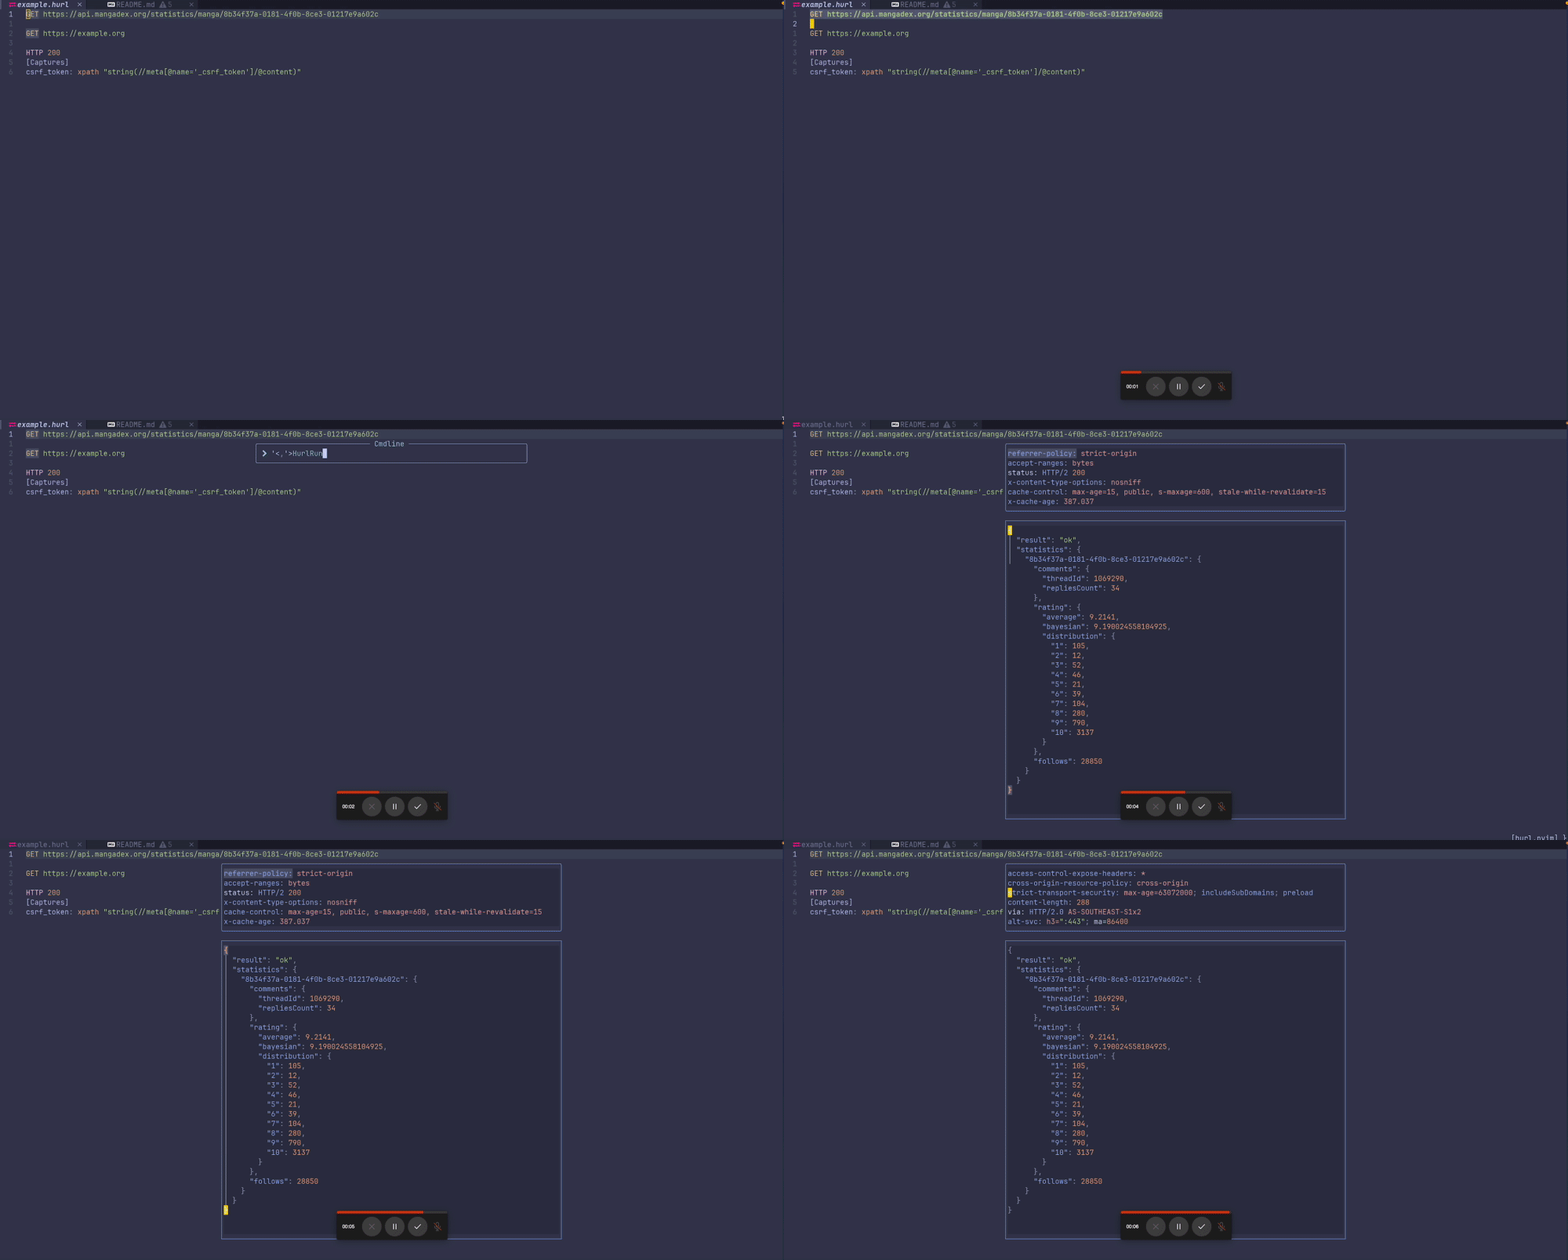
Select a range of lines and press <leader>h to execute the request or run HurlRunner command.
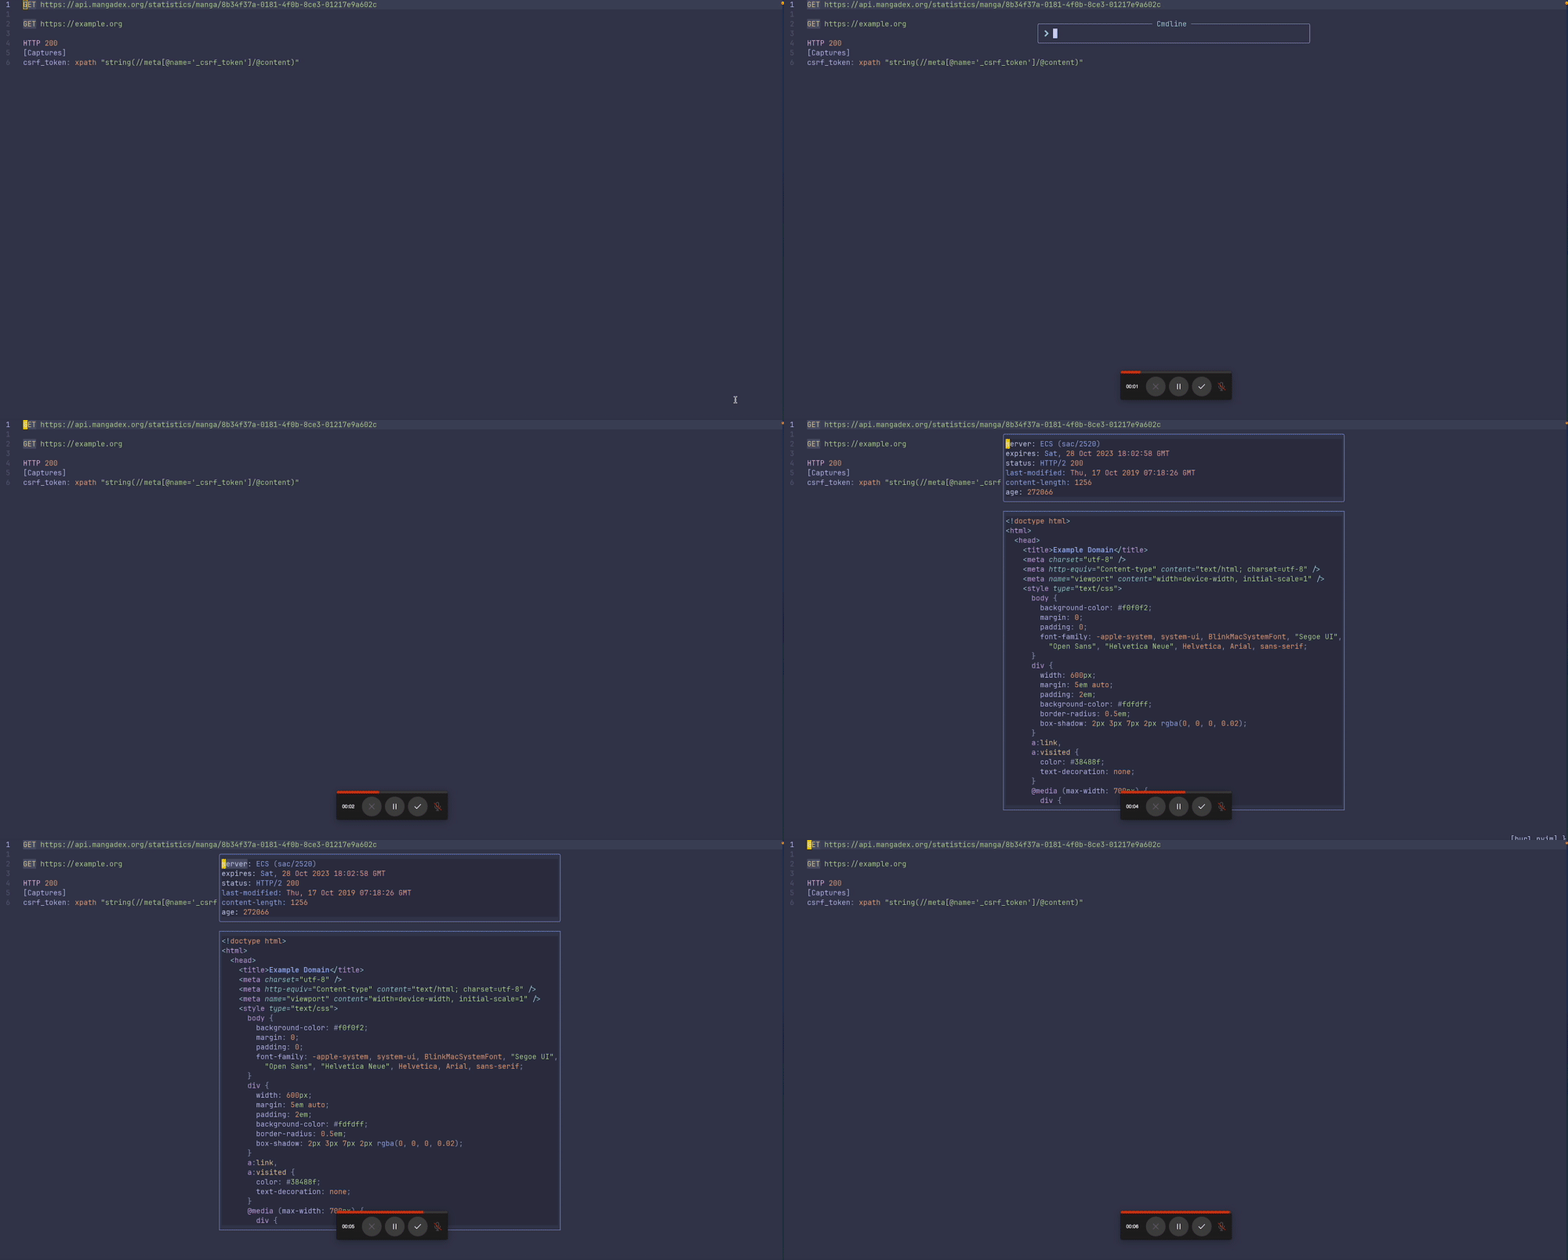
Place your cursor on a HURL entry and press <leader>a or run HurlRunnerAt command to execute the entry request.
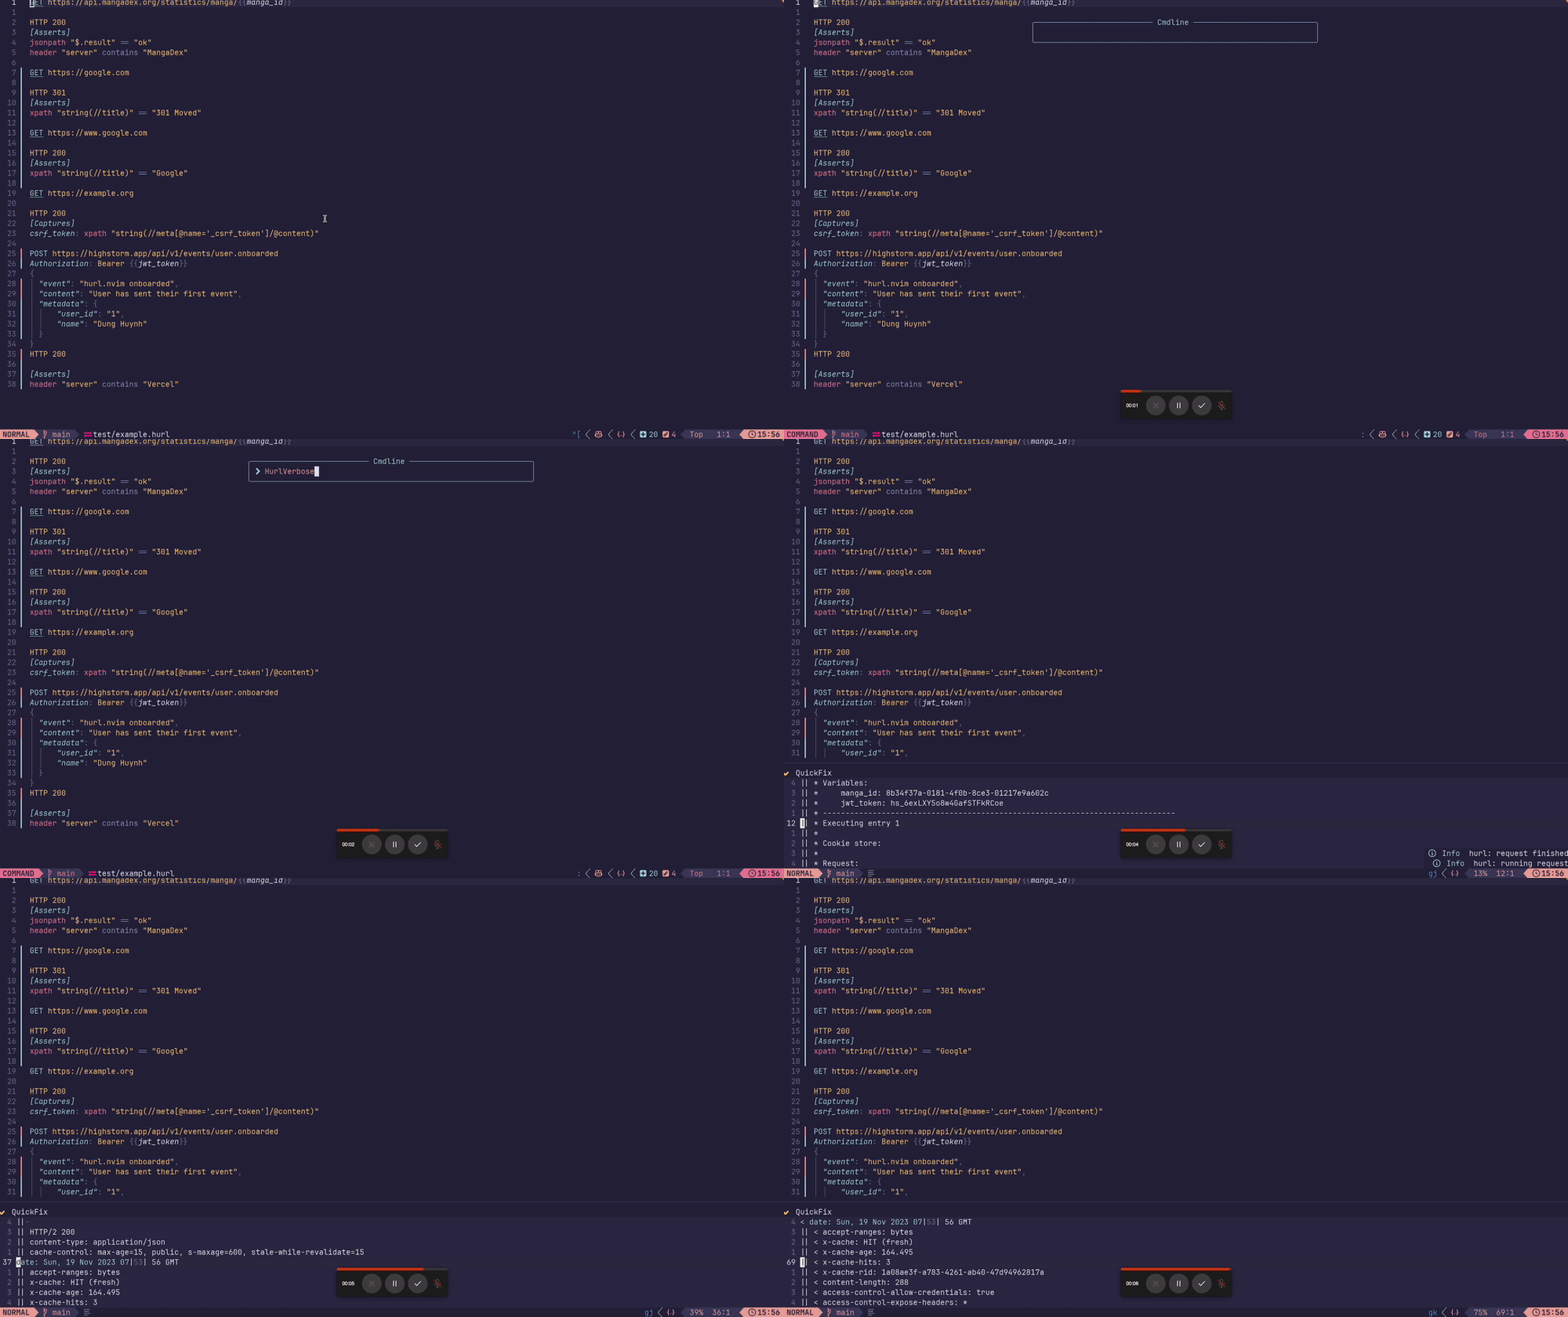
Run HurlVerbose command to execute the request in verbose mode. The response will be displayed in QuickFix window. This is useful for debugging purposes or getting the curl command from hurl file.
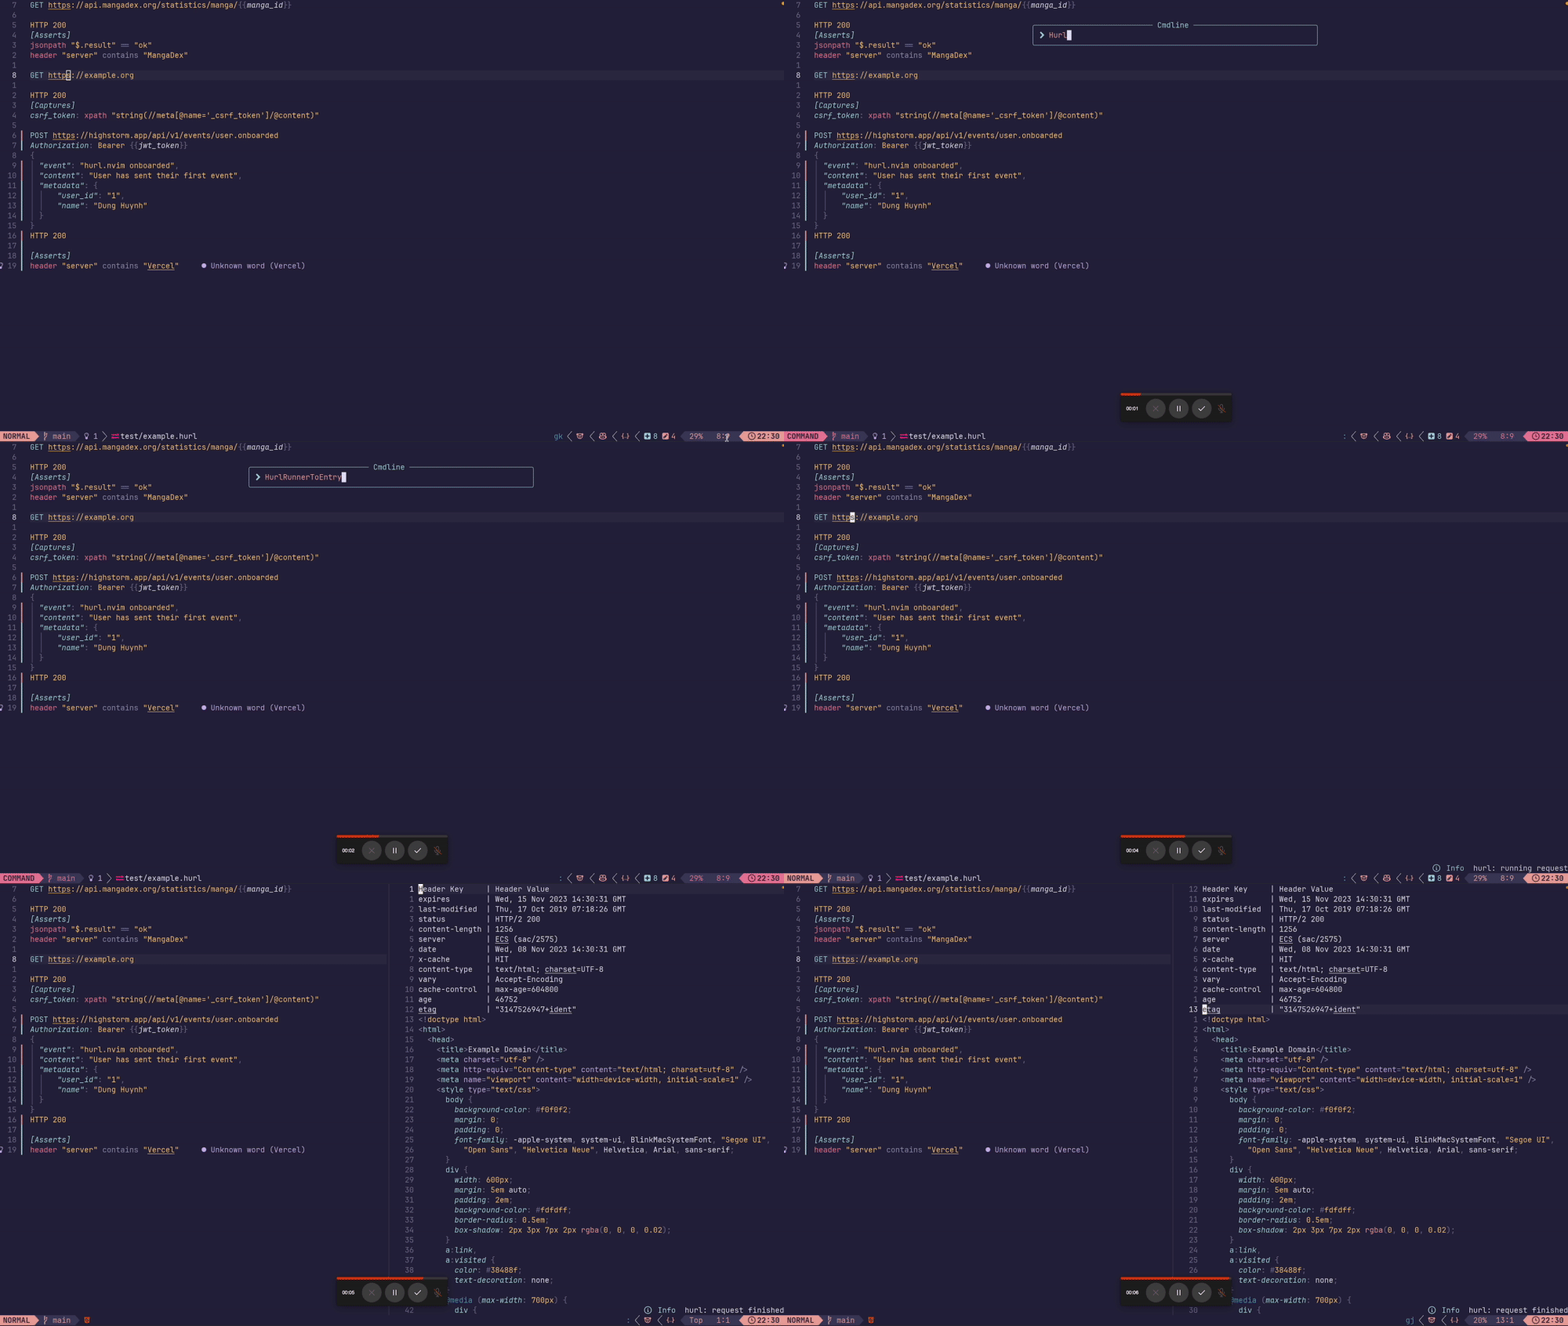
Place your cursor on the line you want to run to that entry and press <leader>te or run HurlRunnerToEntry command to execute the request.
Note: it's running from start of file to the selected entry and ignore the remaining of the file. It is useful for debugging purposes.
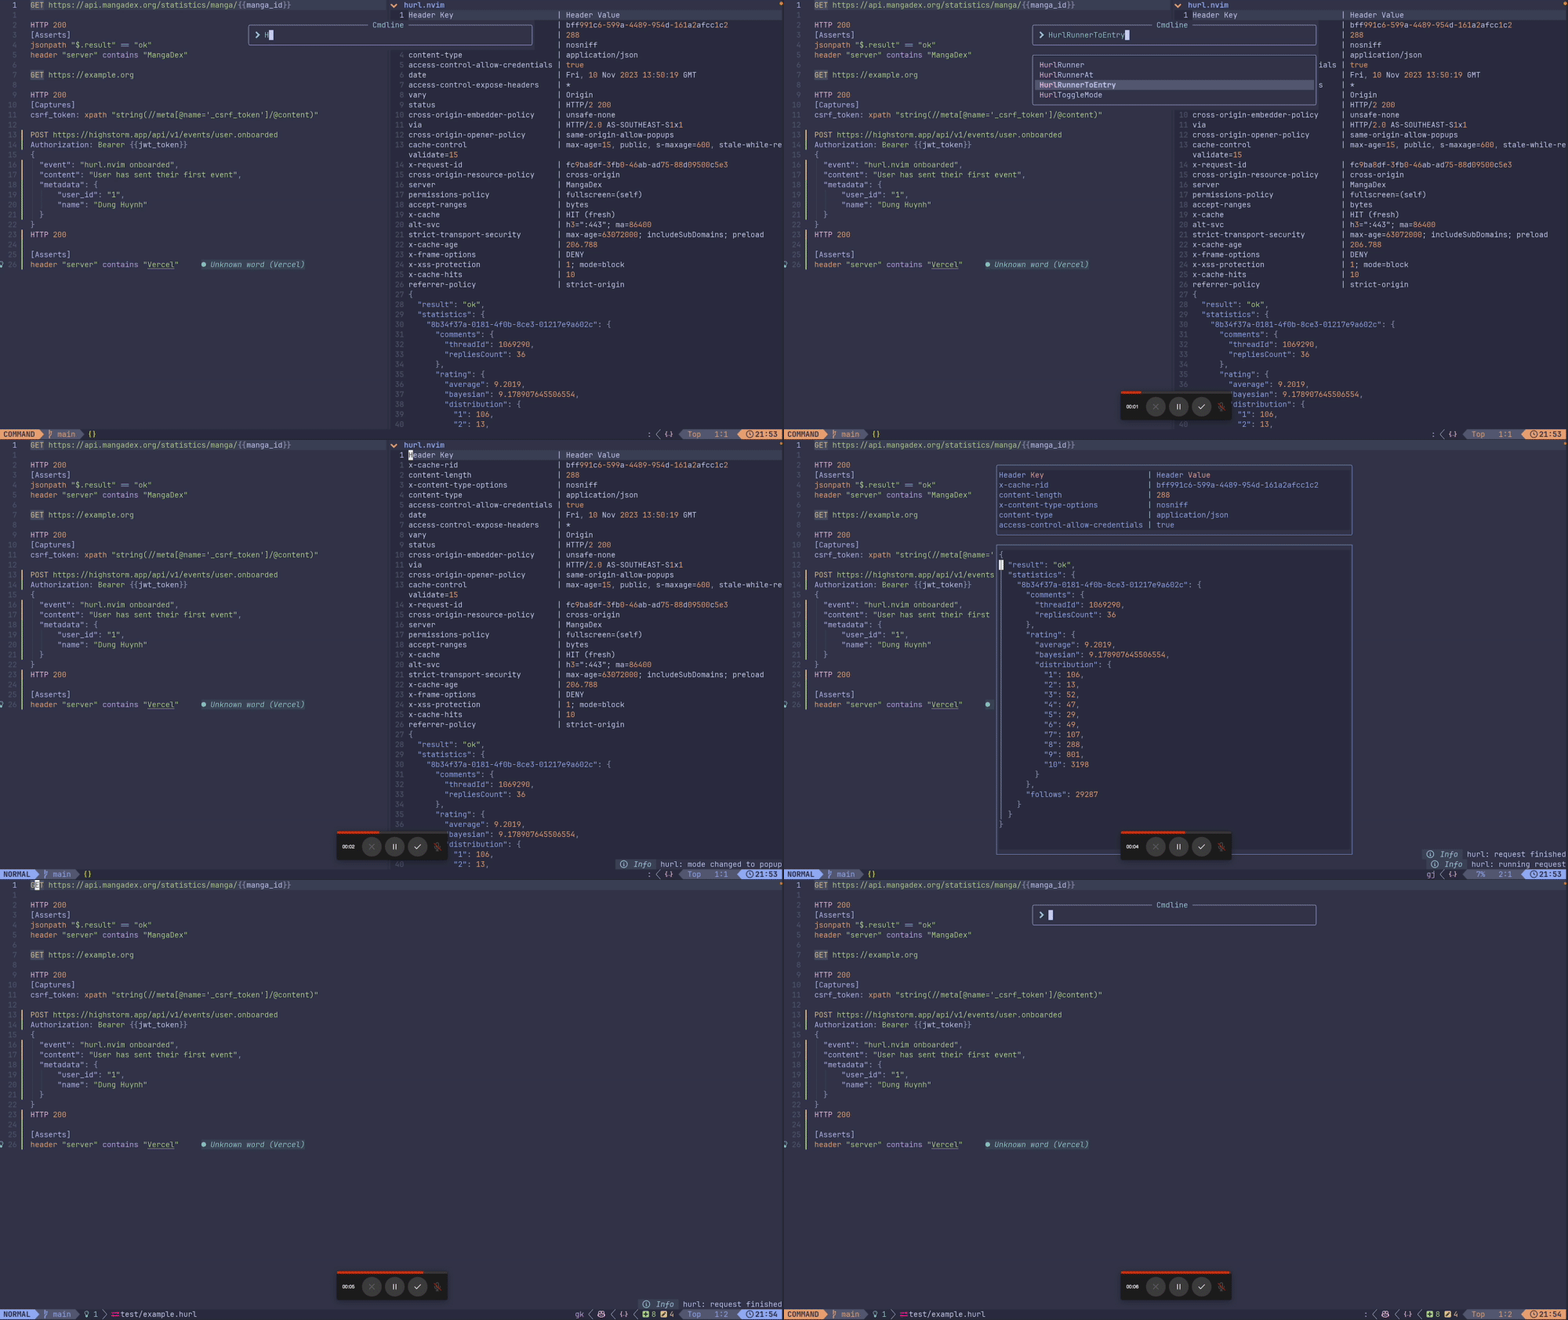
Run HurlToggleMode command to toggle between split and popup mode.
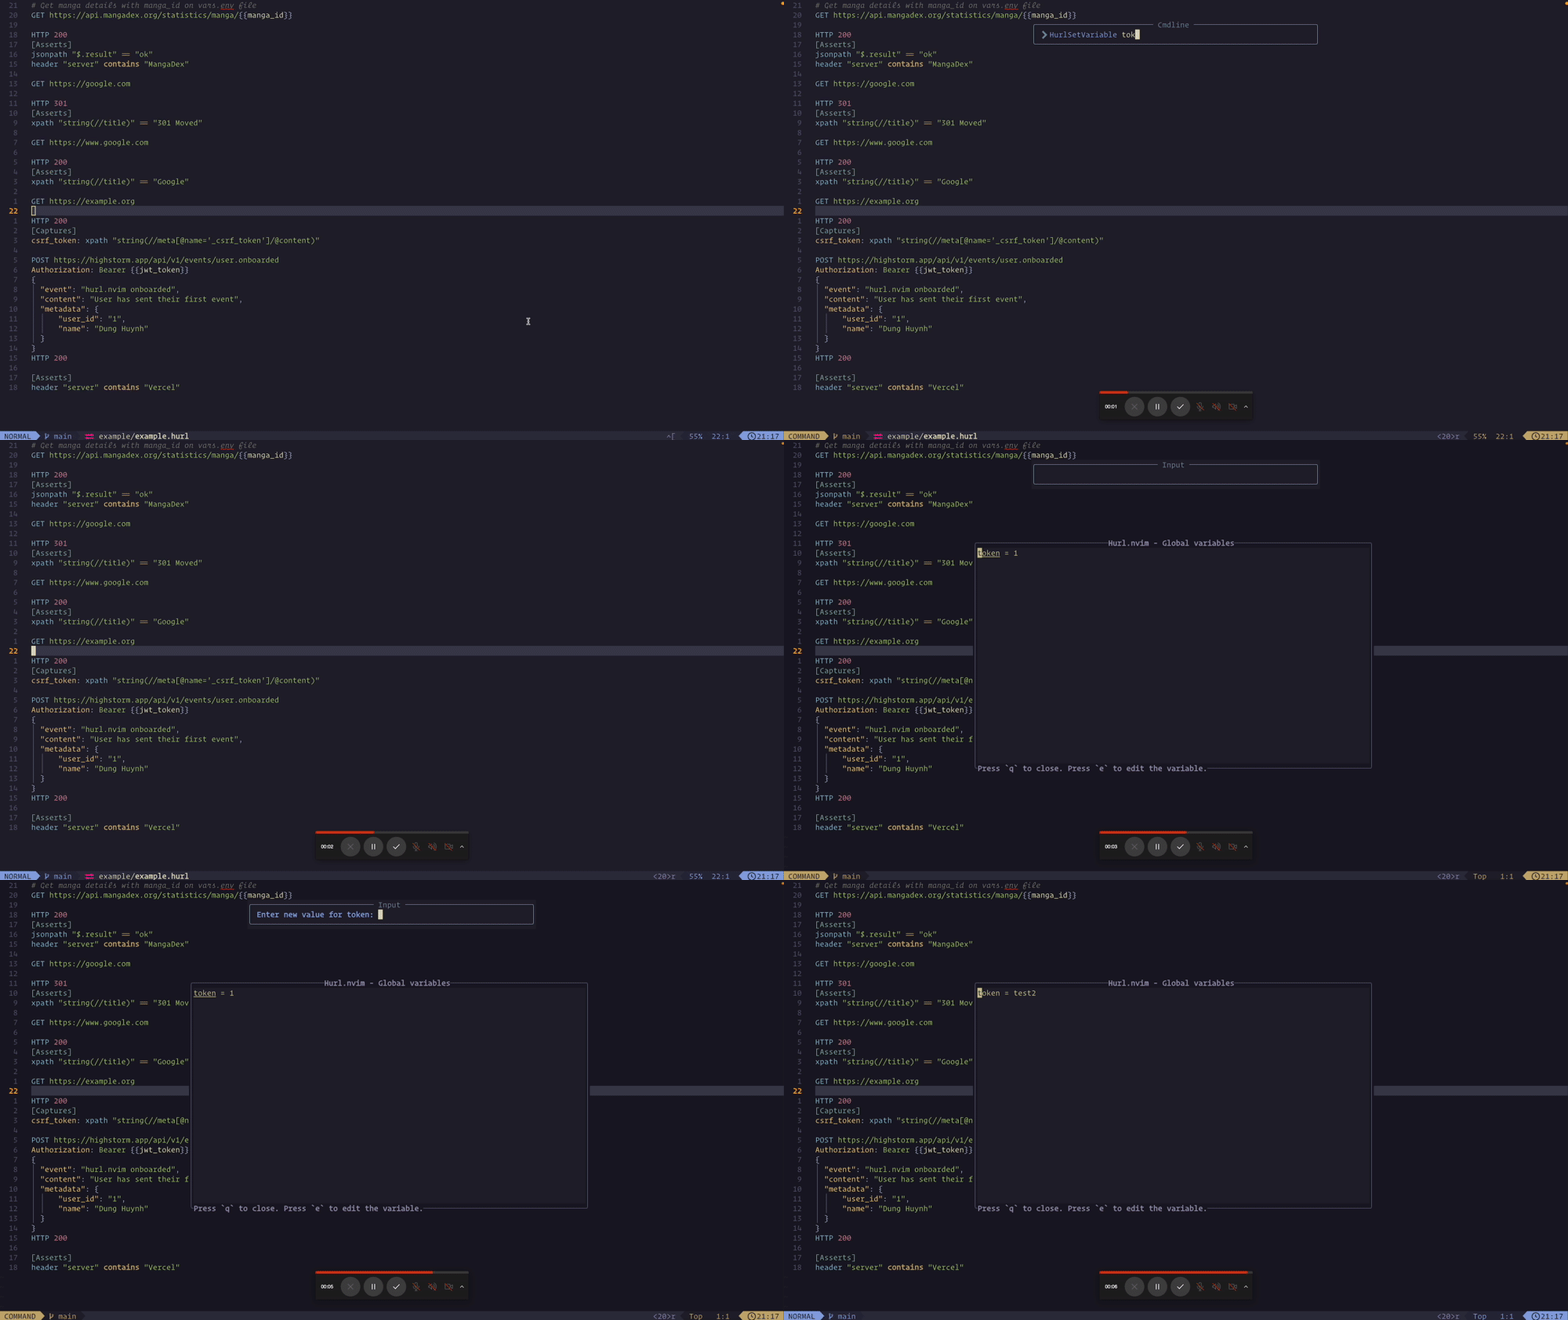
The HurlSetVariable command allows you to set environment variables for your HTTP requests. This is particularly useful for setting dynamic data such as API keys, base URLs, and other configuration values.
To use this command, type :HurlSetVariable followed by the variable name and its value. For example:
:HurlSetVariable API_KEY your_api_keyThis will set the API_KEY environment variable to your_api_key. You can then use this variable in your .hurl files like this:
GET https://api.example.com
Authorization: Bearer {{API_KEY}}
The HurlManageVariable command provides a convenient way to view your environment variables. When you run this command, it opens a new buffer in popup with the current environment variables and their values.
To use this command, simply type :HurlManageVariable in the command line:
:HurlManageVariableThe default keymap for this buffer is:
q: Close the buffere: Edit the variable
For now, if you want to modify the global variables, you can do so by using the HurlSetVariable command or by editing your vars.env file directly.
The HurlShowLastResponse command allows you to view the response of your last HTTP request.
:HurlShowLastResponsehurl.nvim comes with some default key mappings to streamline your workflow:
q: Close the current popup window.<C-n>: Switch to the next popup window.<C-p>: Switch to the previous popup window.
These key mappings are active within the popup windows that hurl.nvim displays.
hurl.nvim can be customized with the following default configurations:
local default_config = {
  -- Toggle debugging information
  debug = false, -- If true, logs will be saved at ~/.local/state/nvim/hurl.nvim.log

  -- Set the display mode for the response: 'split' or 'popup'
  mode = 'split',

  -- Split settings
  split_position = "right",
  split_size = "50%",

  -- Popup settings
  popup_position = '50%',
  popup_size = {
    width = 80,
    height = 40,
  },

  -- Default environment file name
  env_file = {
      'vars.env',
  },

  -- Specify formatters for different response types
  formatters = {
    json = { 'jq' },  -- Uses jq to format JSON responses
    html = {
      'prettier',     -- Uses prettier to format HTML responses
      '--parser',
      'html',
    },
  },
}
To apply these configurations, include them in your Neovim setup like this:
require('hurl').setup({
  debug = true,          -- Enable to show detailed logs
  mode = 'popup',        -- Change to 'popup' to display responses in a popup window
  env_file = { 'vars.env' }, -- Change this to use a different environment file name
  formatters = {
    json = { 'jq' },    -- Customize the JSON formatter command
    html = {
      'prettier',       -- Customize the HTML formatter command
      '--parser',
      'html',
    },
  },
})
Adjust the settings as per your needs to enhance your development experience with hurl.nvim.
Tip
Enable debug mode with debug = true for detailed logs
- Logs are saved at
~/.local/state/nvim/hurl.nvim.logon macOS.
Tip
Split mode with Edgy
hurl.nvimcan be used with edgy.nvim to manage layout when using the split mode.
right = {
  { title = "Hurl Nvim", size = { width = 0.5 }, ft = "hurl-nvim" },
}
Tip
Syntax Highlighting in Stable Neovim
- If you're using a stable version of Neovim that doesn't support Hurl syntax highlighting, you can set the filetype to
shorbashfor your.hurlfiles. This will enable basic syntax highlighting that can improve readability. To do this, add the following line to your Neovim configuration:
autocmd BufRead,BufNewFile *.hurl setfiletype shFor example, here is my autocmd for .hurl files.
- Hurl - Run and Test HTTP Requests
- Inspired by ray-x/web-tools.nvim: Neovim plugin for web developers
- Utilize MunifTanjim/nui.nvim: UI components for Neovim plugins and configurations
👤 Huynh Duc Dung
- Website: https://productsway.com/
- Twitter: @jellydn
- Github: @jellydn
If this guide has been helpful, please give it a ⭐️.
Thanks goes to these wonderful people (emoji key):
Dung Duc Huynh (Kaka) 💻 📖 |
Cenk Kılıç 💻 📖 |
Andre Van Der Merwe 💻 |
Sergey Kochetkov 📖 💻 |
rbingham 💻 |
Horacio Sanson 💻 📖 |
xiwang 💻 📖 |
|
|
||||||
This project follows the all-contributors specification. Contributions of any kind welcome!

![IT Man - Effortless APIs with Hurl.nvim: A Developer's Guide to Neovim Tooling [Vietnamese]](https://i.ytimg.com/vi/nr_RbHvnnwk/hqdefault.jpg)
![IT Man - Building and Testing a #Hapi Server with #Hurl: A Step-By-Step Demo [Vietnamese]](https://i.ytimg.com/vi/LP_RXe8cM_s/mqdefault.jpg)


