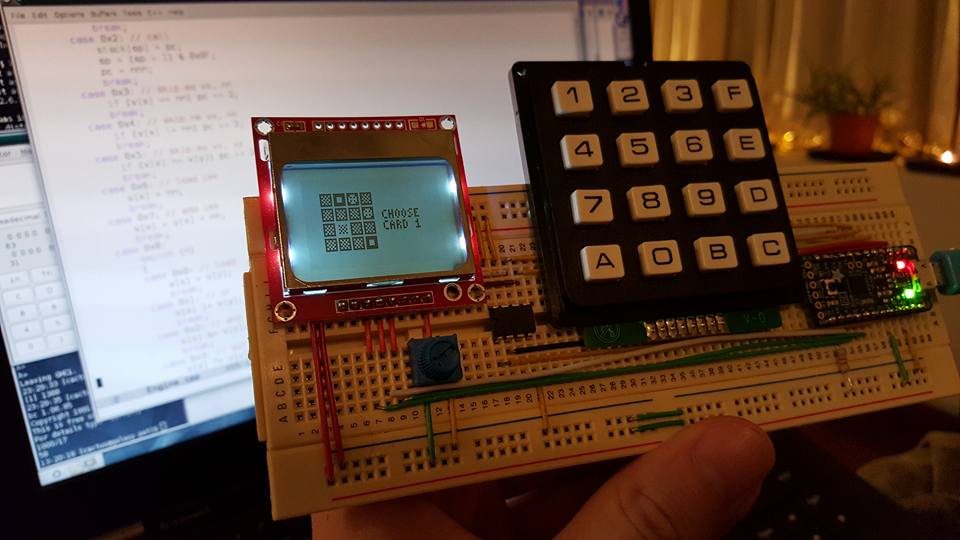
This is a CHIP-8 virtual machine implementation running on AVR.
Its big party trick is that it is written in Rust: back in 2017, it was the first non-trivial Rust application running on AVR. You can read about its development process in my blog post. The CHIP-8 VM itself is implemented in a separate, portable crate written in idiomatic Rust fashion, heavily using algebraic data types and pattern matching; this crate can then be used both to build an SDL-based desktop app and also this crate running on AVR microcontrollers.
The intended hardware is a simple circuit with very few components:
- AVR ATMega328P microcontroller
- PCD8544 84x48 monochrome LCD
- Microchip 23K640 serial RAM
- 4x4 keypad
- 10K resistors (4 pcs)
- 10K trimpot
All of these components come in throughhole versions so it is very easy to build it on a breadboard. NOTE THE RAM CHIP DOESN'T SUPPORT 5 Volts. The board is meant to be powered at 3.3 Volts. An Arduino Uno is going to fry the RAM chip.
AVR support in Rust is not yet available its mainline version, so you
have to use a recent nightly. To override the default Rust version
locally in this directory, use rustup override:
$ rustup override set nightly-2024-01-01
$ rustup component add rust-src --toolchain nightly-2024-01-01
You can find more information about the installation procedure in The AVR-Rust Guidebook.
At this point, you can build chirp8-avr and its
dependencies. The Rust compiler seems to have trouble building in
debug mode, so only release builds are supported for now:
$ cargo build --release
The above process will result in the AVR ELF executable
target/avr-atmega328p/release/chirp8-avr.elf. We can
convert this into the .hex format used by avrdude and
simlar uploaders using avr-objcopy:
$ avr-objcopy -Oihex -R.eeprom \
    target/avr-atmega328p/release/chirp8-avr.elf
    target/avr-atmega328p/release/chirp8-avr.hex
This hex file can be uploaded to the ATMega328P via an AVR programmer; or if you use something like an Arduino Pro 3.3V or an Adafruit Trinket Pro 3.3V, you can upload it directly via USB.
Another way of trying it out is simulation: I've implemented a SimAVR-based simulator for the above schematics that almost runs in real time, as an interactive SDL app.

