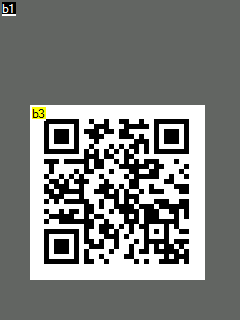
For most users the deployment of the Nextion firmware is straightforward - simply copy the compiled firmware image to a FAT32-formatted microSD card, insert the microSD card into the Nextion LCD, and then apply 5VDC to the power pins on the panel. It should power up the panel, recognize the .TFT file, and update the panel automatically. Once the firmware update has completed you can remove power and eject the microSD card.
Compiled TFT files are included for the Basic and Enhanced versions of the panel. This project does not currently utilize any features offered in the Enhanced panel, and the Enhanced device does not fit in the provided enclosure. It is strongly recommended that you do not use the enhanced display.
Once the project is assembled, future updates to the Nextion firmware can be handled over-the-air by utilizing the built-in web interface or by issuing an MQTT command with a URL to the target TFT file.
With the Nextion firmware flashed you can proceed to the Electronics Assembly section to test the assembled system.
For advanced customization you will need to download the (Windows-only) Nextion editor. You can find instructions on its use here.
If you want to edit the existing HASP interface, you will likely need to delete some pages in order to add your own work as the project consumes nearly the entire memory space of the Nextion basic panel. If you'd like to start a new interface from the ground up, copy over the existing Page 0 page as the ESP8266 firmware makes use of page 0 for user interactions and WiFi setup. The Home Assistant automations will probably need to be changed if any major modifications are made to the HMI.
Objects are referenced by page number (not page name) and object ID (not object name) as shown in the Nextion editor. The Nextion notation for each object is of the form p[1].b[2] meaning page number 1, object ID 2. Confusingly, button object names will start at b0 but it might be object ID 2, or 7, etc. Other objects will be named similarly with different letters. For example, the first text field on the page will be automatically named t0. Ignore these names. They have nothing to do with the object ID, and all objects regardless of type are still referenced as p[<page number>].b[<object id>]

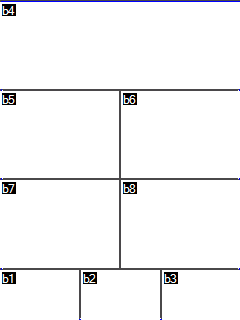
Screenshots of each object number on each page of the HASP project can be found in the Nextion HMI documentation section.
An object will have multiple attributes, some of which can be changed. For example, a button named p[1].b[2] may have a "txt" attribute which we'd refer to as p[1].b[2].txt. Not all attributes can be changed at runtime, the ones which can are shown in a green font in the Nextion editor (see the right pane of the image above.)
The Nextion accepts and sends commands over the serial interface. Your Home Automation system will send Nextion instructions wrapped in an MQTT message to be delivered by HASP to your display. A detailed guide to the Nextion instruction set can be found here.
The Nextion environment utilizes RGB 565 encoding. Use this handy convertor to select your colors and convert to the RGB 565 format.
| Page 0 | Pages 1-3 | Pages 4-5 |
|---|---|---|
 |
 |
 |
| Page 6 | Page 7 | Page 8 |
|---|---|---|
 |
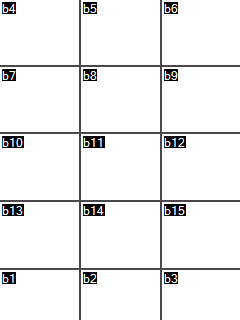 |
 |
| Page 9 | Page 10 | Page 11 |
|---|---|---|
 |
 |
 |
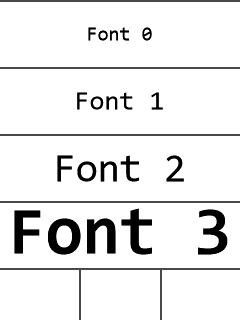
The Nextion display supports monospaced and proportional fonts. For proportional fonts, the HASP project includes Consolas in 4 sizes and Webdings in 1 size.
| Number | Font | Max characters per line | Max lines per button |
|---|---|---|---|
| 0 | Consolas 24 point | 20 characters | 2 lines |
| 1 | Consolas 32 point | 15 characters | 2 lines |
| 2 | Consolas 48 point | 10 characters | 1 lines |
| 3 | Consolas 80 point | 6 characters | 1 lines |
| 4 | Webdings 56 point | 8 characters | 1 lines |
The HASP also includes Google's "Noto Sans" proportional font in 5 sizes. These fonts also have the "FontAwesome" icon set which can be mixed with normal ASCII text.
| Number | Font |
|---|---|
| 5 | Noto Sans Regular 24 point |
| 6 | Noto Sans Regular 32 point |
| 7 | Noto Sans Regular 48 point |
| 8 | Noto Sans Regular 64 point |
| 9 | Noto Sans Regular 80 point |
| 10 | Noto Sans Bold 80 point |


FontAwesome ("FA") icons are now included with HASP in fonts 6-10 (Noto Sans fonts). To use these, open the FontAwesome Cheat Sheet, browse to any of the "Solid", "Regular", or "Brands" pages, highlight the icon in your browser, and then paste the result into your automation or the Nextion editor. The result in your editor should look like this:
When sent to your LCD with the appropriate font selected (again, only fonts 6-10), the icon should show up as seen on the Cheat Sheet. You can also mix text and icons in the same string.
![]()
One feature of the Nextion Editor is the Nextion Simulator, which allows the user to debug an HMI being edited. You've probably used this if you've worked on editing your own HMI file. You can run through the screens using your mouse to issue touch commands and feed it commands and see output in the text boxes provided.
The Nextion simulator allows you to run hardware-in-loop with your microcontroller. If you have a second USB UART kicking around (you could use a second WeMos or Arduino if you have one handy), connect the UART RX to pin D4 and the TX to pin D7 which are the pins you'd use to hook up a real panel. In the Nextion Simulator you can then select "User MCU Input", select your UARTs COM port, set the Baud to 115200, then click Start.
Now the Simulator will accept input from and send output to your flashed ESP8266 without having a Nextion on hand!
