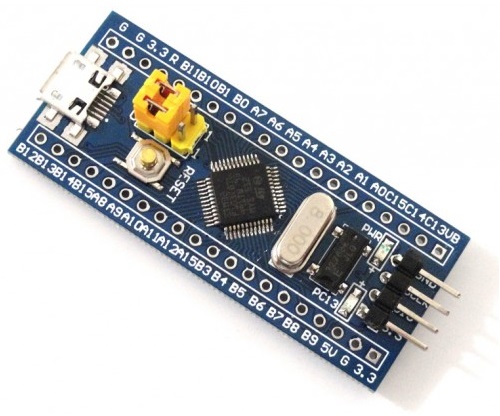
Download and install STM32CubeIDE and ST-LINK Utility. Start STM32CubeIDE and create a new STM32 project. It will show Targer Selection window. Select STM32F103C8 as Part No. Press Next button. Enter the project name and browse a folder to save the project. Set Target Language as C. Set Target Binary Type to Executable. Set Target Project Type to STM32Cube. Click Next and then press Finish.
Double click on your project.ioc file. Go to Pinout & Configuration tab and then click on System Core. Click on RCC and then set High Speed Clock(HSE) to Crystal/Ceramic Resonator. Click on SYS and then set Debug to Serial Wire.
Go to Pinout view and then left click on PC13 pin. Select GPIO_Output from the popup menu.
Go to System view and then press GPIO blue button. Click on PC13 row on Pin Name column. Type LED as User Label.
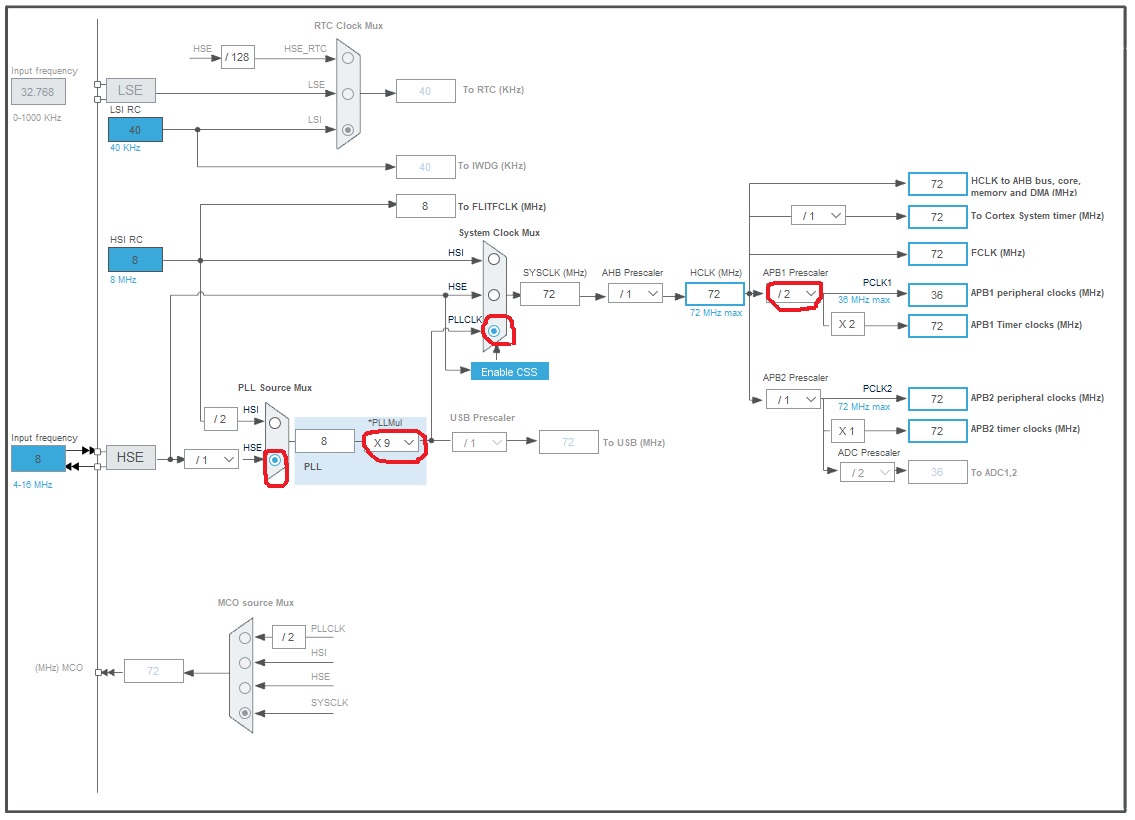
Go to Clock Configuration tab and the configure it according to the following image.
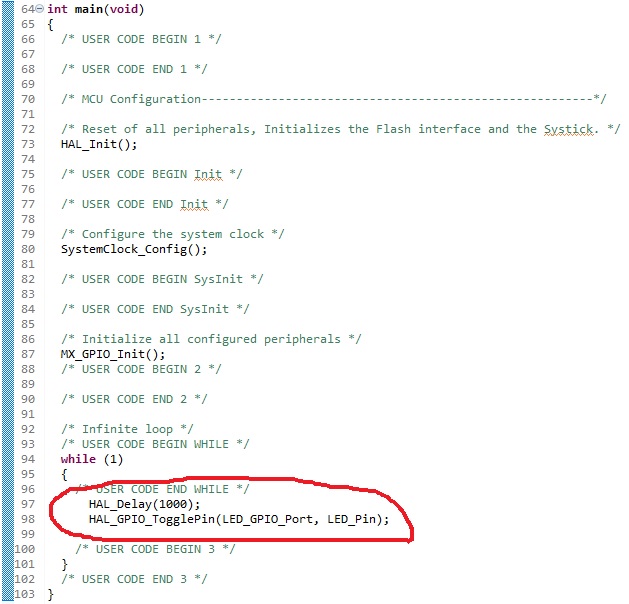
Go to Project menu and then press Generate Code. Core->Src->main.c is your main source file. You can add new code within the USER CODE BEGIN and USER CODE END comment blocks.
To blink the default LED, put following code within the while loop.
Go to Project menu and then press Build All. It will create your project.bin file in Debug folder. We will use this file to flash our board using ST Link utility.
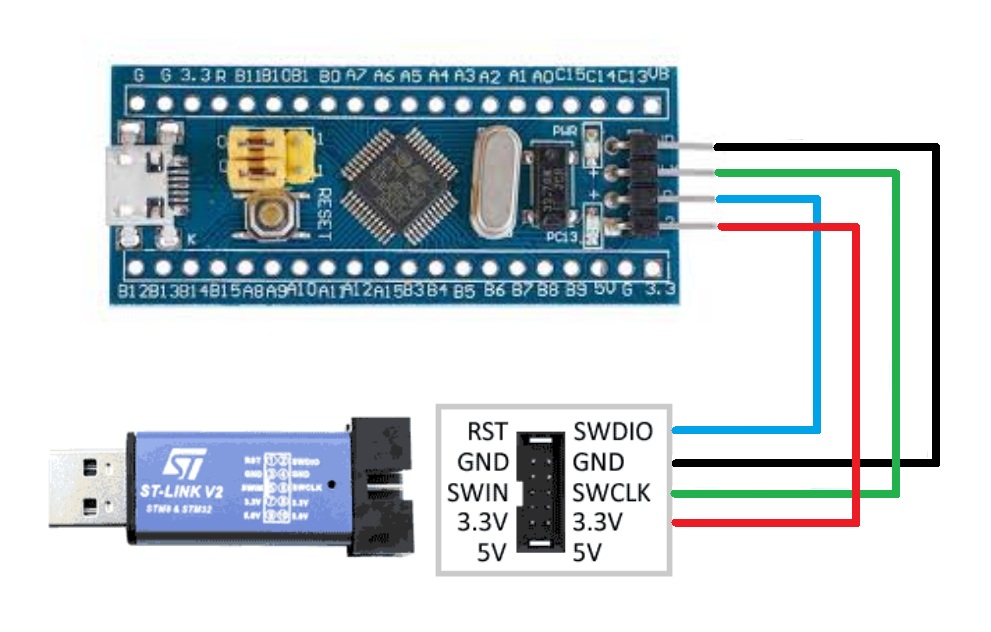
Connect ST-Link v2 (clone) into the Blue Pill according to the pinout as specified on the dongle. Some dongles may have incorrect pin out specifications. Remove the metal cover and compare it with the labels on PCB. (Pushing the usb port by finger will remove the cover.) Jumpers on Blue Pill should be set to zero side.
Warning: Never power the Blue Pill from more than one source. Example; do not plug in the USB on the Blue Pill when 3.3V from the ST-LINK is connected. If you do want to power from the USB, then first disconnect the 3.3V from the ST-LINK.
Plug the ST-Link dongle into the PC. Run the ST-LINK Utility. Go to Target menu and press Settings. Set Mode to Normal and Reset Mode to Software System Reset. If you get any errors, put the BOOT0 jumper to 1 side. (set it to 0 side after flashing)
Go to Target menu and press Program... Browse the project.bin file in Debug folder. Check the Reset after programming check box. And then press the Start button. It should flash the Blue Pill with the given bin file.
When the flashing finishes the LED should be blink according to our program! When you update the bin file, you should close the already opened file in ST-LINK Utility. otherwise it will use the old file from memory.
We need to use OpenOCD as our debugger (GDB will not work). Find the config file : stm32f1x.cfg
C:\ST\STM32CubeIDE_1.5.0\STM32CubeIDE\plugins\com.st.stm32cube.ide.mcu.debug.openocd_1.5.0.202011091203\resources\openocd\st_scripts\target
Add the following near the top of stm32f1x.cfg (before the first If – statement):
set CPUTAPID 0
The zero tells OpenOCD to ignore id numbers, which means all clones or genuine MCUs will work.
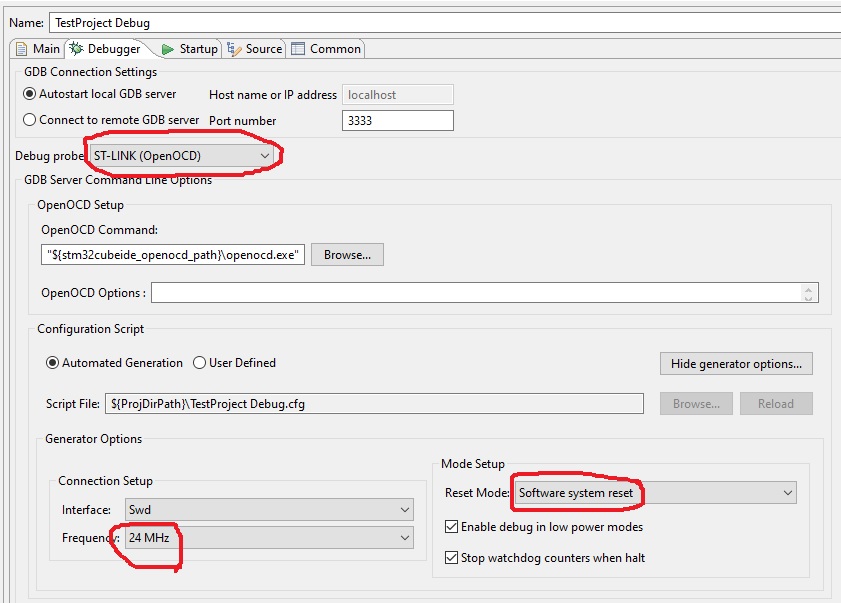
Go to STM32CubeIDE and press the Debug button. It will open debug configuration window. Go to Debugger tab and then set configuration according to following image. (you may need to press Show Generator Options button.)
Now you are ready to debug your code line by line!
