Springify is a custom Spring Boot implementation of spring-data-rest that exposes a discoverable, navigable REST API of a simple music streaming service mockup domain model using JSON HAL as media type.
The Spring Data REST framework analyzes an application’s domain model and exposes hypermedia-driven HTTP resources for aggregates contained in the model using reasonable defaults for endpoints and marshalling, leaving only minimal implementation code for the developer. However, sometimes there's a need for a more custom approach which is showcased in this demo.
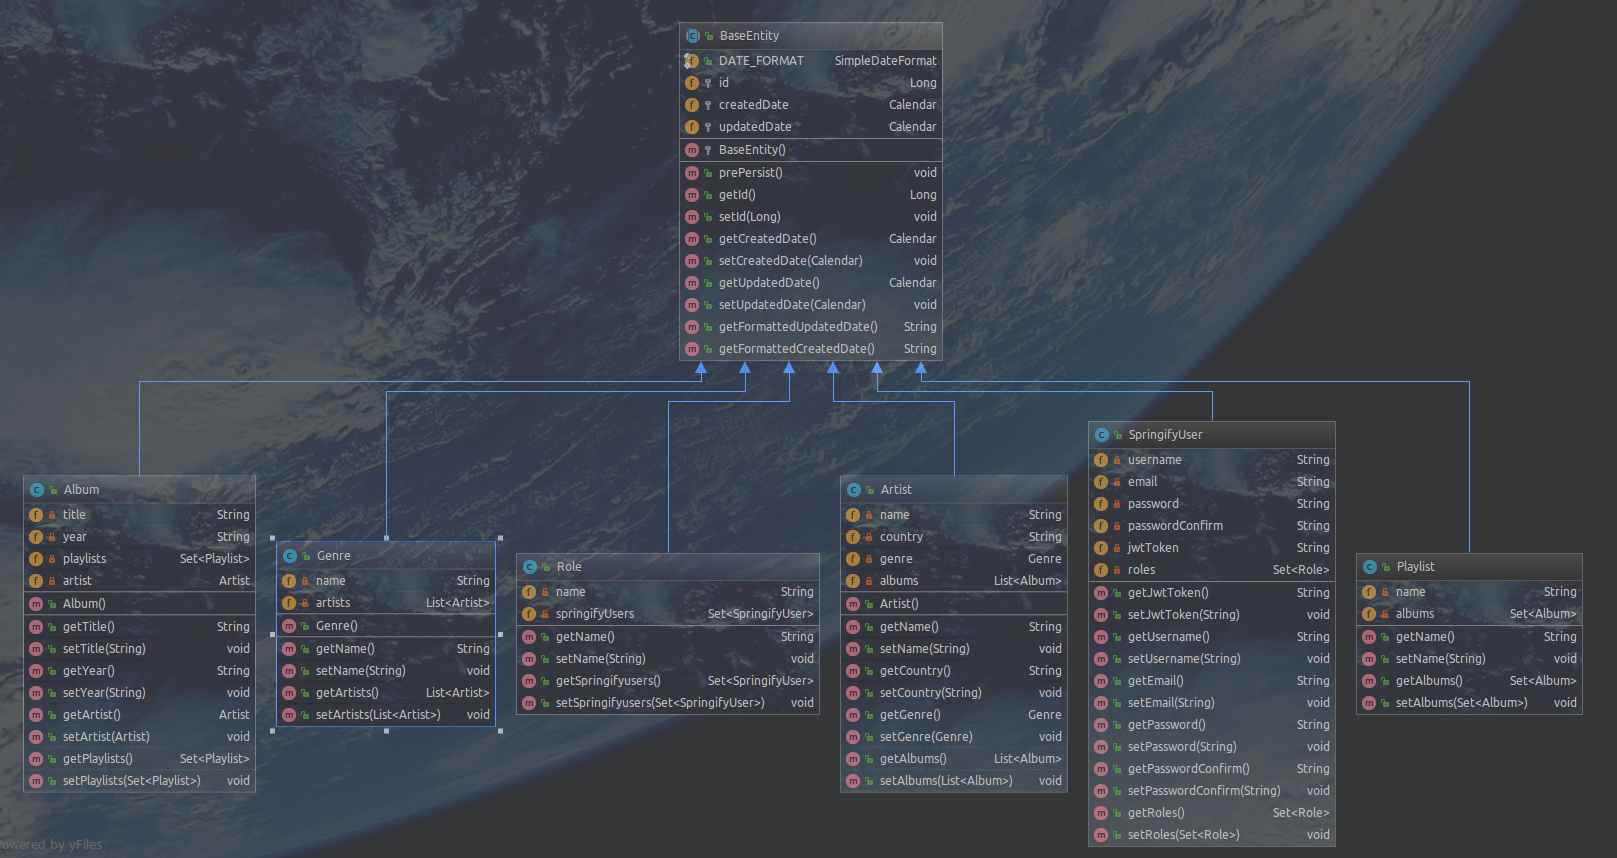
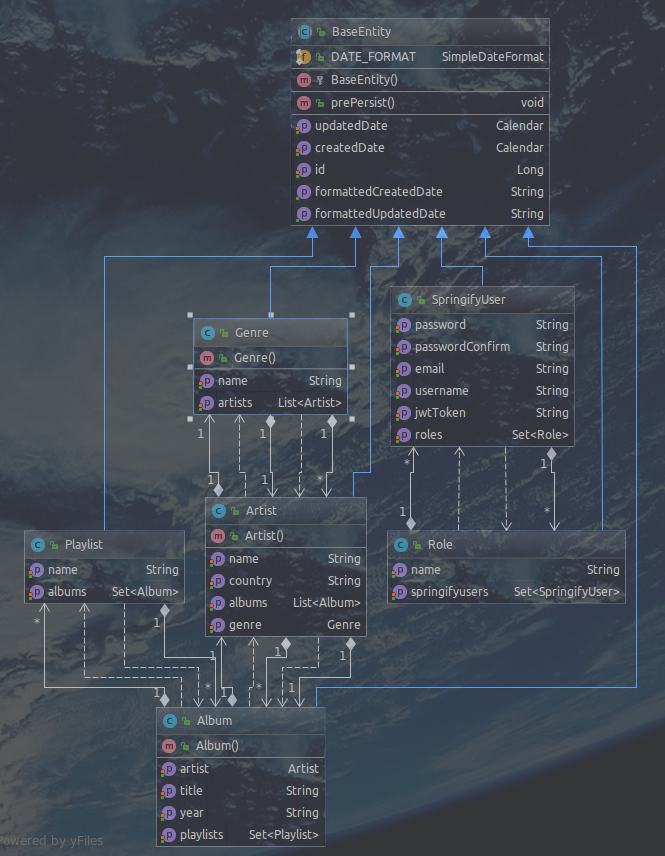
| UML diagram | UML Relations |
|---|---|
 |
 |
- Controller Generics and Inheritance for reducing boilerplate code for common CRUD or association related endpoints. Controllers inherit from
AbstractBaseRestControllerwhich provides some core endpoints - they only have to implement endpoints specific to the domain model they expose. - Extensions of
ResourceSupportfor separation of concerns between the domain model and the JSON marshalled response to avoid littering the model with JSON related annotations like@JsonIgnoreor methods that exist solely for the purpose of returning extra data in addition to model properties. - Custom Resource Assemblers for the purpose of customizing/extending the response links without littering the controllers.
- Domain level exceptions (
EntityNotFoundException,AssociationNotFoundException) to enrich the exception responses with additional information using domain-specific semantics. - Custom Exception to
HttpStatuscode mappings . Reasonable defaults are used for all generic exceptions with the ability to override them or provide additional mappings for domain-specific exceptions. - Global exception handling with Aspect Oriented Programming using
@ControllerAdviceannotation. - Authentication with JWT token.
- Simple Role base authorization.
- Java 8 Optional API.
- Custom modular Gradle setup for profile support.
- PostgreSQL 9.4 database.
- Liquibase for database version control.
- Postman endpoints collection for development convenience.
- Online interactive Swagger documentation on Heroku.
- Karate, BDD style testing framework.
- Gradle Build Tool. Property driven profiles.
- Travis CI
- Code Coverage with JaCoCo and CodeCov.
Gradle does not come with built in profile support, so a custom profile set up was essential to handle different environments.
-
dev, Development Profile. Will load development postgreSQL and Liquibase settings from
src/main/resources/application-dev.propertiesfile. Usegradle -Pdev bootRuncommand to start the application in development mode.bootRunis a task provided by Spring Boot Gradle Plugin and runs a project in place without building a jar. -
deb, Debug Profile. Use
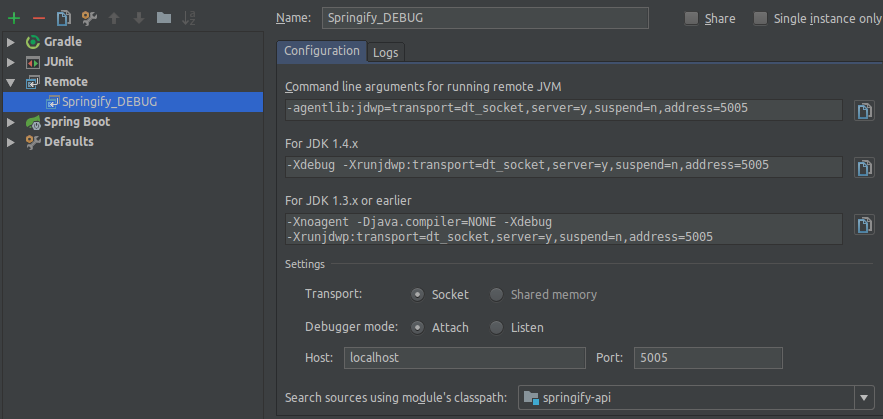
gradle -Pdeb bootRunfor debugging. This will suspend the application listening at port 5005. Console should logListening for transport dt_socket at address: 5005. A client process such as an IDE dubugger can attach to this address and start a debug session. The debug configuration for an IntellijIDEA session is shown in the screenshot below.
-
prod, Development Profile. Will load production (heroku) postgreSQL and Liquibase settings, (as environmental variables) from
src/main/resources/application-prod.propertiesfile.prodproperty is used ingradle -Pprod migrate updateto update the production database with new migrations. In productiongradle -Pprod bootRunis not used, sincebootRunis for development only, the build jar is executed instead. SeeProcfilefor details. -
tests, Test Profile. Will load test postgreSQL and Liquibase settings, from
src/main/resources/application-tests.propertiesfile. Run tests withgradle -Ptests -Padminpwd=[PLAIN_TEXT_PWD] test.adminpwdproperty is explained in test setup section later. -
travis, Travis CI Profile. Will load test postgreSQL and Liquibase settings, from
src/main/resources/application-travis.propertiesfile. Used ingradle -Ptravis -Padminpwd=$ADMINPWD checkto build the project and run the tests on travis CI server. See.travis.ymlfile for details.adminpwdproperty is explained in test setup section later.
springify and spingify-test databases are used for development and test respectively. Create these local databases
, update the related .properties files with database information and then run gradle -Pdev migrate update and gradle -Ptests migrate update to create the tables and populate the databases with static data from src/main/resources/db/migrations/060_populate_tables.sql. migrate is a convenient custom gradle task that encapsulates a rather verbose liquibase command that incrementally updates the database schema. You can drop all the tables anytime with gradle -Pdev migrate dropall and gradle -Ptests migrate dropall.
There are by default 4 users: 1 admin, 2 moderators and a user. The admin password in plain text is needed to run the tests. It is passed as an external gradle property and is not hardcoded anywhere in plain text. Follow these simple steps to define the admin password.
- Comment out the admin specific data migrations in
060_populate_tables.sqlfile:
insert into users (id, username, email, password) values (1, 'admin', '[email protected]', '$2a$10$efzxz2vlIbHOA4bmae41aOKlS97sOhtzagxLLxemVyYagM9vTIv5m');
insert into users_roles (user_id, role_id) values (1, 1);
insert into users_roles (user_id, role_id) values (1, 2);
insert into users_roles (user_id, role_id) values (1, 3);
- Drop all tables if any with
gradle -Pdev migrate dropAll, and set up the development and test databases ( runninggradle -Pdev migrate updateandgradle -Ptests migrate update). Start the application in dev mode withgradle -Pdev bootRun. - Signup (see Postman endpoint) with these credentials, where you provide your own admin password.
{"username": "admin",
"password": "[PLAIN_TEXT_ADMIN_PWD]",
"passwordConfirm": "[PLAIN_TEXT_ADMIN_PWD]",
"email" : "[email protected]"
}
- Retrieve the encoded password for the newly signed up admin from the database,
[ENCODED_ADMIN_PWD] - Comment in the admin specific lines you commented out in
060_populate_tables.sql, replacing the encoded password:insert into users (id, username, email, password) values (1, 'admin', '[email protected]', '[ENCODED_ADMIN_PWD]'); - Drop the tables and create them again (using the new edited version of
060_populate_tables.sql). - Test logging in as an admin using the
loginendpoint, again you can use the Postman template for your request. The request body should be
{ "username" : "admin",
"password" : "[PLAIN_TEXT_ADMIN_PWD]"
}
You should get the admin user and his token as a response. Edit the Postman Springify collection to use Bearer Token Authorization and paste the token you got from the response in the Token field. Use Inherit from parent for all your endpoint configurations in Postman to use this token in your requests.
- At this point you can run the tests with
gradle -Ptests -Padminpwd=[PLAIN_TEXT_ADMIN_PWD] test - You can run individual
*Runner.java(example/src/test/java/springifyapi/album/AlbumRunner.java) test files from your IDE. - You can now make requests from Postman to all endpoints, using the token you obtained from login.
Follow the online instructions to try the API.
