This guide walks you through the process of setting up a RabbitMQ AMQP server that publishes and subscribes to messages.
We are going to configure a direct exchange binding with routing key bounded to our queues. Here is graphic definition of our direct exchange model:

If it is the first time you are listening to amq concepts I will recomend you to read this link:
You’ll build an application that publishes messages using Spring AMQP’s RabbitTemplate and subscribes to the
message using MessageListenerAdapter. Integration Test is using qpid-broker in memory AMQP server.
App could be start by Spring boot main method sending (Application.class). If you want to run Spring Application Rabbitmq server is a must.
Java 1.8 is a must
Maven/Gradle is a must
Docker will be used to run rabbitMq Server
15 minutues of your appreciated time and be patient. Programming is not a game It is a fun way to pass your weekends :)
A Rabbitmq instance is needed to be able to test our Spring boot main project(In test folder we use qpid-broker in memory Server). Run your docker tool and search one Rabbitmq image in docker Hub. In our example bitname image will be used to run main project (https://hub.docker.com/r/bitnami/rabbitmq/)


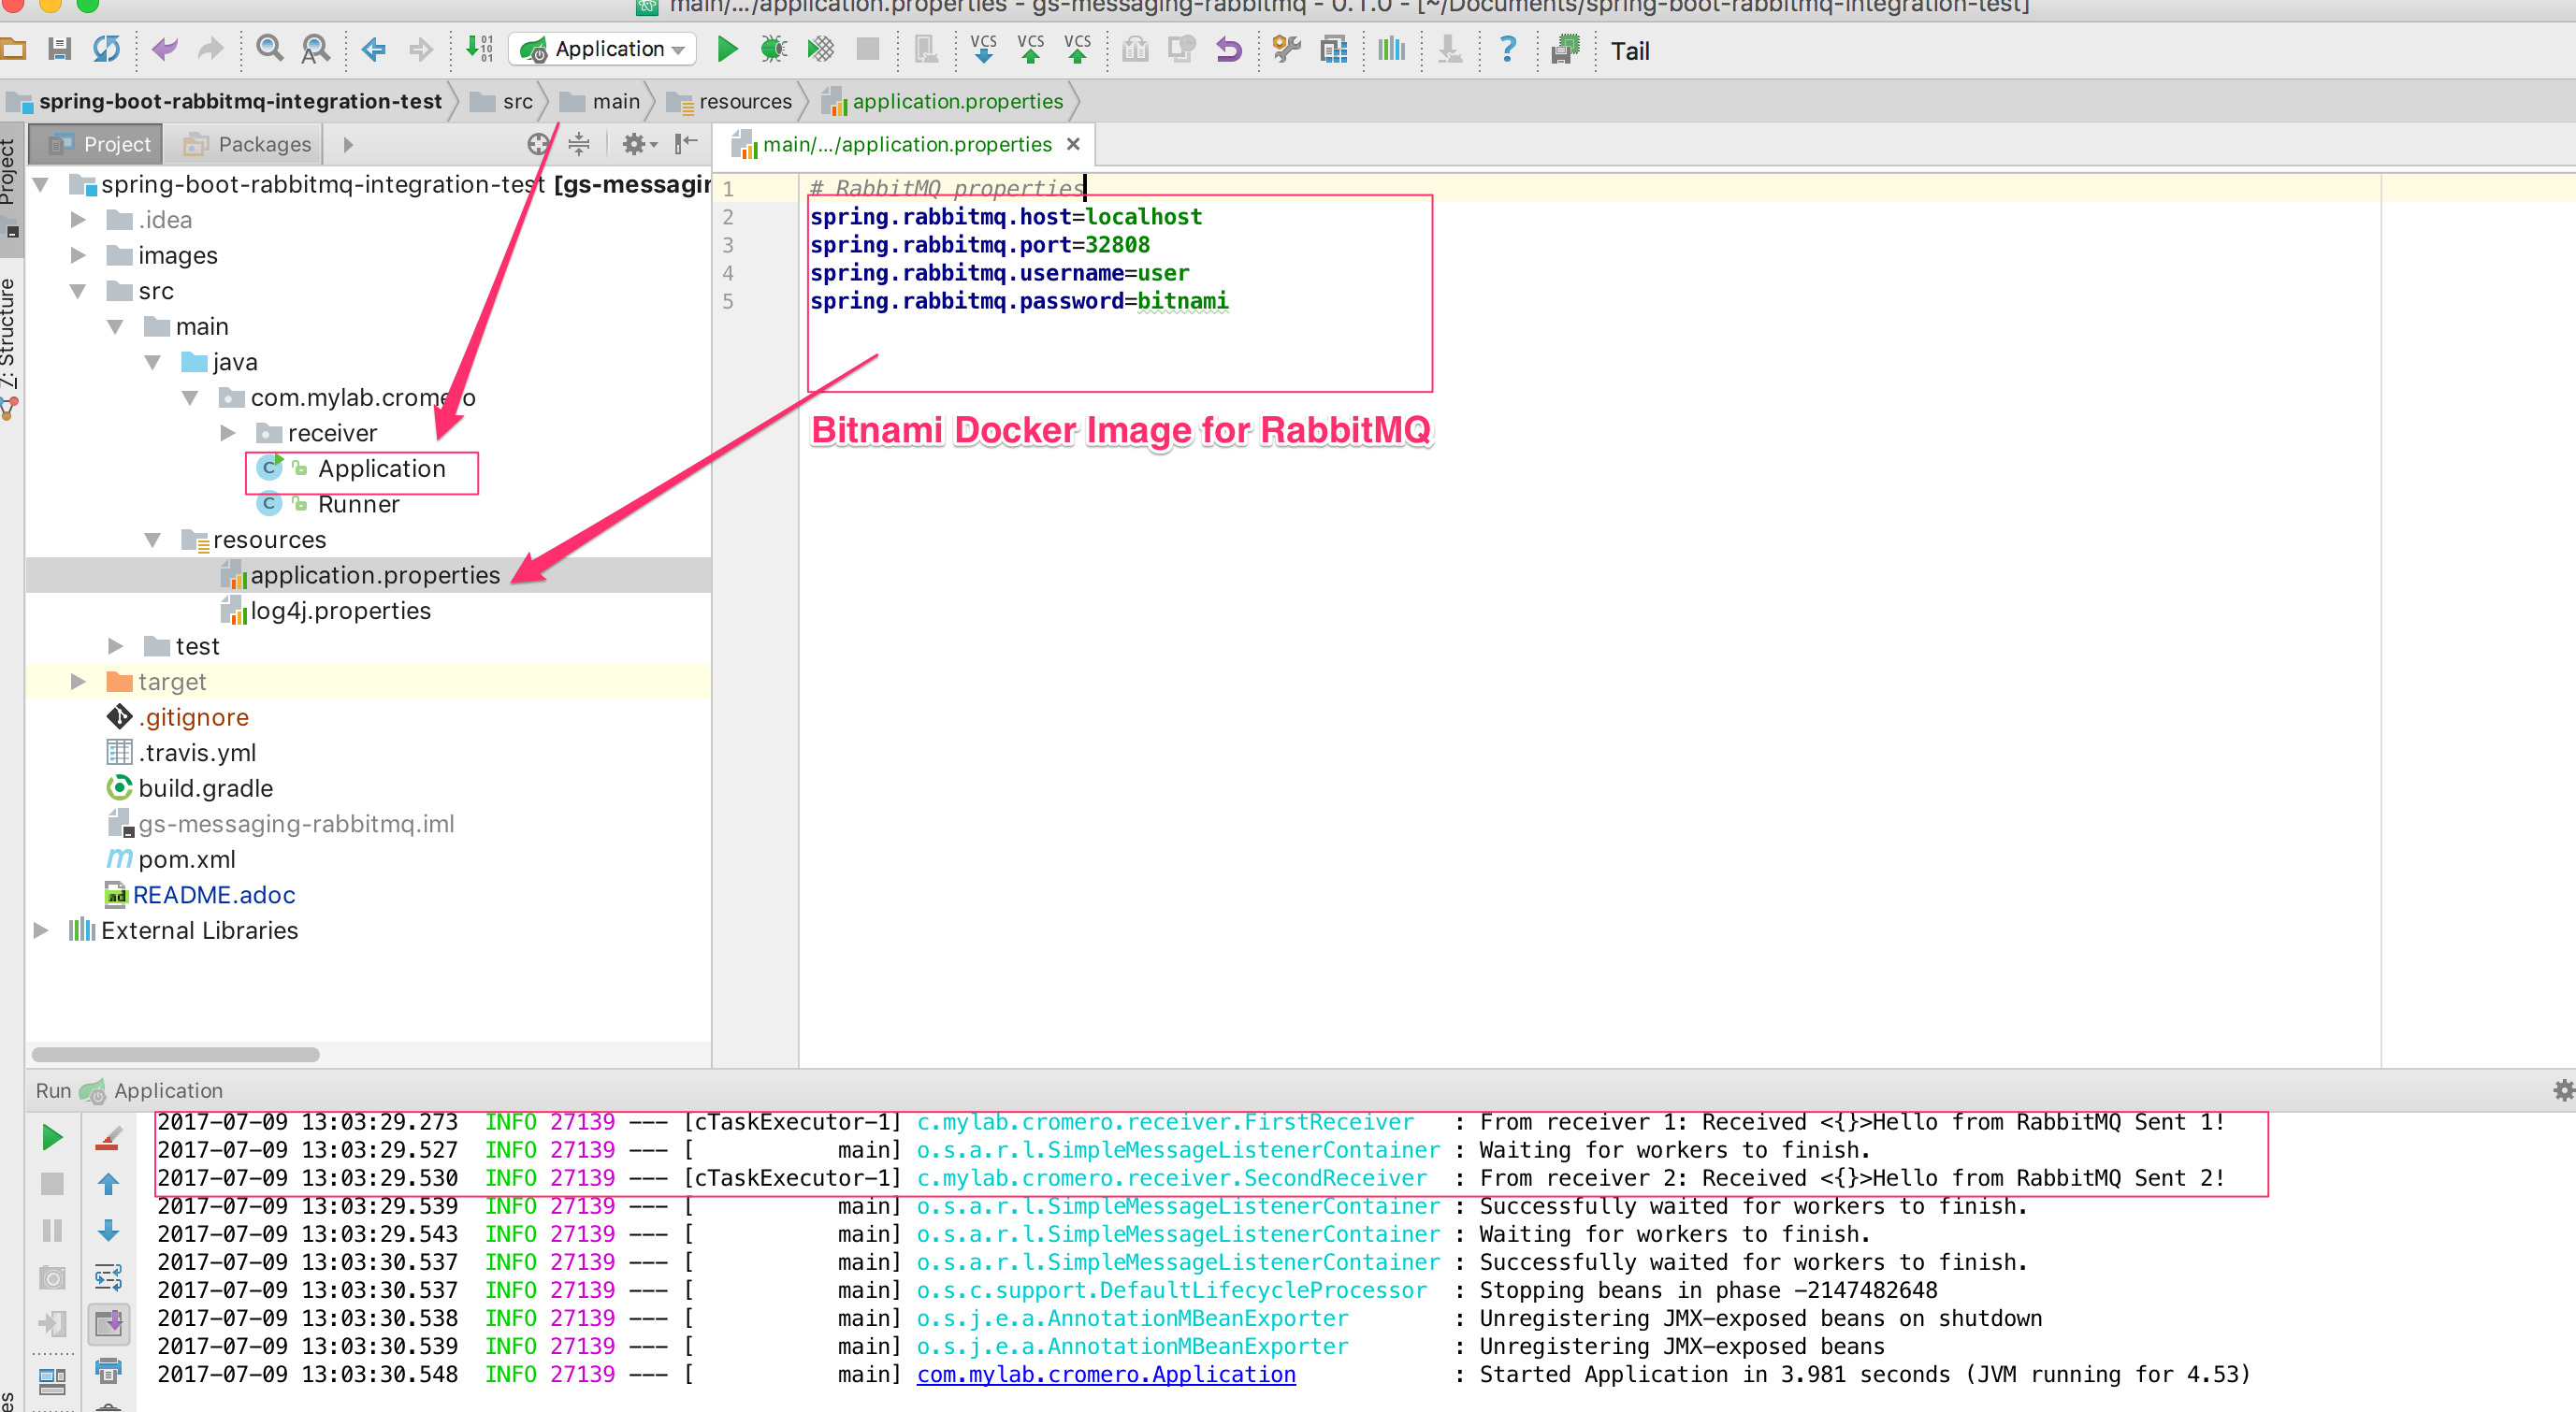
Run your main boot application and access to admin console(this example is http://localhost:32807 with user/bitnami) and verify Direct Exchage and Queues have been created:


