As previously announced, HERE recently released the Intermodal Routing API. Intermodal routing is a novel capability that allows users to find routes across different modes of transportation, such as combining air and ground travel, rail and bike share, or public transit and taxi services.
Current routing services can only route across a single mode of transport - for example, car routing, public transit routing or bike routing. Combining modes really opens new possibilities.
Because Park and Ride is a common and oft-requested application for intermodal routing, we implemented it first. Park and Ride enables use cases ranging from calculating your personal best route to reach your office, to showing customers a map with comfortable Park and Ride solutions to reach your company headquarters in a congested city, to offering a fully flexible Park and Ride Routing solution.
Please note that HERE is offering Park and Ride Routing only in specific locations, see the Coverage Information for currently supported cities. This list of supported cities is growing as we collect the necessary data for more and more destinations, so check back soon if you don't see what you're looking for now.
So without further ado, let's show you how to implement a map using the HERE Intermodal Routing API on your website.
To work with any HERE API, you need to get yourself a pair of credentials. They consist of an App ID and an App Code. You can get your own set of credentials by signing up on developer.here.com. After signing up for our account you create a new application to generate an App ID and an App Code. If you have already signed up, you can access your credentials on your "Projects" page.
For this API, licensing compliance means there's one extra hoop to jump through to activate access. Please fill out the form on the Contact Us page, noting your App ID and requesting that it's enabled for the Intermodal Routing API. We'll try to respond ASAP, but it can take up to three days to activate.
In the meantime, we will quickly show you how to set up the HERE Maps Javascript API. While this post does not go into details of how to use the HERE Maps JavaScript API itself, our 8-part in-depth tutorial does:
- Part 1: Basic Map Set-up
- Part 2: Geolocation
- Part 3: Basic Routing
- Part 4: Advanced Routing
- Part 5: Refactoring
- Part 6: Reacting to outside influences
- Part 7: Traffic
- Part 8: Wrapping Up
In this tutorial we will create a Javascript program that displays a map of Chicago and, from a start point you choose, calculates a Park and Ride route to the HERE offices in Chicago. It should be easy for you to choose a different destination, or extend the script so you can select both origin and destination for your journey freely.
Now that you have your HERE API credentials, you can go ahead and create a JavaScript script to render a map.
Of course, you must first create an HTML file to render your Javascript:
<html>
    <head>
        <script type="text/javascript" src="https://js.api.here.com/v3/3.0/mapsjs-core.js"></script>
        <script type="text/javascript" src="https://js.api.here.com/v3/3.0/mapsjs-mapevents.js"></script>
        <script type="text/javascript" src="https://js.api.here.com/v3/3.0/mapsjs-service.js"></script>
        <script type="text/javascript" src="https://js.api.here.com/v3/3.0/mapsjs-ui.js"></script>
        <script src="http://taser-dev.rnd.transit.api.here.com:8008/static/js/jquery.min.js"></script>
        <script src="tools.js"></script>
    </head>

    <body>
        <div id="map" style="height:800px"></div>
        <script type="text/javascript" src="here.js"></script>
    </body>
</html>
Here we have included the basic HERE JavaScript API imports
and also created a div where our map will be displayed. Then we are including the file here.js, which we are
writing next:
var platform = new H.service.Platform({
    useCIT: true,
    app_id: '{YOUR_APP_ID}', // // <-- ENTER YOUR APP ID HERE
    app_code: '{YOUR_APP_CODE}', // <-- ENTER YOUR APP CODE HERE
});
var maptypes = platform.createDefaultLayers();

var map = new H.Map(document.getElementById('map'), maptypes.terrain.map, {
    zoom: 9,
    center: { lat: 41.884238, lng: -87.638862 }
});

var ui = H.ui.UI.createDefault(map, maptypes);

var mapevents = new H.mapevents.MapEvents(map);
var behavior = new H.mapevents.Behavior(mapevents);
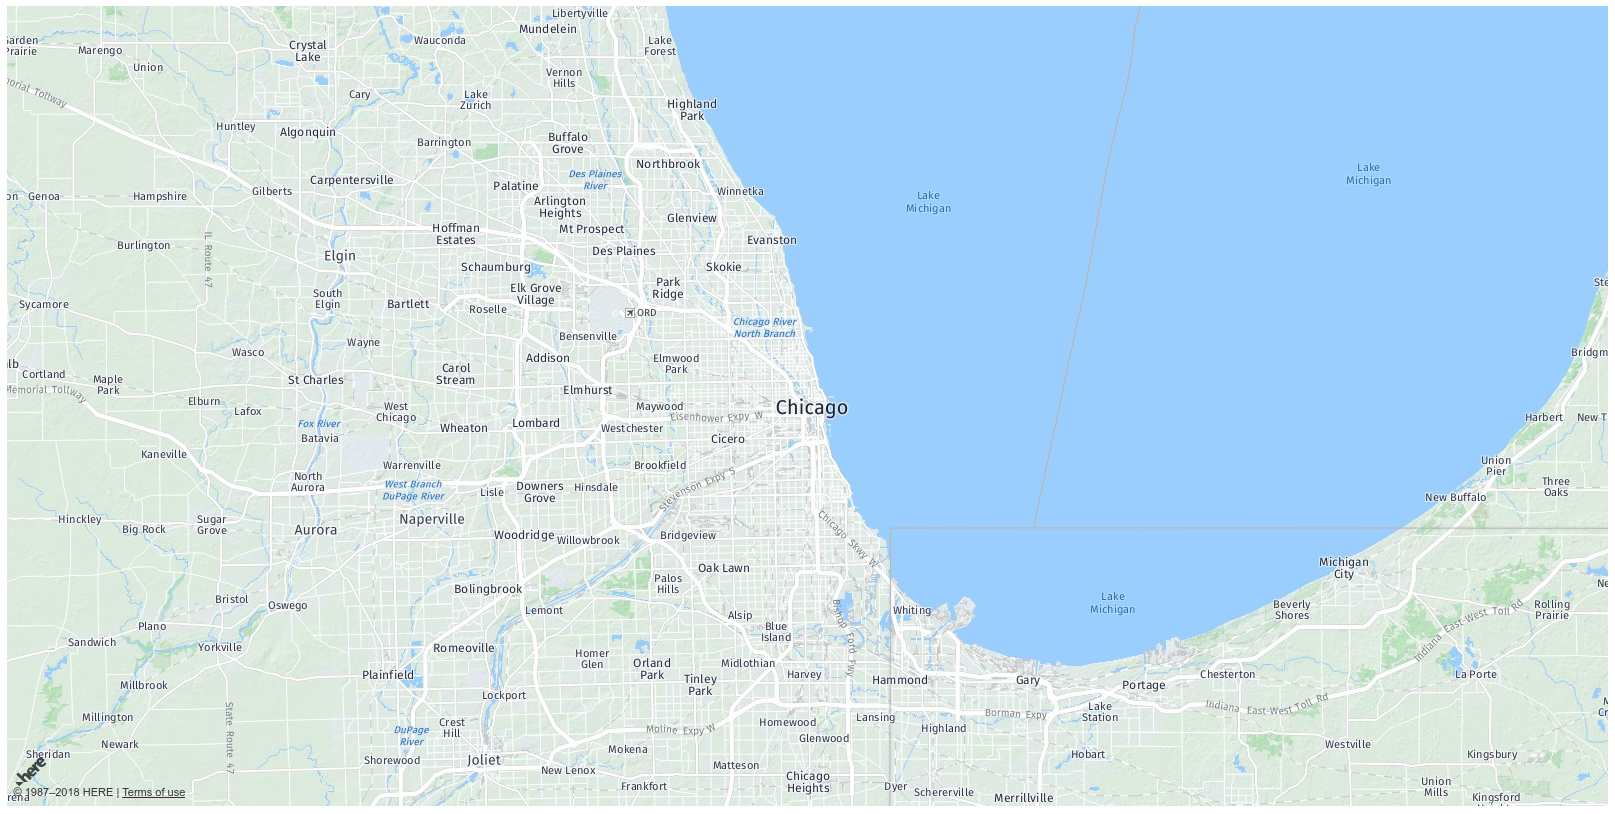
Now you have set up a HERE map, centered at the HERE Chicago offices, which are located at 41.884238 degrees North, 87.638862 West. (See? You already learned something!) It should look approximately like this:
Since it is out of scope of this tutorial to explain how to process and render a route (the HERE Maps
Javascript API tutorial is covering that), I'll just give you some code which takes care of that.
Let's just very quickly add in some code to select a point on the map to start our route from. Copy it and
save it to the file tools.js, which, you may have noticed, we are already including in the HTML file above:
(function(NS) {

    var APP_ID = '{YOUR_APP_ID}', // // <-- ENTER YOUR APP ID HERE
        APP_CODE = '{YOUR_APP_CODE}'; // <-- ENTER YOUR APP CODE HERE

    function Mobility(options) {
        this.map = options.map;
    }

    Mobility.prototype = {
        on: function(name, handler) {
            this._events = this._events || {};
            this._events[name] = this._events[name] || [];
            this._events[name].push(handler);
        },
        emit: function(name, arg1, arg2, arg3) {
            var handlers = this._events && this._events[name] || [];
            for (var i=0, l=handlers.length; i<l; i++) {
                handlers[i].call(this, arg1, arg2, arg3);
            };
        },

        route: function(params) {
            var that = this;
            var url = "https://mobility.api.here.com/v1/route.json?app_id="+APP_ID+"&app_code="+APP_CODE+"&profile=parkandride&dep="+params.dep.join(",")+"&arr="+params.arr.join(",")+"&time="+params.time+"&graph="+params.graph+"&maneuvers="+params.maneuvers;

            $.get(url, function(resp) {
                that.emit("response", resp);
            });
        },

        createDefaultUI: function() {
            new NS.ui.Logic(this);
            new NS.ui.Route(this);
            new NS.ui.Markers(this);
        },

    }


    function Logic(provider) {
        provider.on("response", function(resp) {
            console.log(resp);
            provider.emit("connection", resp.Res.Connections.Connection[0], resp.Res.Guidance && resp.Res.Guidance.Maneuvers);
        });
    }

    function Route(provider) {
        var that = this;
        provider.on("connection", function(conn, maneuvers) {
            var graphs = that._maneuversToGraphs(maneuvers);

            conn.Sections.Sec.forEach(function(sec) {
                var arr       = sec.Arr.Addr || sec.Arr.Stn,
                    dep       = sec.Dep.Addr || sec.Dep.Stn,
                    graph     = (graphs[sec.id] || sec.graph || "").split(" "),
                    transport = sec.Dep.Transport || {},
                    style     = NS.Mobility.routeStyles[sec.mode] || {},
                    color     = (transport.At || {}).color || "black";

                // Create a linestring to use as a point source for the route line
                var linestring = new H.geo.LineString();
                linestring.pushLatLngAlt(dep.y, dep.x);
                for (var i=0, point; point=graph[i]; i++) {
                    point = point.split(",");
                    linestring.pushLatLngAlt(point[0], point[1]);
                }
                linestring.pushLatLngAlt(arr.y, arr.x);

                // Create a polyline to display the route:
                var routeLine = new H.map.Polyline(linestring, {
                    style: { strokeColor: color || style.color, lineWidth: style.lineWidth || 7, lineDash: style.lineDash || [] },
                });

                // Add the route polyline and the two markers to the map:
                map.addObjects([routeLine]);
            });
        });
    }

    Route.prototype._maneuversToGraphs = function(maneuvers) {
        var graphs = {};
        if (maneuvers) {
            for (var i=0, maneuver; (maneuver=maneuvers[i]); i++) {
                var graph = maneuver.Maneuver.reduce(function(acc, curr) {
                    acc.push(curr.graph);
                    return acc;
                }, []).join(" ");
                maneuver.sec_ids.split(" ").forEach(function(secId) {
                    graphs[secId] = graph;
                });
            }
        }
        return graphs;
    }


    function Markers(provider) {
        var depMarker = new H.map.Marker({lat: 0, lng:0}, {
            icon: NS.TRIP_START_ICON,
            data: {"name": "dep"},
        });

        var arrMarker = new H.map.Marker({lat: 0, lng: 0}, {
            icon: NS.TRIP_START_ICON,
            data: {"name": "arr"},
        });
        provider.map.addObjects([arrMarker, depMarker]);

        provider.on("connection", function(conn) {
            var dep = conn.Dep.Stn || conn.Dep.Addr;
            var arr = conn.Arr.Stn || conn.Arr.Addr;
            depMarker.setPosition({lat: dep.y, lng: dep.x});
            arrMarker.setPosition({lat: arr.y, lng: arr.x});
        });
    }


    NS.Mobility = Mobility;
    NS.ui = NS.ui || {};
    NS.ui.Logic = Logic;
    NS.ui.Route = Route;
    NS.ui.Markers = Markers;

    NS.Mobility.routeStyles = {
        21: { strokeColor: "black", lineWidth: 3, lineDash: [5, 5] },  // car
        20: { strokeColor: "black", lineWidth: 5, lineDash: [1, 5]},   // walk
    }


}(window.H = window.H || {}))
Now that you have the basics in place, you are ready for the big moment: Firing off a request to the HERE Intermodal Routing API. The request will look like this:
http://mobility.api.here.com/v1/route
  ?app_id={YOUR_APP_ID}
  &app_code={YOUR_APP_CODE}
  &profile=parkandride
  &dep={YOUR_START_POINT}
  &arr=41.884238,-87.638862
  &time=2018-03-19T07:30:00
The request parameters are the App ID and App Code you set up earlier, the parameter profile you use to
specify you want a Park and Ride route, dep and arr to specify the coordinates of your start and end point,
and a time for which you want the route to be calculated.
If you look at the function Mobility.prototype.route above, you will see this request being assembled,
along with the parameters graph and maneuvers, which are needed if you want to visualize the returned route -
if you don't want to know the geometry and maneuvers for the route, you can omit them.
And here is (an edited version of) what the response will look like. Actually, you'll get a much longer response, but we are limiting ourselves to the bits interesting for this tutorial. For a depiction of the full response, see the Park and Ride Routing Example from the documentation.
{
  "Res": {
    "Connections": {
      "Connection": [
        {
          "@duration": "PT2H3M33S",
          "@transfers": "2",
          "Sections": {
            "Sec": [
              {
                "Dep": {
                  "@time": "2018-02-01T07:47:27",
                  "Addr": {
                    "@x": "-88.0815593", "@y": "41.5246995"
                  }
                },
                "Arr": {
                  "@time": "2018-02-01T08:28:54",
                  "Addr": {
                    "@x": "-87.6507079", "@y": "41.7211479",
                    "@name": "Metra 95th St. Longwood Station",
                    "At": [
                      {
                        "@id": "category",
                        "$": "parking"
                      },
                      {
                        "@id": "PnR",
                        "$": "1"
                      }
                    ]
                  },
                  "Activities": {
                    "Act": [
                      {
                        "@duration": "PT5M",
                        "@type": "parking"
                      }
                    ]
                  }
                },
                "Graph": "41.795175,-87.618325 41.795175,-87.618325 41.797036,-87.618361 ... 41.885705,-87.641778"
              },
              ...
            ]
          }
        }
      ]
    }
  }
}
NB: If you get an error back that says "Date outside the timetable period", the timetable data of at least one public transit provider in the area is not present - either expired, if the date is in the past, or not yet present, if it is in the future. Please adjust the time parameter in the request to be closer to the present date.
The response gives us a JSON list of three Connection objects (of which only one is shown here), each of
which contains a list of Sec objects (again, we are only showing the first one). The Sec objects represent
parts of the journey between which the vehicle is switched. Most importantly for us here, they also contain
the Graph object, which we use to visualize the route on the map.
Let's use our utility class to make a request to the HERE Intermodal Routing API and visualize the response.
To the end of the here.js file, add this code:
var mobility = new H.Mobility({
    map: map,
    app_id: '{YOUR_APP_ID}',  // <-- ENTER YOUR APP ID HERE
    app_code: '{YOUR_APP_CODE}',  // <-- ENTER YOUR APP CODE HERE
});

var ui = mobility.createDefaultUI();

mobility.route({
    dep: {YOUR_START_POINT},  // <-- ENTER YOUR START POINT HERE
    arr: [41.844238,-87.638862],
    time: '2018-02-01T07:30:00',
    graph: 1,
    maneuvers: 1
});
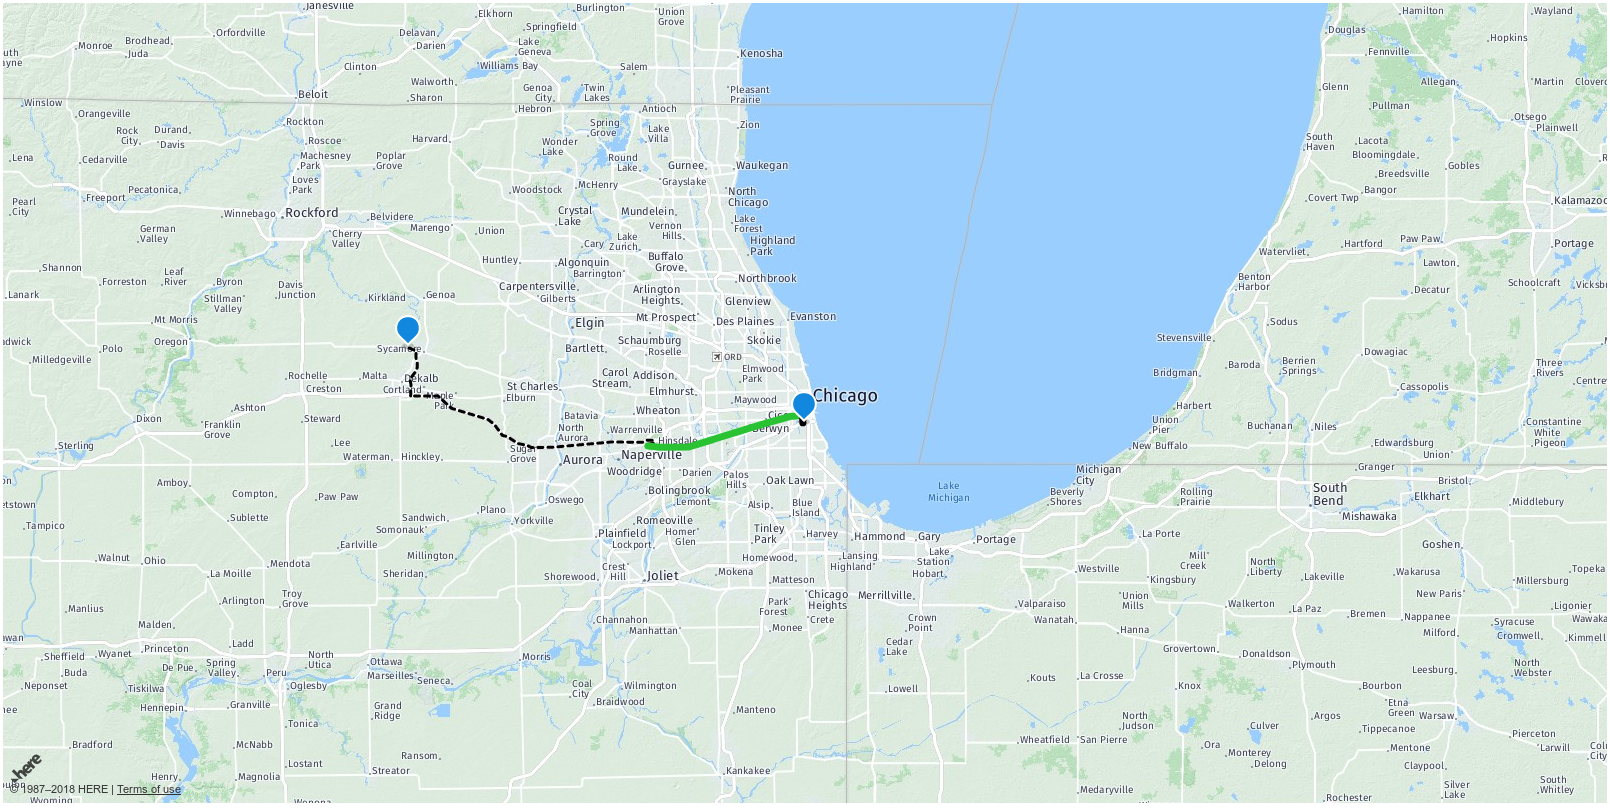
And just with that you have requested and displayed a Park and Ride route on a map. Your result, depending on the start point you use, should look something like this:
Now you can go forth and modify the code to suit your needs!
We have implemented a map doing Park and Ride Routing in about 180 lines of code, most of which is needed to visualize the route. But of course there is more to it. The Intermodal Routing API Documentation is there to help you. For more general questions how to use the HERE Javascript API, refer to the HERE JavaScript API documentation or the eight-part tutorial Linked above. Finally, if you run into a problem the documentation cannot solve, please ask questions on Stack Overflow.
Happy coding!

