#RasPiCamcorderPiTFT#
###RasPiCamcorder3 the PiTFT version###
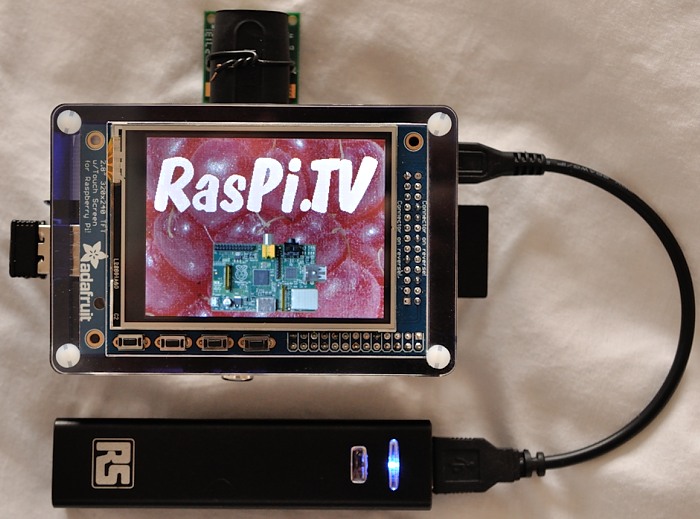
This sofware is intended to be used with a Raspberry Pi, Pi camera and the Adafruit PiTFT screen with four buttons attached. See my blog article here http://raspi.tv/?p=6282
I'm also using the Pimoroni http://shop.pimoroni.com/products/pitft-pibow designed to fit the PiTFT.
###Assemble and install your PiTFT ### Follow the excellent instructions here...
http://learn.adafruit.com/adafruit-pitft-28-inch-resistive-touchscreen-display-raspberry-pi/ You will need four slim buttons on the PCB to use this script.
When it comes to configuring the drivers, don't set up a 'power off button'. (It's one of the extras on the last page of setup instructions.)
We need to use all four buttons for our script, and it already includes a power off button.
Button 1: Record video
Button 2: 'Stop' if pressed momentarily, 'Close program' if pressed for more than 1.25 seconds and 'Shutdown Pi' if pressed for >3 seconds.
Button 3: Toggle screen on and off to save power
Button 4: Take a still photograph and show it on the screen for 10s
###How To Intall This Software###
cd ~
git clone https://github.com/raspitv/RasPiCamcorderPiTFT
You should have git installed already, but if not...
sudo apt-get install git-core
###Install fbcp, if you prefer to compile your own###
For the live screen output to work, you need fbcp. I have included the binary fbcp in the /RasPiCamcorderPiTFT directory. But some people will prefer to look at the source and compile it themselves. You can do that too. It's at...
https://github.com/tasanakorn/rpi-fbcp
The instructions are quite good, but you may need to install cmake with
sudo apt-get install cmake
But if you don't want to do that, just ignore this and stick with the one provided.
###Install imagemagick### You need to install imagemagick or you won't be able to view the photos you just took. The python script will probably crash if you don't install imagemagick (or disable that part).
It's used to resize stills to 320x240 for preview (but it leaves the originals intact).
sudo apt-get install imagemagick
###How to run picamcorder3.py automatically on boot###
sudo nano /etc/rc.local
Then, before the line where it says 'exit 0', insert this...
/home/pi/RasPiCamcorderPiTFT/picamcorder3.py
You will also need to set up the Pi so that it boots to console on the PiTFT. How to do that is on this page.
###How to run picamcorder3.py from the command line###
sudo python /home/pi/RasPiCamcorderPiTFT/picamcorder3.py
or navigate to /home/pi/RasPiCamcorderPiTFT and type...
sudo python picamcorder3.py
The sudo is needed because we're using GPIO.
All your photo and video files will be in /home/pi
Photos will be numbered sequentially up from 00001.jpg Videos will be called video00001.h264 onwards
Numbering can be reset by changing or deleting the files...
/home/pi/RasPiCamcorderPiTFT/vid_rec_num.txt
/home/pi/RasPiCamcorderPiTFT/photo_rec_num.txt
