This repository reflects a cloud-based implementation designed to meet the following design criteria:
- Azure container-based implementation of Galaxy biomedical research portal with FTP upload directly from the portal
- Kubernetes container-based deployment
- HTCondor for dynamic job and node scaling
- a minimum of 60 TB of addressable (NFS) storage
- Helm chart for package management
The challenge was to enable a performant, cost-efficient configuration that could support the Neurolincs ATAQSeq and RNASeq workflows on Azure in support of its AnswerALS Foundation research commitment now, but in a way that anticipates and is informed by a future CloudMan release that will enable full cloud configurability and scaling directly from within Galaxy itself.
Until that time, however, a fully optimized cloud implementation with the current version of Galaxy, even container-based versions, still suffer from limitations imposed when supporting FTP upload and concomitant POSIX-based filesystem and NFS constraints.
As such, in lieu of full Helm chart external configurability, a non-trivial amount of post-deployment steps and incantations obtain. (More fully decoupled and configurable implementations using persistent volume claims and whatnot were explored and achieved, but initial performance was dismal and ultimately incompatible with NFS.)
This implementation, while less purdy, performs and easily scales to multiple agents running multiple nodes or pods, with data uploaded through the ftp server participating directly.
While fundamentally a cloud-neutral implementation based on Kubernetes and HTCondor, this readme describes steps for Azure.
- An Azure account and subscription with Azure Portal access
- Azure CLI installed on the computer you'll be working from
Azure CLI is available for multiple platforms. If you don't see an option below that works for you, check the docs.
Download and run the MSI installer package.
Use Homebrew. From Terminal, run the following:
rc-cola$ brew update
brew install azure-cli
Once you've successfully installed Azure CLI, open up your terminal and login to Azure with it
rc-cola$ az login
You should be prompted to log in from your system's default browser.
rc-cola$ az login
To sign in, use a web browser to open the page https://aka.ms/devicelogin and enter the code 'YOUR_CODE' to authenticate.
Congrats! We're on our way.
Once you've installed Azure CLI, open up a terminal window and create a resource group and the Azure region to create it in.
rc-cola$ az group create --name rcAnswerAlsCluster --location westus2
(If you don't know which region to use or its shortname, get a list of them with this command (note the whizzy use of the '--output table' option to make the output more readable.)
rc-cola$ az account list-locations --output table
After the resource group is created, create a Kubernetes cluster within it.
rc-cola$ az acs create --orchestrator-type kubernetes --resource-group rcAnswerAlsCluster --name rcAlsK8s --generate-ssh-keys
To manage our Kubernetes cluster, we need to install kubectrl.
On Windows you can use the Chocolatey package manager:
$ choco install kubernetes-cli
Use Homebrew. From Terminal, run the following:
rc-cola$ brew install kubectl
kubectl is available as a snap application. If you are on Ubuntu or one of other Linux distributions that support snap package manager, you can install with:
rc-cola$ sudo snap install kubectl --classic
rc-cola$ kubectl version
Now that you've got kubectl installed, let's get some info about the cluster we just created.
First, set up your local environment in the context of your newly-created cluster. Run this command in your Terminal.
az acs kubernetes get-credentials --resource-group=rcAnswerAlsCluster --name=rcAlsK8s
Merged "rcalsk8s-rcansweralsclust-7904d7mgmt" as current context in /Users/rc/.kube/config
We've created our cluster and set our local context. Now let's get some details about what we've created. Run this command in your Terminal
rc-cola$ kubectl get nodes
NAME                        STATUS    ROLES     AGE       VERSION
k8s-agent0-12790836-0   Ready     agent     2h        v1.7.9
k8s-agent0-12790836-1   Ready     agent     2h        v1.7.9
k8s-agent0-12790836-2   Ready     agent     2h        v1.7.9
k8s-master-12790836-0       Ready     master    2h        v1.7.9
Remember those dudes. We're going to need to create accounts and ssh into all of them (and into the agent nodes through the master) to do stuff like mount NFS volumes and whatnot, so keep them handy :).
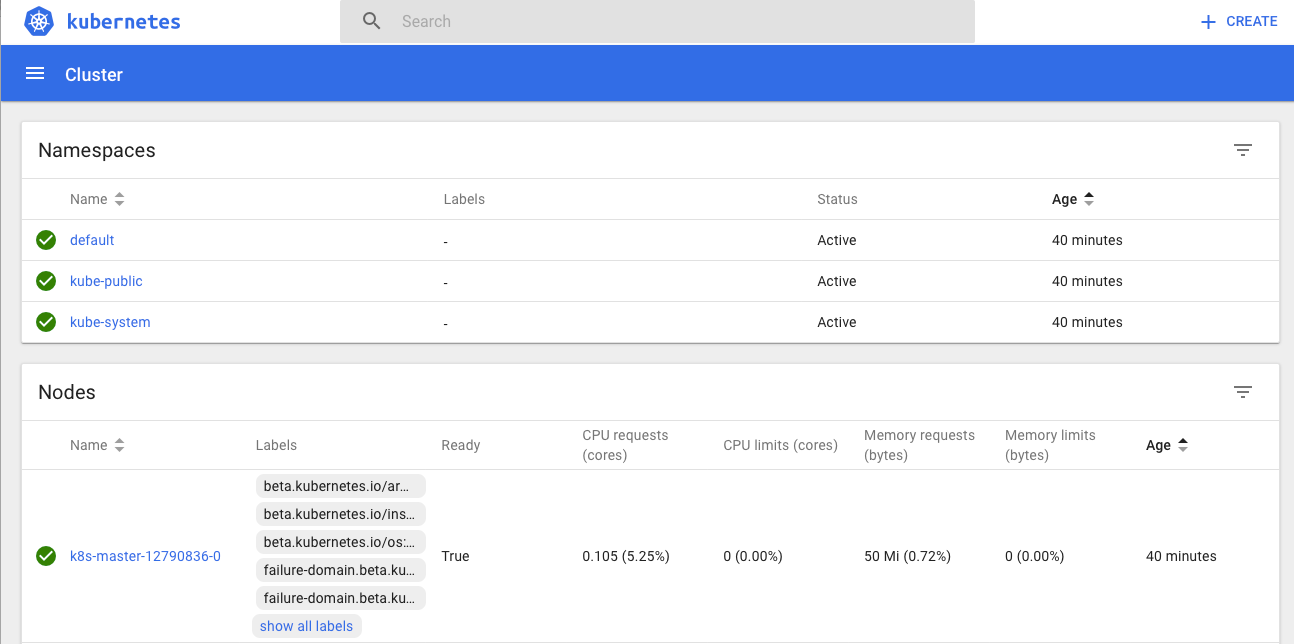
The kubernetes web UI is an excellent tool to configure scaling options manually. To access it, run this command from your Terminal command prompt:
rc-cola$ az acs kubernetes browse -g rcAnswerAlsCluster -n rcAlsK8s
Proxy running on 127.0.0.1:8001/ui
Press CTRL+C to close the tunnel...
Starting to serve on 127.0.0.1:8001
You should see something like this.
Now that we've built and accessed our shiny new cluster, we can start getting it ready for our Galaxy installation.
From your node listing above, select the '-0' agent node as a storage node. Run the following command in your Terminal window (make sure to replace the agent node with the ones from your cluster :-) )
rc-cola$ kubectl label nodes k8s-agent0-12790836-0 type=store
node "k8s-agent0-12790836-0" labeled
Before we can begin our node configuration dance, we have to create user accounts on all the nodes. For this we're going to use the Azure Portal.
In your browser, head over to the Azure Portal and log in using the same credentials you used to create your subscription.
After logging in and arriving at your dashboard, navigate to your Kubernetes agents. The most direct way is by searching (start entering your agent name (i.e. 'k8s-agent...') in the search box and it should appear via autocomplete)
Once you've selected your agent, scroll down the left nav until you see the "Reset password" entry. Select that and, even though it says Reset, we're going to create a new account.

You can add an account that uses a username / password combination or SSH key. We'll use a username / password combination this time.
Repeaat this process until a new user account has been created on all the node VMs, including the master.
Okay. Now we're going to put on our big boy pants and go SSH tunneling. This is where it's easy to get lost so pay close attention to your cursor and your context.
To access the agent nodes to configure them, you first have to ssh to the master node and then SSH from there to the agent nodes. Onward!
First, let's SSH to the master VM. For this, we use the Public IP value we can grab from the portal.

rc-cola$ ssh [email protected]
The first hop on our journey is to the '-0' agent node we made a storage node back in the day. Let's ssh there from our master VM.
rc@masternode$ ssh rc@k8s-agent0-12790836-0
Congratulations! Do you feel like you're in a game of CLI Frogger?
Okay, now that we're on the storage node, let's make an '/export' directory and give read/write permissions to it.
Before we can, though, we'll have to sudo su to get proper permissions. (Your sudo password is your SSH password.)
$ sudo su
[sudo] password for rc:
root@k8s-agent0-12790836-0:/home/rc# mkdir /export
root@k8s-agent0-12790836-0:/# chmod 777 -R /export
The storage node will also, um, serve as an NFS server that the other agent nodes will access when running jobs. So let's install an NFS server.
root@k8s-agent0-12790836-0:/home/rc# sudo apt install nfs-kernel-server
Now that we have an NFS server, we add the "/export" directory to a list of directories eligible for an NFS mount with both read and write privileges. We'll do it by adding an entry to the /etc/exports file.
root@k8s-agent0-12790836-0:/home/rc# vi /etc/exports
Once you're in the file, copy the lines below into it.
  /ubuntu  *(ro,sync,no_root_squash)
  /export  *(rw,sync,no_root_squash)
One more file to modify: '/etc/hosts.allow'
root@k8s-agent0-12790836-0:/home/rc# vi /etc/hosts.allow
Add the following line:
ALL:ALL
(If you need some help with vi commands, here's a good vi cheat sheet.)
Let's fire up the NFS service.
root@k8s-agent0-12790836-0:/home/rc# sudo systemctl start nfs-kernel-server.service
Woohoo! Let's hightail it back to the master node
root@k8s-agent0-12790836-0:/home/rc# exit
exit
$
For the remaining agent nodes, we'll also create an '/export' directory and then mount the '/export' directory of the storage node.
$ sudo su
[sudo] password for rc:
root@k8s-agent0-12790836-1:/home/rc# mkdir /export
root@k8s-agent0-12790836-1:/export# sudo mount k8s-agent0-12790836-0:/export /export
Repeat these same commands for all the remaining agent nodes in your cluster. When you're done updating the last agent node, back out of all your connections all the way to your localhost. If you get 'permission denied' errors, head back over to the -0 NFS server node and try stopping and starting the service again.
Do not proceed until the mount is successful.
$ exit
Connection to k8s-agent0-12790836-2 closed.
$ exit
Connection to k8s-agent0-12790836-1 closed.
$ exit
Connection to k8s-agent0-12790836-0 closed.
$ exit
Connection to k8s-agent0-12790836-1 closed.
$ exit
Connection to k8s-agent0-12790836-0 closed.
$ exit
Connection to my.master.node.ip closed.
rc-cola:~
Well done. Speaking of done, we're getting there.
Now that our cluster and its nodes are configured globally, we're almost ready to intall and boot Galaxy.
The first thing we need to do (see what I did there? first?) is intall Helm on our local laptop.
Good old homebrew!
rc-cola:~ rc$ brew install kubernetes-helm
Updating Homebrew...
(Remember: we should be running this on our local computer, not the VMs in our cluster)
Sorry dudes. Looks like it's a source install for you.
rc-cola:galaxy-kubernetes-htcondor-azure rc$ helm install galaxy

NAME:   nordic-prawn
LAST DEPLOYED: Sun Jan 21 12:25:33 2018
NAMESPACE: default
STATUS: DEPLOYED

RESOURCES:
==> v1/Pod
NAME                      READY  STATUS             RESTARTS  AGE
galaxy-htcondor-executor  0/1    ContainerCreating  0         13s
galaxy-htcondor           0/1    ContainerCreating  0         13s
galaxy-init               0/1    ContainerCreating  0         13s
galaxy-postgres           0/1    ContainerCreating  0         13s
galaxy-proftpd            0/1    ContainerCreating  0         13s
galaxy                    0/2    ContainerCreating  0         13s

==> v1/ReplicationController
NAME                          DESIRED  CURRENT  READY  AGE
galaxy-htcondor-executor-big  1        1        0      13s

==> v1beta1/Deployment
NAME                 DESIRED  CURRENT  UP-TO-DATE  AVAILABLE  AGE
nordic-prawn-galaxy  1        1        1           0          13s

==> v1/Service
NAME                 CLUSTER-IP    EXTERNAL-IP  PORT(S)   AGE
galaxy-htcondor      10.0.234.39   <none>       9618/TCP  13s
galaxy-postgres      10.0.118.128  <none>       5432/TCP  13s
nordic-prawn-galaxy  10.0.41.61    <none>       80/TCP    13s


NOTES:
1. Get the application URL by running these commands:
  export POD_NAME=$(kubectl get pods --namespace default -l "app=galaxy,release=nordic-prawn" -o jsonpath="{.items[0].metadata.name}")
  echo "Visit http://127.0.0.1:8080 to use your application"
  kubectl port-forward $POD_NAME 8080:80
- check if galaxy is running with
[localhost]: kubectl port-forward galaxy 8080:80
- browse to localhost:8080
- get shell to galaxy-htcondor container
[localhost]:kubectl exec -it galaxy-htcondor -- /bin/bash
- edit file /etc/hosts
[root@galaxy-htcondor]: vi /etc/hosts
- add 127.0.0.1 galaxy-htcondor
- get shell to galaxy-htcondor-executor container
[localhost]:kubectl exec -it galaxy-htcondor-executor -- /bin/bash
- edit file /etc/hosts
[root@galaxy-htcondor-executor]: vi /etc/hosts
- add 127.0.0.1 galaxy-htcondor-executor
- get shell to galaxy container
[localhost]:kubectl exec -it galaxy --container=galaxy -- /bin/bash
- edit file /etc/condor/condor_config.local
[root@galaxy-htcondor]: vi /etc/condor/condor_config.local
- add the following lines
HOSTALLOW_READ = *
HOSTALLOW_WRITE = *
HOSTALLOW_NEGOTIATOR = *
HOSTALLOW_ADMINISTRATOR = *
- restart condor with
[root@galaxy]:condor_restart