This app is a sample video conferencing app that uses the Twilio Programmable Video SDK. The open source app can be easily configured by developers to try out real-time video and audio features.
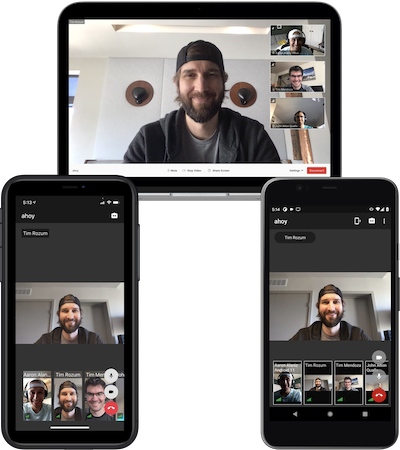
- Video conferencing with real-time video and audio
- Speaker grid layout
- Presentation layout
- Enable/disable camera
- Mute/unmute mic
- Switch between front and back camera
- Dominant speaker indicator
- Network quality indicator
- Bandwidth Profile API
NOTE: The Twilio Function that provides access tokens via a passcode should NOT be used in a production environment. This token server supports seamlessly getting started with the collaboration app, and while convenient, the passcode is not secure enough for production environments. You should use an authentication provider to securely provide access tokens to your client applications. You can find more information about Programmable Video access tokens in this tutorial.
The app requires a back-end to generate Twilio access tokens. Follow the instructions below to deploy a serverless back-end using Twilio Functions.
- Install Twilio CLI.
- Run
twilio loginand follow prompts to login to your Twilio account. - Run
twilio plugins:install @twilio-labs/plugin-rtc. - Run
twilio rtc:apps:video:deploy --authentication passcode. - The passcode that is output will be used later to sign in to the app.
The passcode will expire after one week. To generate a new passcode, run twilio rtc:apps:video:deploy --authentication passcode --override.
If any errors occur after running a Twilio CLI RTC Plugin command, or the application fails to validate a passcode, then try the following steps.
- Update your application to the latest source
- Run
twilio plugins:updateto update the RTC plugin to the latest version. - Run
twilio rtc:apps:video:deleteto delete any existing authentication servers. - Run
twilio rtc:apps:video:deploy --authentication passcodeto deploy a new authentication server.
- Open
VideoApp/VideoApp.xcodeprojwith Xcode. - In Xcode navigate to the Signing & Capabilities pane of the project editor for the
Video-Communitytarget. - Change
Teamto your team. - Change
Bundle identifierto something unique. - Check
Automatically manage signing.
- In Xcode use the Scheme menu to select the
Video-Communityscheme. - In Xcode use the Scheme menu to select a destination. Cameras do not work in the simulator so select a device for best results.
- Run
⌘Rthe app.
The Video-Internal scheme uses authentication that is only available to Twilio employees in order to make internal testing easier.
For each device:
- Run the app.
- Enter any unique name in the
Your namefield. - Enter the passcode from Deploy Twilio Access Token Server in the
Passcodefield. - Tap
Sign in. - Enter a room name.
- Tap
Continue. - Configure the camera and microphone and tap
Join Now.
The passcode will expire after one week. Follow the steps below to sign in with a new passcode.
- Generate a new passcode.
- In the app tap
Settings > Sign Out. - Repeat the steps above.
NOTE: Usage charges will apply for video calls. See pricing for more information.
This app uses SwiftUI. SwiftUI and Combine work particularly well for the video collaboration features in this app, which involve a lot of real-time state changes. SwiftUI has allowed us to build a better app with a lot less code.
If your app uses UIKit or an older version of SwiftUI, you should still be able to use a lot of code from this repo in your app. Here are some tips:
- UIKit can display SwiftUI views and SwiftUI can display UIKit views, so you may be able to use
SwiftUIcode from this repo even if your app is currently allUIKit. - Use the before-swift-ui tag to view the app source prior to converting from
UIKittoSwiftUI. It has a lot of the same video collaboration features but the UI isn't as nice. - If you can use
SwiftUIbut have to support iOS 13, most of the app should work well. The main issue will beLazyVGridrequires iOS 14. However our usage ofLazyVGridis very basic with no scrolling so it shouldn't be a lot of work to replace it with a custom grid built withHStackandVStack. - If you don't want to use
SwiftUIbut can useCombine(requires iOS 13), you should be able to use all of the view models andTwilioVideointegration code. For the UI, replace theSwiftUIcode with your ownUIKitimplementation. TheCombineinterface provided by the view models andTwilioVideointegration layer should be nice forUIKitto use. - If you need to support older than iOS 13, you will have to replace the
SwiftUIcode with your ownUIKitimplementation, and replace theCombinecode used in the view models andTwilioVideointegration layer with something else. It shouldn't be a lot of work to replaceCombinewithNotificationCenteror a multicast delegate.
For unit tests use:
Video-Internalscheme.Video-InternalTeststarget.Unittest plan.- Quick and Nimble to write unit tests.
- Swift Mock Generator to create mocks.
UI tests require credentials that are only available to Twilio employees.
- Running tests
⌘Uwill crash if the app was run⌘Ron the device previously. See issue #12 for a workaround and more details.
Twilio employees should follow these instructions for internal testing.
Apache 2.0 license. See the LICENSE file for details.