-
Notifications
You must be signed in to change notification settings - Fork 5
global configuration
Before configuring any Job that uses this plugin, you first need to setup an xCP Environment. You should create an xCP Environment for each product (and patch!) version of xCP that you need to use.
For each xCP Environment, You will need to download from the EMC download site the xCP Designer and xms-tools packages.
You should extract both packages to a local directory on the same server running jenkins.
# adding version 2.1 Patch 10 under folder /opt/xCP2.1P10
$ mkdir -p /opt/xCP2.1P10
$ cd /opt/xCP2.1P10
$ unzip /path/to/archive/xms-tools-1.1.zip -d xms-tools-1.1
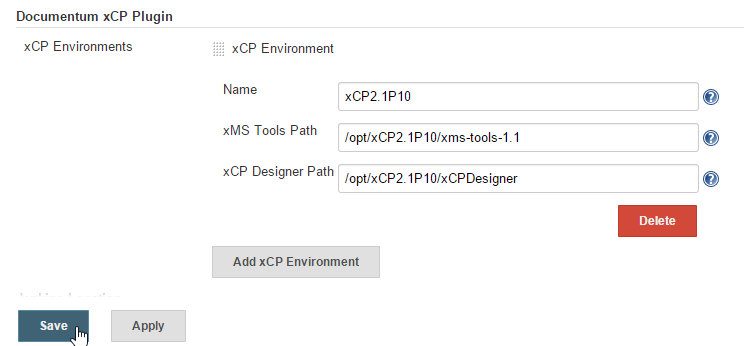
$ tar xvf /path/to/archive/xCPDesigner_linux64_2.1.tarTo create an environment, access the Manage Jenkins > Configure System screen and locate Documentum xCP Plugin section. After expanding the environment list, click on Add xCP Environment.

Set a (unique) environment name as well as the full path to both xCP Designer and xms-tools folders. Don't forget to press the Save button after all the changes.

That's it, you can now use your new configured environment for creating your build or deploy jobs (or both...).