Writing Content
You have a two basic options for writing and submitting content to MerchDocs:
- Write in Github: Fast and easy edits through the GitHub website. Write, commit, and branch all through a single page!
- Write like a Developer: Clone and write using an editor on your local computer.
We also provide guides to help you write:
- Writing guidelines: Tips and guides to writing for merchant docs.
- Writing styles and markdown: Quick and easy guide for using markdown code.
Our merchdocs repository currently supports two user guide versions: 2.4 (current) and 2.3
Our default (master) branch is used to publish the most current guide (2.4). If you need to make changes to our 2.3 guide, you must branch from the 2.3-production branch and submit your PR there.
If you are new to contribution and not used to working in a text editor, you can contribute directly in GitHub!

-
In your GitHub MerchDocs fork, locate a documentation file you want to edit.
You can search in Find file, or browse to a file in the
srcfolder. All content is located here.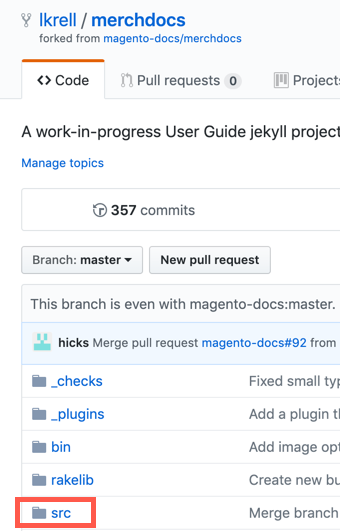
-
Click the edit icon.

-
Add, edit, and update content in the file.
-
When the changes are complete, scroll down and enter a meaningful commit message.
-
Select Create a new branch... and enter a name for the branch.
-
Click Commit file change.

 When ready to submit a pull request (PR), see Submit a pull request.
If you have experience with text editors or have a local developer environment, you can branch and write using Git. For detailed information, see Branches to PRs.

-
Clone the forked repo to your local computer.
-
Create a new branch.
For changes to our 2.4 guide, branch from master. For change to our 2.3 guide, branch from 2.3-production.
Use a name that best describes the work, or references a GitHub issue number.
-
Write content in the .md source files.
-
Commit updates to the branch with meaningful commit messages.
-
Push your branch to your fork to save work.
-
When ready, create a PR to contribute your code to Magento!
For your very first PR, you will be asked to sign the Adobe Contributor Agreement.
If looking for a text editor, we recommend:
Add markdown extensions and plugins to help with formatting and previews as you type. For Visual Studio Code, we recommend the following extensions for real-time previews and more:
- Markdown
- Markdown All in One
- Markdownlinter
- GitLens
- GitHub Pull Requests
- Git Project Manager
Markdown and Visual Studio Code documents markdown extensions, edits, and previews.
- Write content using Markdown, a simple way to format content.
- Focus your efforts on providing useful information for your fellow Magento developers and community members. For example, consider providing or revising code samples, important notes, and clarifying vague or ambiguous content.
- Define the goal of your topic. What exactly do you want to teach the reader?
- For new topics, add a title that reflects the content.
- Keep your sentences concise. Separate conceptual information from procedural steps.
- Remember to write in present tense, use the second person, and use active voice (not passive). For example, "The log captures commands, output...".
- Do not make global find-and-replace changes without first creating an issue and discussing it with us. Global changes can have unintended consequences.
- Combine multiple small changes (such as minor editorial and technical changes) into a single pull request. This helps us efficiently and effectively facilitate your contribution.
The following sections provide simple formats for content. For additional formats, see markdown guides like Markdown Guide.
For an example of documentation using multiple Markdown formats, see the following: Managing Sources in HTML and source code.

There are two basic things to do when you want to add a new page. The first is to create the markdown file that contains the content for your page. The second is to add the page to the site navigation so that users will find it alongside related information.
Our content files are organized within a series of folders (directories) that group them by subject area. Before you create a new content file, you should figure out where in belongs in the file structure. The easiest way to do that is to review the User Guide site and decide where it best fits within the existing content organization. When you find that spot, you can look at a neighboring page to determine where that source file is located and create your new markdown file in the same directory.
Each major section of the guide is defined by a .yml file located in the src/_data directory. These files are used to define the structure and navigation, where each one maps to a section of the guide as you see it displayed in the left navigation. If you would rather not work with these files to add your page to the structure, just request assistance in your PR and one of our Doc Team members will help you out and add the correct navigation link for your page.
Every file begins with front matter or metadata for your content. This information includes:
---
title: Title of the page
---
The title displays as the title of the page.

As you start writing content, it automatically generates along the left side (or margin). To create a paragraph, leave an empty line between sentences.
If you need to indent content, use the tab key. Each tab moves content to the right, indenting the page content.
To format for bolding and italics, see the following:
| Example | Output |
|---|---|
_emphasis_ |
emphasis |
**bold** |
bold |
We recommend using a dash (-) for each line in a bulleted list. Lists also support *.
- List Item 1
- List Item 2
- List Item 3
Numbered lists add numbers to a set of instructions or steps. Start every line with 1.. When building the documentation, the instructions automatically number for you.
For procedures that require supporting information for steps, such as screens or descriptions of the available option, make sure that you nest the supplemental information under the numbered item. As a general rule, the numbered item should be a single-sentence, simple directive. Then you can nest the information that is required for the reader to successfully complete that directive. Use three spaces to indent the supporting elements.
For example:
1. In the _Scheduled Changes_ box at the top of the page, click **Preview**.
The Preview opens a new browser tab and shows how the product will appear during the scheduled campaign.
{: .zoom}
_Promotion - preview scheduled Cchange_
1. In the upper-left corner of the Preview window, click **Calendar**.
The calendar detail shows other campaigns that are scheduled for the same day. Each record in the list is a separate campaign.
{: .zoom}
_List of Campaigns Scheduled for a Specific Date_
Simple tables can help format content. For example, lists of attributes with descriptions. Adding the style below the table helps with formatting column widths.
| Attribute | Description |
|--|--|
|name|Description of name|
|id|Description of ID|
Adding links to content outside of documentation such as an external website:
[text](web-address)
For example:
[GitHub](http://github.com)
Adding links to other pages or topics within the user guide:
[Topic Name]({% link <folder>/<filename>.md -%})
For example:
[Managing Inventory]({% link catalog/inventory-management.md -%})
We recommend saving all images in PNG format. Images are typically saved in the src/images location in one of the following folders:
-
imagesholds Open Source/all editions images -
images-b2bholds B2B images -
images-eeholds Commerce images
The code for displaying images is:
{: .zoom}
_Caption_
The {: .zoom} option is used for large images to display a scaled down image. Readers can click the image to open the full size. The caption displays under the image with emphasis.
For example:
{: .zoom}
_Import Settings_
To highlight content in an information or "note" box, use a standard info note. It adds a blue box and an info icon. Change info to tip or warning for those formats.
{:.bs-callout-info}
Note content
For additional formats and options, you can reference this basic template: General topic template