Working With iOS
In 9 cases out of 10 if you have a problem installing an app make sure your device is a 64 bit device. If not you will need to add the build hint ios.debug.archs=armv7. Notice that a 32 bit app will still work on a 64 bit device it will just display a performance warning.
If you have access to a Mac you can connect a cable and open xcode where you can use the device explorer console to look at messages which sometimes give a clue about what went wrong. If not here is a laundry list of a few things that might fail:
-
Make sure you built the debug version and not the appstore version. The appstore version won’t install on the device and can only be distributed via Apple’s store or testflight
-
Verify that you are sending a 32 bit build in the build hints using the build hint
ios.debug.archs=armv7. It’s only necessary if you have an older 32 bit device, see this. Notice that this only applies for debug builds, release builds include both 32 and 64 bit versions
|
Tip
|
Devices prior to iPad Air & iPhone 5s were 32 bit devices so iPhone 5s won’t need that flag but iPhone 5 or iPhone 5c will need it |
-
Check the the UDID is correct - if you got the UDID from an app then it’s probably wrong as apps don’t have access to the device UDID anymore. The way to get the UDID is either thru iOS Settings app or itunes
-
Make sure the device isn’t locked for installing 3rd party apps. I’ve had this when trying to install on my kids tablet which I configured to be child safe. This is configured in the settings as parental controls
-
Check that you "own" the package name. E.g. if you previously installed an app with the same package name but a different certificate a new install will fail (this is true for Android too). So if you installed the kitchen sink from the store then built one of your own and installed it there will be a collision.
Notice that this might be problematic if you use overly generic package names as someone else might have used them which is why you must always use your own domain -
Make sure the device has a modern enough version of iOS for the dependencies. I think the current minimum for hello world is 6.0.1 but some apps might require a newer version e.g. Intercom requires OS 8 or newer
-
Verify that you are using Safari when installing on the device (if you tried via cable that’s not a problem), some developers had issues with firefox not launching the install process
-
Check that the build hint
ios.includePushis set in a way that matches your iOS provisioning. So it must be false if you don’t have push within the provisioning profile
|
Note
|
As of version 5.0 (September 2018), screenshot generation is no longer enabled by default. Instead, the launch storyboard is used. Therefore much of the following section is no longer relevant. |
iOS apps seem to start almost instantly in comparison to Android apps.
There is a trick to that, iOS applications have a file traditionally called Default.png that includes a 320x480 pixel
image of the first screen of the application. This creates an "illusion" of the application instantly coming to life and
filling up with data, this is rather clever but is a source trouble as the platform grows [1].
|
Tip
|
You can disable the screenshot process entirely with the ios.fastBuild=true build hint. This will only apply for debug builds so you don’t need to worry about accidentally forgetting it in production.
|
The screenshot process was a pretty clever workaround but as Apple introduced the retina display 640x960 it required
a higher resolution [email protected] file, then it added the iPad, iPad Retina and iPhone 5 [2] iPhone 6 & 6+ all of which required images of their own.
To make matters worse iPad apps (and iPhone 6+ apps) can be launched in landscape mode so that’s two more resolutions for the horizontal orientation iPad. Overall as of this writing (or until Apple adds more resolutions) we need 16 screenshots for a typical iOS app:
| Resolution | File Name | Devices |
|---|---|---|
320x480 |
|
iPhone 3gs |
640x960 |
iPhone 4x |
|
640x1136 |
iPhone 5x |
|
1024x768 |
|
Non-retina ipads in portrait mode |
768x1024 |
|
Non-retina ipads in landscape mode |
2048x1536 |
Retina ipads in portrait mode |
|
1536x2048 |
Retina ipads in landscape mode |
|
750x1334 |
iPhone 6 |
|
1242x2208 |
iPhone 6 Plus Portrait |
|
2208x1242 |
iPhone 6 Plus Landscape |
|
2048×2732 |
iPad Pro Portrait |
|
2732x2048 |
iPad Pro Landscape |
|
1668×2224 |
10.5" iPad Pro Portrait |
|
2224x1668 |
10.5" iPad Pro Landscape |
|
1125×2436 |
iPhone X Portrait |
|
2436x1125 |
iPhone X Landscape |
|
Tip
|
You can predefine any of these files within the native/ios directory in your project. If the build server sees a file matching that exact name it will not generate a screenshot for that resolution
|
Native iOS developers can run their applications 16 times with blank data to grab these screenshots every time they change something in the first view of their application!
With Codename One this will not be feasible since the fonts and behavior might not match the device. Thus Codename One runs the application 16 times in the build servers, grabs the right sized screenshots in the simulator and then builds the app!
This means the process of the iPhone splash screen is almost seamless to the developer, however like every abstraction this too leaks.
The biggest problem developers have with this approach is for apps that use a web browser or native maps in the first screen of their app. This won’t work well as those are native widgets. They will look different during the screenshot process.
Another problem is with applications that require a connection immediately on startup, this can fail for the build process.
A solution to both problems is to create a special case for the first launch of the app where no data exists. This will setup the screenshot process correctly and let you proceed with the app as usual.
One of the first things we ran into when building one of our demos was a case where an app that wasn’t very big in terms of functionality took up 30mb!
After inspecting the app we discovered that the iPad retina PNG files were close to 5mb in size…
Since we had 2 of them (landscape and portrait) this was the main problem.
The iPad retina is a 2048x1536 device and with the leather theme the PNG images are almost impossible to compress because of the richness of details within that theme. This produced the huge screenshots that ballooned the application.
A very common use case is to have an application that pops up a login dialog on first run. This doesn’t work well since the server takes a picture of the login screen and the login screen will appear briefly for future loads and will never appear again.
One of the biggest obstacles is with heavyweight components, e.g. if you use a browser or maps on the first screen of the app you will see a partially loaded/distorted MapComponent and the native webkit browser obviously can’t be rendered properly by our servers.
The workaround for such issues is to have a splash screen that doesn’t include any of the above. Its OK to show it for a very brief amount of time since the screenshot process is pretty fast.
With the shift to Xcode 9, which is the default version on the Codename One build servers as of February 2018, it is now possible to use a launch-screen storyboard as the splash screen instead of launch images. This will potentially solve the issue of the proliferation of screenshots, as you can supply a single storyboard which will work on all devices. Launch screen storyboards are enabled by default (as of version 5.0/September 2018). You can disable them by adding the ios.generateSplashScreens=true build hint.
The key benefit of using a launch storyboard right now is that it allows your app to be used in split-screen mode. Storyboards, however, work a little bit differently than launch images. They don’t show a screenshot of the first page of your app. The default Codename One launch storyboard simply shows your app’s icon in the middle of the screen. You can customize the launch screen by providing one or more of the following files in your project’s native/ios directory
-
Launch.Foreground.png- Will be shown instead of your app’s icon in the center of the screen. -
Launch.Background.png- Will fill the background of the screen. -
LaunchScreen.storyboard- A custom storyboard developed in Xcode, that will be used instead of the default storyboard.
|
Important
|
Make sure to add the ios.multitasking=true build hint, or your launch storyboard will not be used.
|
|
Note
|
Changes to the launch screen will not take effect until the device has been restarted. I.e. If you install your app on a device, then you make changes to the launch screen and update the app, the launch screen won’t change until the device is restarted. |
Local notifications are similar to push notifications, except that they are initiated locally by the app, rather than remotely. They are useful for communicating information to the user while the app is running in the background, since they manifest themselves as pop-up notifications on supported devices.
|
Tip
|
To set the notification icon on Android place a 24x24 icon named ic_stat_notify.png under the native/android folder of the app. The icon can be white with transparency areas
|
The process for sending a notification is:
-
Create a LocalNotification object with the information you want to send in the notification.
-
Pass the object to
Display.scheduleLocalNotification().
Notifications can either be set up as one-time only or as repeating.
LocalNotification n = new LocalNotification();
n.setId("demo-notification");
n.setAlertBody("It's time to take a break and look at me");
n.setAlertTitle("Break Time!");
n.setAlertSound("beep-01a.mp3");

Display.getInstance().scheduleLocalNotification(
        n,
        System.currentTimeMillis() + 10 * 1000, // fire date/time
        LocalNotification.REPEAT_MINUTE  // Whether to repeat and what frequency
);
The resulting notification will look like
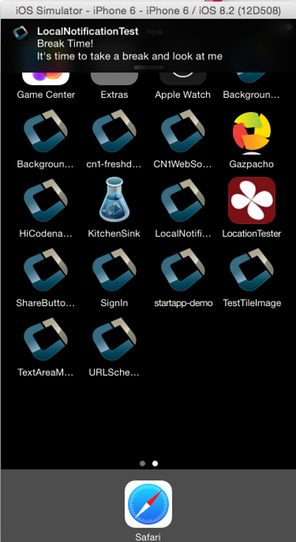
The API for receiving/handling local notifications is also similar to push. Your application’s main lifecycle class needs to implement the com.codename1.notifications.LocalNotificationCallback interface which includes a single method:
public void localNotificationReceived(String notificationId)The notificationId parameter will match the id value of the notification as set using LocalNotification.setId().
public class BackgroundLocationDemo implements LocalNotificationCallback {
    //...

    public void init(Object context) {
        //...
    }

    public void start() {
        //...

    }

    public void stop() {
        //...
    }

    public void destroy() {
        //...
    }

    public void localNotificationReceived(String notificationId) {
        System.out.println("Received local notification "+notificationId);
    }
}|
Note
|
localNotificationReceived() is only called when the user responds to the notification by tapping on the alert. If the user doesn’t click on the notification, then this event handler will never be fired.
|
Repeating notifications will continue until they are canceled by the app. You can cancel a single notification by calling:
Display.getInstance().cancelLocalNotification(notificationId);Where notificationId is the string id that was set for the notification using LocalNotification.setId().
Apple provides the ability to distribute beta versions of your application to beta testers using testflight. This allows you to recruit up to 1000 beta testers without the typical UDID limits a typical Apple account has.
|
Note
|
This is supported for pro users as part of the crash protection feature. |
To take advantage of that capability use the build hint ios.testFlight=true and then submit the app to the store for
beta testing. Make sure to use a release build target.
Due to security exploits Apple blocked some access to insecure URL’s which means that http code that worked before could stop working for you on iOS 9+. This is generally a good move, you should use https and avoid http as much as possible but that’s sometimes impractical especially when working with an internal or debug environment.
You can disable the strict URL checks from Apple by using the venerable ios.plistInject build hint and setting it to:
<key>NSAppTransportSecurity</key><dict><key>NSAllowsArbitraryLoads</key><true/></dict>However, it seems that Apple will reject your app if you just include that and don’t have a good reason.
CocoaPods is a dependency manager for Swift and Objective-C Cocoa projects. It has over eighteen thousand libraries and can help you scale your projects elegantly. Cocoapods can be used in your Codename One project to include native iOS libraries without having to go through the hassle of bundling the actual library into your project. Rather than bundling .h and .a files in your ios/native directory, you can specify which "pods" your app uses via the ios.pods build hint. (There are other build hints also if you need more advanced features).
Examples
Include the AFNetworking library in your app:
ios.pods=AFNetworking
Include the AFNetworking version 3.0.x library in your app:
ios.pods=AFNetworking ~> 3.0
For full versioning syntax specifying pods see the Podfile spec for the "pod" directive.
Multiple pods can be separated by either commas or semi-colons in the value of the ios.pods build hint. E.g. To include GoogleMaps and AFNetworking, you could:
ios.pods=GoogleMaps,AFNetworking
Or specifying versions:
ios.pods=AFNetworking ~> 3.0,GoogleMaps
ios.pods.platform : The minimum platform to target. In some cases, Cocoapods require functionality that is not in older version of iOS. For example, the GoogleMaps pod requires iOS 7.0 or higher, so you would need to add the ios.pods.platform=7.0 build hint.
ios.pods.sources : Some pods require that you specify a URL for the source of the pod spec. This may be optional if the spec is hosted in the central CocoaPods source (https://github.com/CocoaPods/Specs.git).
Most documentation for Cocoapods "pods" provide instructions on what you need to add to your Xcode project’s PodFile. Here is an example from the GoogleMaps cocoapod to show you how a PodFile can be converted into equivalent build hints in a Codename One project.
The GoogleMaps cocoapod directs you to add the following to your PodFile:
source 'https://github.com/CocoaPods/Specs.git'
platform :ios, '7.0'
pod 'GoogleMaps'
This would translate to the following build hints in your Codename One project:
ios.pods.sources=https://github.com/CocoaPods/Specs.git
ios.pods.platform=7.0
ios.pods=GoogleMaps
(Note that the ios.pods.sources directive is optional).
If you need to use a dynamic framework (e.g. SomeThirdPartySDK.framework), and it isn’t available via cocoapods, then you can add it to your project by simply zipping up the framework and copying it to your native/ios directory.
e.g. native/ios/SomeThirdPartySDK.framework.zip
There are no build hints necessary for this approach. The build server will automatically detect the framework and link it into your app.