Resources that are packaged within the "JAR" don’t really belong in this section of the developer guide but since they are often confused with Storage/FileSystemStorage this might be the best place to clarify what they are.
You can place arbitrary files within the src directory of a Codename One project. This file will get packaged into the final distribution. In standard Java SE you can usually do something like:
InputStream i = getClass().getResourceAsStream("/myFile");This isn’t guaranteed to work on all platforms and will probably fail on some. Instead you should use something such as:
InputStream i = Display.getInstance().getResourceAsStream(getClass(), "/myFile");This isn’t the only limitation though, you can use hierarchies so something like this would fail:
InputStream i = Display.getInstance().getResourceAsStream(getClass(), "/res/myFile");You can’t use relative paths either so this will fail as well (notice the lack of the first slash):
InputStream i = Display.getInstance().getResourceAsStream(getClass(), "myFile");The reason for those limitations is portability, on iOS and Android resources behave quite differently so supporting the full Java SE semantics is unrealistic.
|
Warning
|
This is even worse in some regards. Because of the way iOS works with resources some unique file names might fail e.g. if you use the @ character or have a . more than once (e.g. file.ext.act)
|
Notice that just like in Java SE, the entries within the "JAR" are read only and can’t be modified. You can’t gain access to the actual file, only to the stream!
Storage is accessed via the Storage
class. It is a flat filesystem like interface and contains the ability to list/delete and write to named storage entries.
The Storage API also provides convenient methods to write objects to Storage and read them from Storage
specifically readObject & writeObject.
|
Tip
|
The objects in Storage are usually deleted when an app is uninstalled but are retained between application updates. A notable exception is Android which, on some devices, keeps by default objects in Storage after app uninstalling. To force Android to remove them on app uninstalling, use the build hint android.allowBackup=false
|
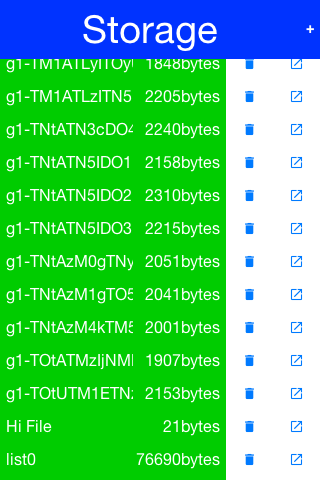
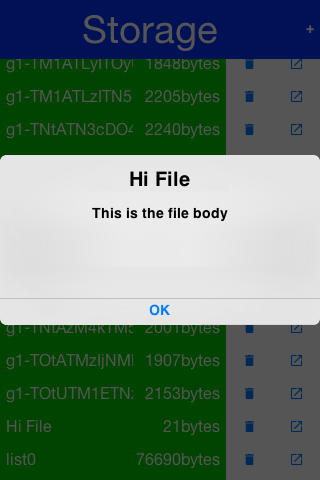
The sample code below demonstrates listing the content of the storage, adding/viewing and deleting entries within the storage:
Toolbar.setGlobalToolbar(true);
Form hi = new Form("Storage", new BoxLayout(BoxLayout.Y_AXIS));
hi.getToolbar().addCommandToRightBar("+", null, e -> {
    TextField tf = new TextField("", "File Name", 20, TextField.ANY);
    TextArea body = new TextArea(5, 20);
    body.setHint("File Body");
    Command ok = new Command("OK");
    Command cancel = new Command("Cancel");
    Command result = Dialog.show("File Name", BorderLayout.north(tf).add(BorderLayout.CENTER, body), ok, cancel);
    if(ok == result) {
        try(OutputStream os = Storage.getInstance().createOutputStream(tf.getText());) {
            os.write(body.getText().getBytes("UTF-8"));
            createFileEntry(hi, tf.getText());
            hi.getContentPane().animateLayout(250);
        } catch(IOException err) {
            Log.e(err);
        }
    }
});
for(String file : Storage.getInstance().listEntries()) {
    createFileEntry(hi, file);
}
hi.show();

private void createFileEntry(Form hi, String file) {
   Label fileField = new Label(file);
   Button delete = new Button();
   Button view = new Button();
   FontImage.setMaterialIcon(delete, FontImage.MATERIAL_DELETE);
   FontImage.setMaterialIcon(view, FontImage.MATERIAL_OPEN_IN_NEW);
   Container content = BorderLayout.center(fileField);
   int size = Storage.getInstance().entrySize(file);
   content.add(BorderLayout.EAST, BoxLayout.encloseX(new Label(size + "bytes"), delete, view));
   delete.addActionListener(e -> {
       Storage.getInstance().deleteStorageFile(file);
       content.setY(hi.getWidth());
       hi.getContentPane().animateUnlayoutAndWait(150, 255);
       hi.removeComponent(content);
       hi.getContentPane().animateLayout(150);
   });
   view.addActionListener(e -> {
       try(InputStream is = Storage.getInstance().createInputStream(file);) {
           String s = Util.readToString(is, "UTF-8");
           Dialog.show(file, s, "OK", null);
       } catch(IOException err) {
           Log.e(err);
       }
   });
   hi.add(content);
}
Storage also offers a very simple API in the form of the Preferences class. The Preferences class allows developers
to store simple variables, strings, numbers, booleans etc. in storage without writing any storage code. This is a common use case within applications e.g. you have a server token that you need to store you can store it like this:
Preferences.set("token", myToken);You can then read the token like this:
String token = Preferences.get("token", null);|
Warning
|
This gets somewhat confusing with primitive numbers e.g. if you use Preferences.set("primitiveLongValue", myLongNumber) then invoke Preferences.get("primitiveLongValue", 0) you might get an exception!This would happen because the value is physically a Long object but you are trying to get an Integer. The workaround is to remain consistent and use code like this Preferences.get("primitiveLongValue", (long)0).
|
FileSystemStorage provides file system access. It maps to the underlying OS’s file system API providing most of the common operations expected from a file API somewhat in the vain of java.io.File & java.io.FileInputStream e.g. opening, renaming, deleting etc.
Notice that the file system API is somewhat platform specific in its behavior. All paths used the API should be absolute otherwise they are not guaranteed to work.
The main reason java.io.File & java.io.FileInputStream weren’t supported directly has a lot to do with the richness of those two API’s. They effectively allow saving a file anywhere, however mobile devices are far more restrictive and don’t allow apps to see/modify files that are owned by other apps.
All paths in FileSystemStorage are absolute, this simplifies the issue of portability significantly since the concept of relativity and current working directory aren’t very portable.
All URL’s use the / as their path separator we try to enforce this behavior even in Windows.
Directories end with the / character and thus can be easily distinguished by their name.
The FileSystemStorage API provides a getRoots() call to list the root directories of the file system (you can then "dig in" via the listFiles API). However, this is confusing and unintuitive for developers.
To simplify the process of creating/reading files we added the getAppHomePath() method. This method allows us to obtain the path to a directory where files can be stored/read.
We can use this directory to place an image to share as we did in the share sample.
|
Warning
|
A common Android hack is to write files to the SDCard storage to share them among apps. Android 4.x disabled the ability to write to arbitrary directories on the SDCard even when the appropriate permission was requested. |
A more advanced usage of the FileSystemStorage API can be a FileSystemStorage Tree:
Form hi = new Form("FileSystemTree", new BorderLayout());
TreeModel tm = new TreeModel() {
    @Override
    public Vector getChildren(Object parent) {
        String[] files;
        if(parent == null) {
            files = FileSystemStorage.getInstance().getRoots();
            return new Vector<Object>(Arrays.asList(files));
        } else {
            try {
                files = FileSystemStorage.getInstance().listFiles((String)parent);
            } catch(IOException err) {
                Log.e(err);
                files = new String[0];
            }
        }
        String p = (String)parent;
        Vector result = new Vector();
        for(String s : files) {
            result.add(p + s);
        }
        return result;
    }

    @Override
    public boolean isLeaf(Object node) {
        return !FileSystemStorage.getInstance().isDirectory((String)node);
    }
};
Tree t = new Tree(tm) {
    @Override
    protected String childToDisplayLabel(Object child) {
        String n = (String)child;
        int pos = n.lastIndexOf("/");
        if(pos < 0) {
            return n;
        }
        return n.substring(pos);
    }
};
hi.add(BorderLayout.CENTER, t);
hi.show();
The question of storage vs. file system is often confusing for novice mobile developers. This embeds two separate questions:
-
Why are there 2 API’s where one would have worked?
-
Which one should I pick?
The main reasons for the 2 API’s are technical. Many OS’s provide 2 ways of accessing data specific to the app and this is reflected within the API. E.g. on Android the FileSystemStorage maps to API’s such as java.io.FileInputStream whereas the Storage maps to Context.openFileInput().
The secondary reason for the two API’s is conceptual. FileSystemStorage is more powerful and in a sense provides more ways to fail, this is compounded by the complex on-device behavior of the API. Storage is designed to be friendlier to the uninitiated and more portable.
You should pick Storage unless you have a specific requirement that prevents it. Some API’s such as Capture expect a FileSystemStorage URI so in those cases this would also be a requirement.
Another case where FileSystemStorage is beneficial is the case of hierarchy or native API usage. If you need a a directory structure or need to communicate with a native API the FileSystemStorage approach is usually easier.
|
Important
|
In some OS’s the FileSystemStorage API can find the content of the Storage API. As one is implemented on top of the other. This is undocumented behavior that can change at any moment!
|
To summarize the differences between the 3 file storage options:
| Option | Storage | File System | JAR Resource |
|---|---|---|---|
Main Use Case |
General application Data |
Low level access |
Ship data within the app |
Initial State |
Blank |
Blank |
As defined by developer |
Modifiable |
Yes |
Yes |
No |
Supports Hierarchies |
No |
Yes |
No |
Most new devices contain one version of sqlite or another; sqlite is a very lightweight SQL database designed for embedding into devices. For portability we recommend avoiding SQL altogether since it is both fragmented between devices (different sqlite versions) and isn’t supported on all devices.
In general SQL seems overly complex for most embedded device programming tasks.
SQLite is supported on iOS, Android, RIM, Desktop & JavaScript builds. However, the JavaScript version of SQL has been deprecated and isn’t supported on all platforms.
You will notice that at this time support is still missing from the Windows builds.
The biggest issue with SQLite portability is in iOS. The SQLite version for most platforms is threadsafe and as a result very stable. However, the iOS version is not!
This might not seem like a big deal normally, however if you forget to close a connection the GC might close it for you thus producing a crash. This is such a common occurrence that Codename One logs a warning when the GC collects a database resource on the simulator.
SQL is pretty powerful and very well suited for common tabular data. The Codename One SQL API is similar in spirit to JDBC but considerably simpler since many of the abstractions of JDBC designed for pluggable database architecture make no sense for a local database.
The Database API is a high level abstraction that allows you to open an arbitrary database file using syntax such as:
Database db = Display.getInstance().openOrCreate(“databaseName”);Some SQLite apps ship with a "ready made" database. We allow you to replace the DB file by using the code:
String path = Display.getInstance().getDatabasePath(“databaseName”);You can then use the FileSystemStorage class to write the content of your DB file into the path. Notice that it must be a valid SQLite file!
|
Warning
|
getDatabasePath() is not supported in the Javascript port. It will always return null.
|
This is very useful for applications that need to synchronize with a central server or applications that ship with a large database as part of their core product.
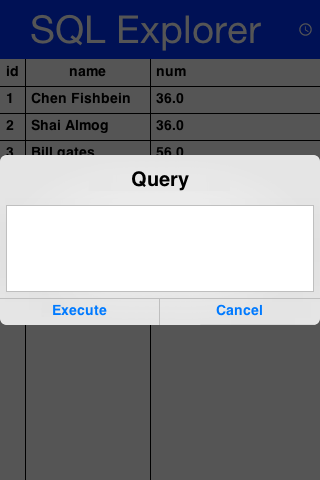
Working with a database is pretty trivial, the application logic below can send arbitrary queries to the database and present the results in a Table. You can probably integrate this code into your app as a debugging tool:
Toolbar.setGlobalToolbar(true);
Style s = UIManager.getInstance().getComponentStyle("TitleCommand");
FontImage icon = FontImage.createMaterial(FontImage.MATERIAL_QUERY_BUILDER, s);
Form hi = new Form("SQL Explorer", new BorderLayout());
hi.getToolbar().addCommandToRightBar("", icon, (e) -> {
    TextArea query = new TextArea(3, 80);
    Command ok = new Command("Execute");
    Command cancel = new Command("Cancel");
    if(Dialog.show("Query", query, ok, cancel) == ok) {
        Database db = null;
        Cursor cur = null;
        try {
            db = Display.getInstance().openOrCreate("MyDB.db");
            if(query.getText().startsWith("select")) {
                cur = db.executeQuery(query.getText());
                int columns = cur.getColumnCount();
                hi.removeAll();
                if(columns > 0) {
                    boolean next = cur.next();
                    if(next) {
                        ArrayList<String[]> data = new ArrayList<>();
                        String[] columnNames = new String[columns];
                        for(int iter = 0 ; iter < columns ; iter++) {
                            columnNames[iter] = cur.getColumnName(iter);
                        }
                        while(next) {
                            Row currentRow = cur.getRow();
                            String[] currentRowArray = new String[columns];
                            for(int iter = 0 ; iter < columns ; iter++) {
                                currentRowArray[iter] = currentRow.getString(iter);
                            }
                            data.add(currentRowArray);
                            next = cur.next();
                        }
                        Object[][] arr = new Object[data.size()][];
                        data.toArray(arr);
                        hi.add(BorderLayout.CENTER, new Table(new DefaultTableModel(columnNames, arr)));
                    } else {
                        hi.add(BorderLayout.CENTER, "Query returned no results");
                    }
                } else {
                    hi.add(BorderLayout.CENTER, "Query returned no results");
                }
            } else {
                db.execute(query.getText());
                hi.add(BorderLayout.CENTER, "Query completed successfully");
            }
            hi.revalidate();
        } catch(IOException err) {
            Log.e(err);
            hi.removeAll();
            hi.add(BorderLayout.CENTER, "Error: " + err);
            hi.revalidate();
        } finally {
            Util.cleanup(db);
            Util.cleanup(cur);
        }
    }
});
hi.show();
One of the more common problems in Network programming is spawning a new thread to handle the network operations. In Codename One this is done seamlessly and becomes unessential thanks to the NetworkManager.
NetworkManager effectively alleviates the need for managing network threads by managing the complexity of network threading. The connection request class can be used to facilitate web service requests when coupled with the JSON/XML parsing capabilities.
To open a connection one needs to use a ConnectionRequest object, which has some similarities to the networking mechanism in JavaScript but is obviously somewhat more elaborate.
You can send a get request to a URL using something like:
ConnectionRequest request = new ConnectionRequest(url, false);
request.addResponseListener((e) -> {
    // process the response
});

// request will be handled asynchronously
NetworkManager.getInstance().addToQueue(request);
Notice that you can also implement the same thing and much more by avoiding the response listener code and instead overriding the methods of the ConnectionRequest class which offers multiple points to override e.g.
ConnectionRequest request = new ConnectionRequest(url, false) {
   protected void readResponse(InputStream input) {
        // just read from the response input stream
   }

   protected void postResponse() {
        // invoked on the EDT after processing is complete to allow the networking code
        // to update the UI
   }

   protected void buildRequestBody(OutputStream os) {
        // writes post data, by default this “just works” but if you want to write this
       // manually then override this
   }
};
NetworkManager.getInstance().addToQueue(request);|
Tip
|
Notice that overriding buildRequestBody(OutputStream) will only work for POST requests and will replace writing the arguments
|
|
Important
|
You don’t need to close the output/input streams passed to the request methods. They are implicitly cleaned up. |
NetworkManager also supports synchronous requests which work in a similar way to Dialog via the invokeAndBlock call and thus don’t block the EDT [1] illegally. E.g. you can do something like this:
ConnectionRequest request = new ConnectionRequest(url, false);
// request will be handled synchronously
NetworkManager.getInstance().addToQueueAndWait(request);
byte[] resultOfRequest = request.getData();
Notice that in this case the addToQueueAndWait method returned after the connection completed. Also notice that this was totally legal to do on the EDT!
By default the NetworkManager launches with a single network thread. This is sufficient for very simple applications that don’t do too much networking but if you need to fetch many images concurrently and perform web services in parallel this might be an issue.
|
Warning
|
Once you increase the thread count there is no guarantee of order for your requests. Requests might not execute in the order with which you added them to the queue! |
To update the number of threads use:
NetworkManager.getInstance().updateThreadCount(4);All the callbacks in the ConnectionRequest occur on the network thread and not on the EDT!
There is one exception to this rule which is the postResponse() method designed to update the UI after the networking code completes.
|
Important
|
Never change the UI from a ConnectionRequest callback. You can either use a listener on the ConnectionRequest, use postResponse() (which is the only exception to this rule) or wrap your UI code with callSerially.
|
HTTP/S is a complex protocol that expects complex encoded data for its requests. Codename One tries to simplify and abstract most of these complexities behind common sense API’s while still providing the full low level access you would expect from such an API.
HTTP supports several "request methods", most commonly GET & POST but also a few others such as HEAD, PUT, DELETE etc.
Arguments in HTTP are passed differently between GET and POST methods. That is what the setPost method in Codename One determines, whether arguments added to the request should be placed using the GET semantics or the POST semantics.
So if we continue our example from above we can do something like this:
ConnectionRequest request = new ConnectionRequest(url, false);
request.addArgument("MyArgName", value);
This will implicitly add a get argument with the content of value. Notice that we don’t really care what value is. It’s implicitly HTTP encoded based on the get/post semantics. In this case it will use the get encoding since we passed false to the constructor.
A simpler implementation could do something like this:
ConnectionRequest request = new ConnectionRequest(url +
    "MyArgName=" + Util.encodeUrl(value), false);
This would be almost identical but doesn’t provide the convenience for switching back and forth between GET/POST and it isn’t as fluent.
We can skip the encoding in complex cases where server code expects illegal HTTP characters (this happens) using the addArgumentNoEncoding method. We can also add multiple arguments with the same key using addArgumentArray.
As we explained above, the setPost() method allows us to manipulate the get/post semantics of a request. This implicitly changes the POST or GET method submitted to the server.
However, if you wish to have finer grained control over the submission process e.g. for making a HEAD request you can do this with code like:
ConnectionRequest request = new ConnectionRequest(url, false);
request.setHttpMethod("HEAD");When communicating with HTTP servers we often pass data within headers mostly for authentication/authorization but also to convey various properties.
Some headers are builtin as direct API’s e.g. content type is directly exposed within the API since it’s a pretty common use case. We can set the content type of a post request using:
ConnectionRequest request = new ConnectionRequest(url, true);
request.setContentType("text/xml");
We can also add any arbitrary header type we want, e.g. a very common use case is basic authorization where the authorization header includes the Base64 encoded user/password combination as such:
String authCode = user + ":" + password;
String authHeader = "Basic " + Base64.encode(authCode.getBytes());
request.addRequestHeader("Authorization", authHeader);
This can be quite tedious to do if you want all requests from your app to use this header. For this use case you can just use:
String authCode = user + ":" + password;
String authHeader = "Basic " + Base64.encode(authCode.getBytes());
NetworkManager.getInstance().addDefaultHeader("Authorization", authHeader);
Server returned headers are a bit trickier to read. We need to subclass the connection request and override the readHeaders method e.g.:
ConnectionRequest request = new ConnectionRequest(url, false) {
    protected void readHeaders(Object connection) throws IOException {
        String[] headerNames = getHeaderFieldNames(connection);
        for(String headerName : headerNames) {
            String headerValue = getHeader(headerName);
            //....
        }
    }
    protected void readResponse(InputStream input) {
        // just read from the response input stream
    }
};
NetworkManager.getInstance().addToQueue(request);
Here we can extract the headers one by one to handle complex headers such as cookies, authentication etc.
As you noticed above practically all of the methods in the ConectionRequest throw IOException. This allows you to avoid the try/catch semantics and just let the error propagate up the chain so it can be handled uniformly by the application.
There are two distinct placed where you can handle a networking error:
-
The
ConnectionRequest- by overriding callback methods -
The
NetworkManagererror handler
Notice that the NetworkManager error handler takes precedence thus allowing you to define a global policy for network error handling by consuming errors.
E.g. if I would like to block all network errors from showing anything to the user I could do something like this:
NetworkManager.getInstance().addToQueue(request);
NetworkManager.getInstance().addErrorListener((e) -> e.consume());
The error listener is invoked first with the NetworkEvent matching the error. Consuming the event prevents it from propagating further down the chain into the ConnectionRequest callbacks.
We can also override the error callbacks of the various types in the request e.g. in the case of a server error code we can do:
ConnectionRequest request = new ConnectionRequest(url, false) {
    protected void handleErrorResponseCode(int code, String message) {
        if(code == 444) {
            // do something
        }
    }
    protected void readResponse(InputStream input) {
        // just read from the response input stream
    }
};
NetworkManager.getInstance().addToQueue(request);|
Important
|
The error callback callback is triggered in the network thread! As a result it can’t access the UI to show a Dialog or anything like that.
|
Another approach is to use the setFailSilently(true) method on the ConnectionRequest. This will prevent the ConnectionRequest from displaying any errors to the user. It’s a very powerful strategy if you use the synchronous version of the API’s e.g.:
ConnectionRequest request = new ConnectionRequest(url, false);
request.setFailSilently(true);
NetworkManager.getInstance().addToQueueAndWait(request);
if(request.getResponseCode() != 200) {
    // probably an error...
}|
Tip
|
This code will only work with the synchronous "AndWait" version of the method since the response code will take a while to return for the non-wait version. |
When we get an error code that isn’t 200/300 we ignore the result. This is problematic as the result might contain information we need. E.g. many webservices provide further XML/JSON based details describing the reason for the error code.
Calling setReadResponseForErrors(true) will trigger a mode where even errors will receive the readResponse callback with the error stream. This also means that API’s like getData and the listener API’s will also work correctly in case of error.
Gzip is a very common compression format based on the lz algorithm, it’s used by web servers around the world to compress data.
Codename One supports GZipInputStream and GZipOutputStream, which allow you to compress data seamlessly into a stream and extract compressed data from a stream. This is very useful and can be applied to every arbitrary stream.
Codename One also features a GZConnectionRequest, which will automatically unzip an HTTP response if it is indeed gzipped. Notice that some devices (iOS) always request gzip’ed data and always decompress it for us, however in the case of iOS it doesn’t remove the gziped header. The GZConnectionRequest is aware of such behaviors so it’s better to use that when connecting to the network (if applicable).
By default GZConnectionRequest doesn’t request gzipped data (only unzips it when its received) but its pretty easy to do so just add the HTTP header Accept-Encoding: gzip e.g.:
GZConnectionRequest con = new GZConnectionRequest();
con.addRequestHeader("Accept-Encoding", "gzip");
Do the rest as usual and you should have smaller responses from the servers.
MultipartRequest tries to simplify the process of uploading a file from the local device to a remote server.
You can always submit data in the buildRequestBody but this is flaky and has some limitations in terms of devices/size allowed. HTTP standardized file upload capabilities thru the multipart request protocol, this is implemented by countless servers and is well documented. Codename One supports this out of the box:
MultipartRequest request = new MultipartRequest();
request.setUrl(url);
request.addData("myFileName", fullPathToFile, "text/plain")
NetworkManager.getInstance().addToQueue(request);|
Tip
|
MultipartRequest is a ConnectionRequest most stuff you expect from there should work. Even addArgument etc.
|
Since we assume most developers reading this will be familiar with Java here is the way to implement the multipart upload in the servlet API:
@WebServlet(name = "UploadServlet", urlPatterns = {"/upload"})
@MultipartConfig(fileSizeThreshold = 1024 * 1024 * 100, // 10 MB
        maxFileSize = 1024 * 1024 * 150, // 50 MB
        maxRequestSize = 1024 * 1024 * 200)      // 100 MB
public class UploadServlet extends HttpServlet {

    @Override
    public void doPost(HttpServletRequest req, HttpServletResponse res)
            throws ServletException, IOException {
        Collection<Part> parts = req.getParts();
        Part data = parts.iterator().next();
        try(InputStream is = data.getInputStream();) {}
            // store or do something with the input stream
        }
    }
}Codename One has several built in parsers for JSON, XML, CSV & Properties formats. You can use those parsers to read data from the Internet or data that is shipping with your product. E.g. use the CSV data to setup default values for your application.
All our parsers are designed with simplicity and small distribution size; they don’t validate and will fail in odd ways when faced with broken data. The main logic behind this is that validation takes up CPU time on the device where CPU is a precious resource.
CSV is probably the easiest to use, the "Comma Separated Values" format is just a list of values separated by commas (or some other character) with new lines to indicate another row in the table. These usually map well to an Excel spreadsheet or database table and are supported by default in all spreadsheets.
To parse a CSV just use the CSVParser class as such:
Form hi = new Form("CSV Parsing", new BorderLayout());
CSVParser parser = new CSVParser();
try(Reader r = new CharArrayReader("1997,Ford,E350,\"Super, \"\"luxurious\"\" truck\"".toCharArray());) {
    String[][] data = parser.parse(r);
    String[] columnNames = new String[data[0].length];
    for(int iter=  0 ; iter < columnNames.length ; iter++) {
        columnNames[iter] = "Col " + (iter + 1);
    }
    TableModel tm = new DefaultTableModel(columnNames, data);
    hi.add(BorderLayout.CENTER, new Table(tm));
} catch(IOException err) {
    Log.e(err);
}
hi.show();
The data contains a two dimensional array of the CSV content. You can change the delimiter character by using the CSVParser constructor that accepts a character.
|
Important
|
Notice that we used CharArrayReader from the com.codename1.io package for this sample. Normally you would want to use java.util.InputStreamReader for real world data.
|
The JSON ("Java Script Object Notation") format is popular on the web for passing values to/from webservices since it works so well with JavaScript. Parsing JSON is just as easy but has two different variations. You can use the JSONParser class to build a tree of the JSON data as such:
JSONParser parser = new JSONParser();
Hashtable response = parser.parse(reader);
The response is a Map containing a nested hierarchy of Collection (java.util.List), Strings and numbers to represent the content of the submitted JSON. To extract the data from a specific path just iterate the Map keys and recurs into it.
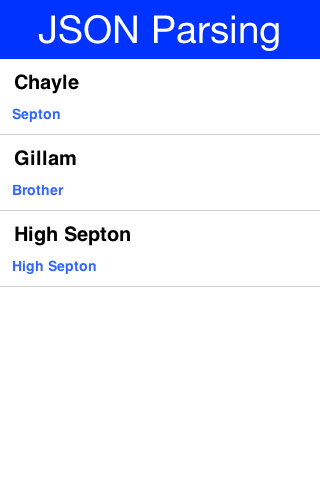
The sample below uses results from an API of ice and fire that queries structured data about the "Song Of Ice & Fire" book series. Here is a sample result returned from the API for the query http://www.anapioficeandfire.com/api/characters?page=5&pageSize=3 :
[
  {
    "url": "http://www.anapioficeandfire.com/api/characters/13",
    "name": "Chayle",
    "culture": "",
    "born": "",
    "died": "In 299 AC, at Winterfell",
    "titles": [
      "Septon"
    ],
    "aliases": [],
    "father": "",
    "mother": "",
    "spouse": "",
    "allegiances": [],
    "books": [
      "http://www.anapioficeandfire.com/api/books/1",
      "http://www.anapioficeandfire.com/api/books/2",
      "http://www.anapioficeandfire.com/api/books/3"
    ],
    "povBooks": [],
    "tvSeries": [],
    "playedBy": []
  },
  {
    "url": "http://www.anapioficeandfire.com/api/characters/14",
    "name": "Gillam",
    "culture": "",
    "born": "",
    "died": "",
    "titles": [
      "Brother"
    ],
    "aliases": [],
    "father": "",
    "mother": "",
    "spouse": "",
    "allegiances": [],
    "books": [
      "http://www.anapioficeandfire.com/api/books/5"
    ],
    "povBooks": [],
    "tvSeries": [],
    "playedBy": []
  },
  {
    "url": "http://www.anapioficeandfire.com/api/characters/15",
    "name": "High Septon",
    "culture": "",
    "born": "",
    "died": "",
    "titles": [
      "High Septon",
      "His High Holiness",
      "Father of the Faithful",
      "Voice of the Seven on Earth"
    ],
    "aliases": [
      "The High Sparrow"
    ],
    "father": "",
    "mother": "",
    "spouse": "",
    "allegiances": [],
    "books": [
      "http://www.anapioficeandfire.com/api/books/5",
      "http://www.anapioficeandfire.com/api/books/8"
    ],
    "povBooks": [],
    "tvSeries": [
      "Season 5"
    ],
    "playedBy": [
      "Jonathan Pryce"
    ]
  }
]
We will place that into a file named "anapioficeandfire.json" in the src directory to make the next sample simpler:
Form hi = new Form("JSON Parsing", new BoxLayout(BoxLayout.Y_AXIS));
JSONParser json = new JSONParser();
try(Reader r = new InputStreamReader(Display.getInstance().getResourceAsStream(getClass(), "/anapioficeandfire.json"), "UTF-8");) {
    Map<String, Object> data = json.parseJSON(r);
    java.util.List<Map<String, Object>> content = (java.util.List<Map<String, Object>>)data.get("root"); // (1)
    for(Map<String, Object> obj : content) { // (2)
        String url = (String)obj.get("url");
        String name = (String)obj.get("name");
        java.util.List<String> titles =  (java.util.List<String>)obj.get("titles"); // (3)
        if(name == null || name.length() == 0) {
            java.util.List<String> aliases = (java.util.List<String>)obj.get("aliases");
            if(aliases != null && aliases.size() > 0) {
                name = aliases.get(0);
            }
        }
        MultiButton mb = new MultiButton(name);
        if(titles != null && titles.size() > 0) {
            mb.setTextLine2(titles.get(0));
        }
        mb.addActionListener((e) -> Display.getInstance().execute(url));
        hi.add(mb);
    }
} catch(IOException err) {
    Log.e(err);
}
hi.show();-
The
JSONParserreturns aMapwhich is great if the root object is aMapbut in some cases its a list of elements (as is the case above). In this case a special case "root" element is created to contain the actual list of elements. -
We rely that the entries are all maps, this might not be the case for every API type.
-
Notice that the "titles" and "aliases" entries are both lists of elements. We use
java.util.Listto avoid a clash withcom.codename1.ui.List.
|
Tip
|
The structure of the returned map is sometimes unintuitive when looking at the raw JSON. The easiest thing to do is set a breakpoint on the method and use the inspect variables capability of your IDE to inspect the returned element hierarchy while writing the code to extract that data |
An alternative approach is to use the static data parse() method of the JSONParser class and implement a callback parser e.g.:
JSONParser.parse(reader, callback);
Notice that a static version of the method is used! The callback object is an instance of the JSONParseCallback interface, which includes multiple methods. These methods are invoked by the parser to indicate internal parser states, this is similar to the way traditional XML SAX event parsers work.
The XMLParser started its life as an HTML parser built for displaying mobile HTML. That usage has since been deprecated but the parser can still parse many HTML pages and is very "loose" in terms of verification. This is both good and bad as the parser will work with invalid data without complaining.
The simplest usage of XMLParser looks a bit like this:
XMLParser parser = new XMLParser();
Element elem = parser.parse(reader);
The Element contains children and attributes. It represents a tag within the XML document and even the root document itself. You can iterate over the XML tree to extract the data from within the XML file.
We’ve had a great sample of working with XMLParser in the
Tree Section of this guide.
XMLParser has the complimentary XMLWriter class which can generate XML from the Element hierarchy. This allows a developers to mutate (modify) the elements and save them to a writer stream.
The Result class provides a subset of
XPath, but it is not limited to just XML documents, it can also work with JSON documents, and even with raw Map objects.
Lets start by demonstrating how to process a response from the Google Reverse Geocoder API. Lets start with this XML snippet:
<?xml version="1.0" encoding="UTF-8"?>
<GeocodeResponse>
  <status>OK</status>
  <result> <!-- (irrelevant content removed) -->
      <address_component>
          <long_name>London</long_name>
          <short_name>London</short_name>
          <type>locality</type>
          <type>political</type>
      </address_component>
      <!-- (irrelevant content removed) -->
     <address_component>
          <long_name>Ontario</long_name>
          <short_name>ON</short_name>
          <type>administrative_area_level_1</type>
          <type>political</type>
      </address_component>
      <address_component>
         <long_name>Canada</long_name>
         <short_name>CA</short_name>
         <type>country</type>
         <type>political</type>
      </address_component>
  </result>
</GeocodeResponse>
We want to extract some of the data above into simpler string results. We can do this using:
Result result = Result.fromContent(input, Result.XML);
String country = result.getAsString("/result/address_component[type='country']/long_name");
String region = result.getAsString("/result/address_component[type='administrative_area_level_1']/long_name");
String city = result.getAsString("/result/address_component[type='locality']/long_name");
If you are at all familiar with processing responses from webservices, you will notice that what would normally require several lines of code of selecting and testing nodes in regular java can now be done in a single line using the new path expressions.
In the code above, input can be any of:
-
InputStreamdirectly fromConnectionRequest.readResponse(java.io.InputStream). -
XML or JSON document in the form of a {@code String}</li>
-
JSON DOM
Mapreturned from JSONParser
To use the expression processor when calling a webservice, you could use something like the following to parse JSON (notice this is interchangeable between JSON and XML):
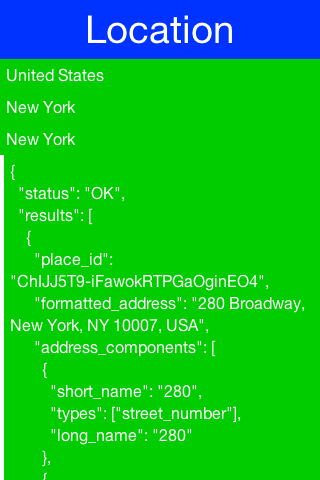
Form hi = new Form("Location", new BoxLayout(BoxLayout.Y_AXIS));
hi.add("Pinpointing Location");
Display.getInstance().callSerially(() -> {
    Location l = Display.getInstance().getLocationManager().getCurrentLocationSync();
    ConnectionRequest request = new ConnectionRequest("http://maps.googleapis.com/maps/api/geocode/json", false) {
        private String country;
        private String region;
        private String city;
        private String json;

        @Override
        protected void readResponse(InputStream input) throws IOException {
                Result result = Result.fromContent(input, Result.JSON);
                country = result.getAsString("/results/address_components[types='country']/long_name");
                region = result.getAsString("/results/address_components[types='administrative_area_level_1']/long_name");
                city = result.getAsString("/results/address_components[types='locality']/long_name");
                json = result.toString();
        }

        @Override
        protected void postResponse() {
            hi.removeAll();
            hi.add(country);
            hi.add(region);
            hi.add(city);
            hi.add(new SpanLabel(json));
            hi.revalidate();
        }
    };
    request.setContentType("application/json");
    request.addRequestHeader("Accept", "application/json");
    request.addArgument("sensor", "true");
    request.addArgument("latlng", l.getLatitude() + "," + l.getLongitude());

    NetworkManager.getInstance().addToQueue(request);
});
hi.show();
[source,java]
The returned JSON looks something like this (notice it’s snipped because the data is too long):
{
  "status": "OK",
  "results": [
    {
      "place_id": "ChIJJ5T9-iFawokRTPGaOginEO4",
      "formatted_address": "280 Broadway, New York, NY 10007, USA",
      "address_components": [
        {
          "short_name": "280",
          "types": ["street_number"],
          "long_name": "280"
        },
        {
          "short_name": "Broadway",
          "types": ["route"],
          "long_name": "Broadway"
        },
        {
          "short_name": "Lower Manhattan",
          "types": [
            "neighborhood",
            "political"
          ],
          "long_name": "Lower Manhattan"
        },
        {
          "short_name": "Manhattan",
          "types": [
            "sublocality_level_1",
            "sublocality",
            "political"
          ],
          "long_name": "Manhattan"
        },
        {
          "short_name": "New York",
          "types": [
            "locality",
            "political"
          ],
          "long_name": "New York"
        },
        {
          "short_name": "New York County",
          "types": [
            "administrative_area_level_2",
            "political"
          ],
          "long_name": "New York County"
        },
        {
          "short_name": "NY",
          "types": [
            "administrative_area_level_1",
            "political"
          ],
          "long_name": "New York"
        },
        {
          "short_name": "US",
          "types": [
            "country",
            "political"
          ],
          "long_name": "United States"
        },
        {
          "short_name": "10007",
          "types": ["postal_code"],
          "long_name": "10007"
        },
        {
          "short_name": "1868",
          "types": ["postal_code_suffix"],
          "long_name": "1868"
        }
      ],
      "types": ["street_address"],
      "geometry": {
        "viewport": {
          "northeast": {
            "lng": -74.0044642197085,
            "lat": 40.7156470802915
          },
          "southwest": {
            "lng": -74.0071621802915,
            "lat": 40.7129491197085
          }
        },
        "location_type": "ROOFTOP",
        "location": {
          "lng": -74.00581319999999,
          "lat": 40.7142981
        }
      }
    }
    /* SNIPED the rest */
  ]
}
The XML processor currently handles global selections by using a double slash anywhere within the expression, for example:
// get all address_component names anywhere in the document with a type "political"
String array[] = result.getAsStringArray("//address_component[type='political']/long_name");

// get all types anywhere under the second result (dimension is 0-based)
String array[] = result.getAsStringArray("/result[1]//type");|
Note
|
Notice that Google’s JSON webservice uses plural form for each of the node names in that API (ie. results, address_components, and types) where they don’t in the XML services (ie result, address_component etc.) |
It also possible to do some more complex expressions. We’ll use the following XML fragment for the next batch of examples:
<rankings type="aus" gender="male" date="2011-12-31">
    <player id="1036" coretennisid="6752" rank="1"
       delta="0" singlespoints="485000" doublespoints="675"
       deductedpoints="0" totalpoints="485675">
        <firstname>Bernard</firstname>
        <lastname>Tomic</lastname>
        <town>SOUTHPORT</town>
        <state>QLD</state>
        <dob>1992-10-21</dob>
    </player>
    <player id="2585" coretennisid="1500" rank="2"
       delta="0" singlespoints="313500" doublespoints="12630"
       deductedpoints="0" totalpoints="326130">
        <firstname>Mathew</firstname>
        <lastname>Ebden</lastname>
        <town>CHURCHLANDS</town>
        <state>WA</state>
        <dob>1987-11-26</dob>
    </player>
    <player id="6457" coretennisid="287" rank="3"
        delta="0" singlespoints="132500" doublespoints="1500"
        deductedpoints="0" totalpoints="134000">
       <firstname>Lleyton</firstname>
       <lastname>Hewitt</lastname>
       <town>EXETER</town>
       <state>SA</state>
       <dob>1981-02-24</dob>
    </player>
    <!-- ... etc ... -->
</rankings>
Above, if you want to select the IDs of all players that are ranked in the top 2, you can use an expression like:
int top2[] = result.getAsIntegerArray("//player[@rank < 3]/@id");|
Tip
|
Notice above that the expression is using an attribute for selecting both rank and id. In JSON documents, if you attempt to select an attribute, it will look for a child node under the attribute name you ask for) |
If a document is ordered, you might want to select nodes by their position, for example:
String first2[] = result.getAsStringArray("//player[position() < 3]/firstname");

String secondLast = result.getAsString("//player[last() - 1]/firstName");
It is also possible to select parent nodes, by using the ‘..’ expression. For example:
int id = result.getAsInteger("//lastname[text()='Hewitt']/../@id");Above, we globally find a lastname element with a value of ‘Hewitt’, then grab the parent node of lastname which happens to be the player node, then grab the id attribute from the player node. Alternatively, you could get the same result from the following simpler statement:
int id = result.getAsInteger("//player[lastname='Hewitt']/@id");It is also possible to nest expressions, for example:
String id=result.getAsInteger("//player[//address[country/isocode='CA']]/@id");In the above example, if the player node had an address object, we’d be selecting all players from Canada. This is a simple example of a nested expression, but they can get much more complex, which will be required as the documents themselves get more complex.
Moving on, to select a node based on the existence of an attribute:
int id[] = result.getAsIntegerArray("//player[@rank]/@id");Above, we selected the IDs of all ranked players. Conversely, we can select the non-ranked players like this:
int id[] = result.getAsIntegerArray("//player[@rank=null]/@id");|
Note
|
Logical not (!) operators currently are not implemented) |
You can also select by the existence of a child node
int id[] = result.getAsIntegerArray("//player[middlename]/@id");Above, we selected all players that have a middle name.<br/> Keep in mind that the Codename One path expression language is not a full implementation of XPath 1.0, but does already handle many of the most useful features of the specification.
Properties files are standard key/value pairs encoded into a text file. This file format is very familiar to Java developers and the Codename One specific version tries to be as close as possible to the original Java implementation.
Notice that properties file both in Java proper and in Codename One don’t support non-ascii characters. In order to encode unicode values into the properties file format you should use the native2ascii tool that ships with the JDK.
One major difference between standard Java properties and the ones in Codename One is that Codename One sorts properties alphabetically when saving. Java uses random order based on the Hashtable natural ordering.
This was done to provide consistency for saved files.

Codename One includes a Network Monitor tool which you can access via the simulator menu option. This tool reflects all the requests made through the connection requests and displays them in the left pane. This allows you to track issues in your code/web service and see everything the is "going through the wire".
This is a remarkably useful tool for optimizing and for figuring out what exactly is happening with your server connection logic.
A very common task is file download to storage or filesystem.
The Util class has simple utility methods:
downloadUrlToFileSystemInBackground, downloadUrlToStorageInBackground, downloadUrlToFile & downloadUrlToStorage.
These all delegate to a feature in ConnectionRequest:
ConnectionRequest.setDestinationStorage(fileName) &
ConnectionRequest.setDestinationFile(fileName);
Both of which simplify the whole process of downloading a file.
Codename One has multiple ways to download an image and the general recommendation is the URLImage.
However, the URLImage assumes that you know the size of the image in advance or that you are willing to resize it. In that regard it works great for some use cases but not so much for others.
The download methods mentioned above are great alternatives but they are a bit verbose when working with images and don’t provide fine grained control over the ConnectionRequest e.g. making a POST request to get an image.
|
Tip
|
Adding global headers is another use case but you can use addDefaultHeader to add those. |
To make this process simpler there is a set of helper methods in ConnectionRequest that downloads images directly.
These methods complement the Util methods but go a bit further and feature very terse syntax e.g. you can just
download a ConnectionRequest to Storage using code like this:
request.downloadImageToStorage(url, (img) -> theImageIsHereDoSomethingWithIt(img));This effectively maps the ConnectionRequest directly to a SuccessCallback for further processing.
URLImage is great. It changed the way we do some things in Codename One.
However, when we introduced it we didn’t have support for the cache filesystem or for the JavaScript port. The cache filesystem is probably the best place for images of URLImage so supporting that as a target is a "no brainer" but JavaScript seems to work so why would it need a special case?
JavaScript already knows how to download and cache images from the web. URLImage is actually a step back from the things a good browser can do so why not use the native abilities of the browser when we are running there and fallback to using the cache filesystem if it’s available and as a last resort go to storage…
That’s exactly what the new method of URLImage does:
public static Image createCachedImage(String imageName, String url, Image placeholder, int resizeRule);There are a few important things you need to notice about this method:
-
It returns Image and not URLImage. This is crucial. Down casting to `URLImage* will work on the simulator but might fail in some platforms (e.g. JavaScript) so don’t do that!
Since this is implemented natively in JavaScript we need a different abstraction for that platform. -
It doesn’t support image adapters and instead uses a simplified resize rule. Image adapters work on
URLImagesince we have a lot of control in that class. However, in the browser our control is limited and so an adapter won’t work.
If you do use this approach it would be far more efficient when running in the JavaScript port and will make better use of caching in most OS’s.
The Rest API makes it easy to invoke a restfull webservice without many of the nuances of ConnectionRequest. You can use it to define the HTTP method and start building based on that. So if I want to get a parsed JSON result from a URL you could do:
Map<String, Object> jsonData = Rest.get(myUrl).getAsJsonMap();For a lot of REST requests this will fail because we need to add an HTTP header indicating that we accept JSON results. We have a special case support for that:
Map<String, Object> jsonData = Rest.get(myUrl).acceptJson().getAsJsonMap();We can also do POST requests just as easily:
Map<String, Object> jsonData = Rest.post(myUrl).body(bodyValueAsString).getAsJsonMap();Notice the usage of post and the body builder method. There are MANY methods in the builder class that cover pretty much everything you would expect and then some when it comes to the needs of rest services.
I changed the code in the kitchen sink webservice sample to use this API. I was able to make it shorter and more readable without sacrificing anything.
The best way to explain the usage of this API is via a concrete "real world" example. Twilio provides many great telephony oriented webservices to developers. One of those is an SMS sending webservice which can be useful for things such as "device activation".
To get started you would need to signup to Twilio and have the following 3 variable values:
String accountSID = "----------------";
String authToken = "---------------";
String fromPhone = "your Twilio phone number here";|
Tip
|
You can open a trial Twilio account and it just tags all of your SMS’s. Notice you would need to use a US based number if you don’t want to pay |
We can now send hello world as an SMS to the end user. Once this is in place sending an SMS via REST is just a matter of using the Rest API:
Response<Map> result = Rest.post("https://api.twilio.com/2010-04-01/Accounts/" + accountSID + "/Messages.json").
        queryParam("To", destinationPhone).
        queryParam("From", fromPhone).
        queryParam("Body", "Hello World").
        basicAuth(accountSID, authToken)).
        getAsJsonMap();
Notice that this is equivalent of this "curl" command:
curl 'https://api.twilio.com/2010-04-01/Accounts/[accountSID]/Messages.json' -X POST \
--data-urlencode 'To=[destinationPhone]' \
--data-urlencode 'From=[fromPhone]' \
--data-urlencode 'Body=Hello World' \
-u [accountSID]:[AuthToken]
That’s pretty cool as the curl command maps almost directly to the Rest API call!
What we do here is actually pretty trivial, we open a connection the the api messages URL. We add arguments to the body of the post request and define the basic authentication data.
The result is in JSON form we mostly ignore it since it isn’t that important but it might be useful for error handling. This is a sample response (redacted keys):
{
    "sid": "[sid value]",
    "date_created": "Sat, 09 Sep 2017 19:47:30 +0000",
    "date_updated": "Sat, 09 Sep 2017 19:47:30 +0000",
    "date_sent": null,
    "account_sid": "[sid value]",
    "to": "[to phone number]",
    "from": "[from phone number]",
    "messaging_service_sid": null,
    "body": "Sent from your Twilio trial account - Hello World",
    "status": "queued",
    "num_segments": "1",
    "num_media": "0",
    "direction": "outbound-api",
    "api_version": "2010-04-01",
    "price": null,
    "price_unit": "USD",
    "error_code": null,
    "error_message": null,
    "uri": "/2010-04-01/Accounts/[sid value]/Messages/SMe802d86b9f2246989c7c66e74b2d84ef.json",
    "subresource_uris": {
        "media": "/2010-04-01/Accounts/[sid value]/Messages/[message value]/Media.json"
    }
}
Notice the error message entry which is null meaning there was no error, if there was an error we’d have a message there or an error code that isn’t in the 200-210 range.
This should display an error message to the user if there was a problem sending the SMS:
if(result.getResponseData() != null) {
    String error = (String)result.getResponseData().get("error_message");
    if(error != null) {
        ToastBar.showErrorMessage(error);
    }
} else {
    ToastBar.showErrorMessage("Error sending SMS: " + result.getResponseCode());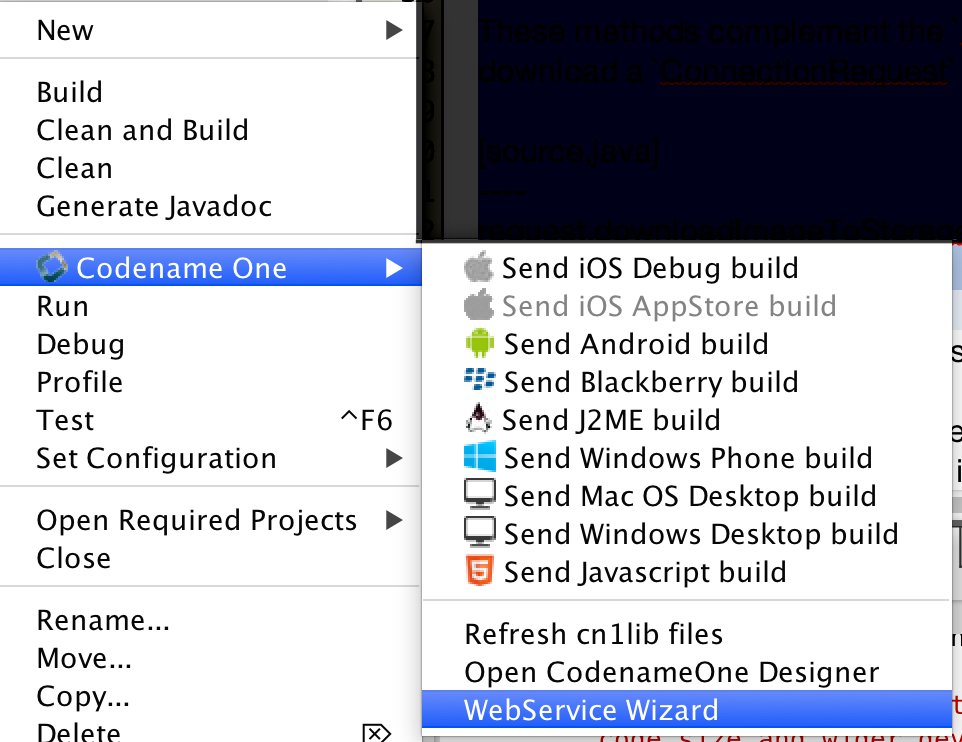
}The Webservice Wizard can be invoked directly from the plugin. It generates stubs for the client side that allow performing simple method invocations on the server. It also generates a servlet that can be installed on any servlet container to intercept client side calls.
There are limits to the types of values that can be passed via the webservice wizard protocol but it is highly efficient since it is a binary protocol and very extensible thru object externalization. All methods are provided both as asynchronous and synchronous calls for the convenience of the developer.
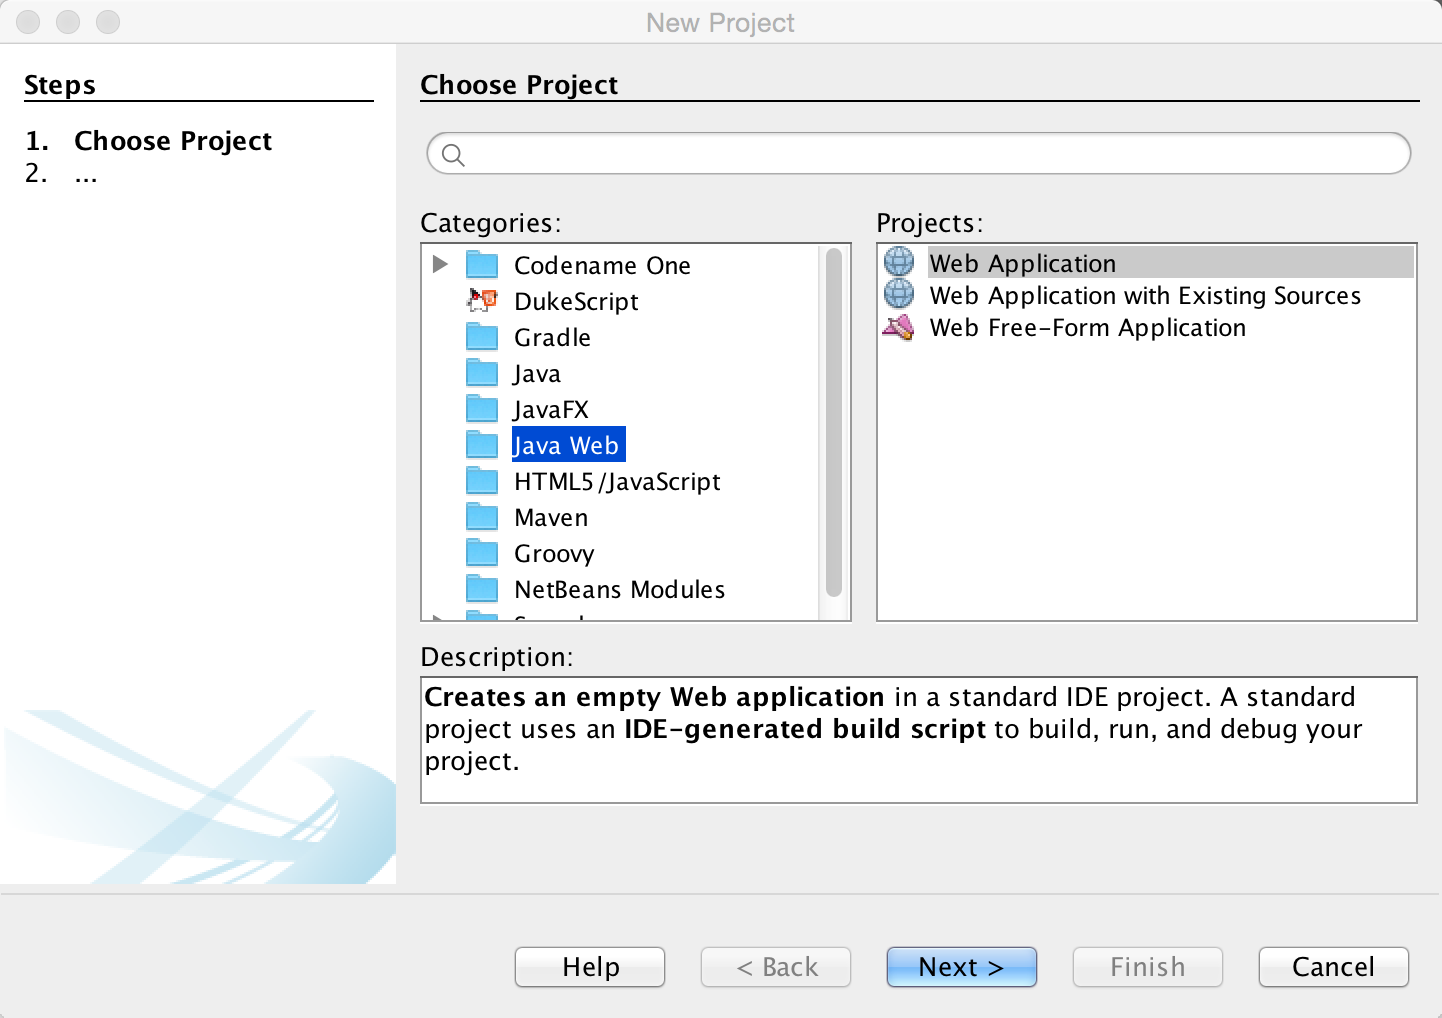
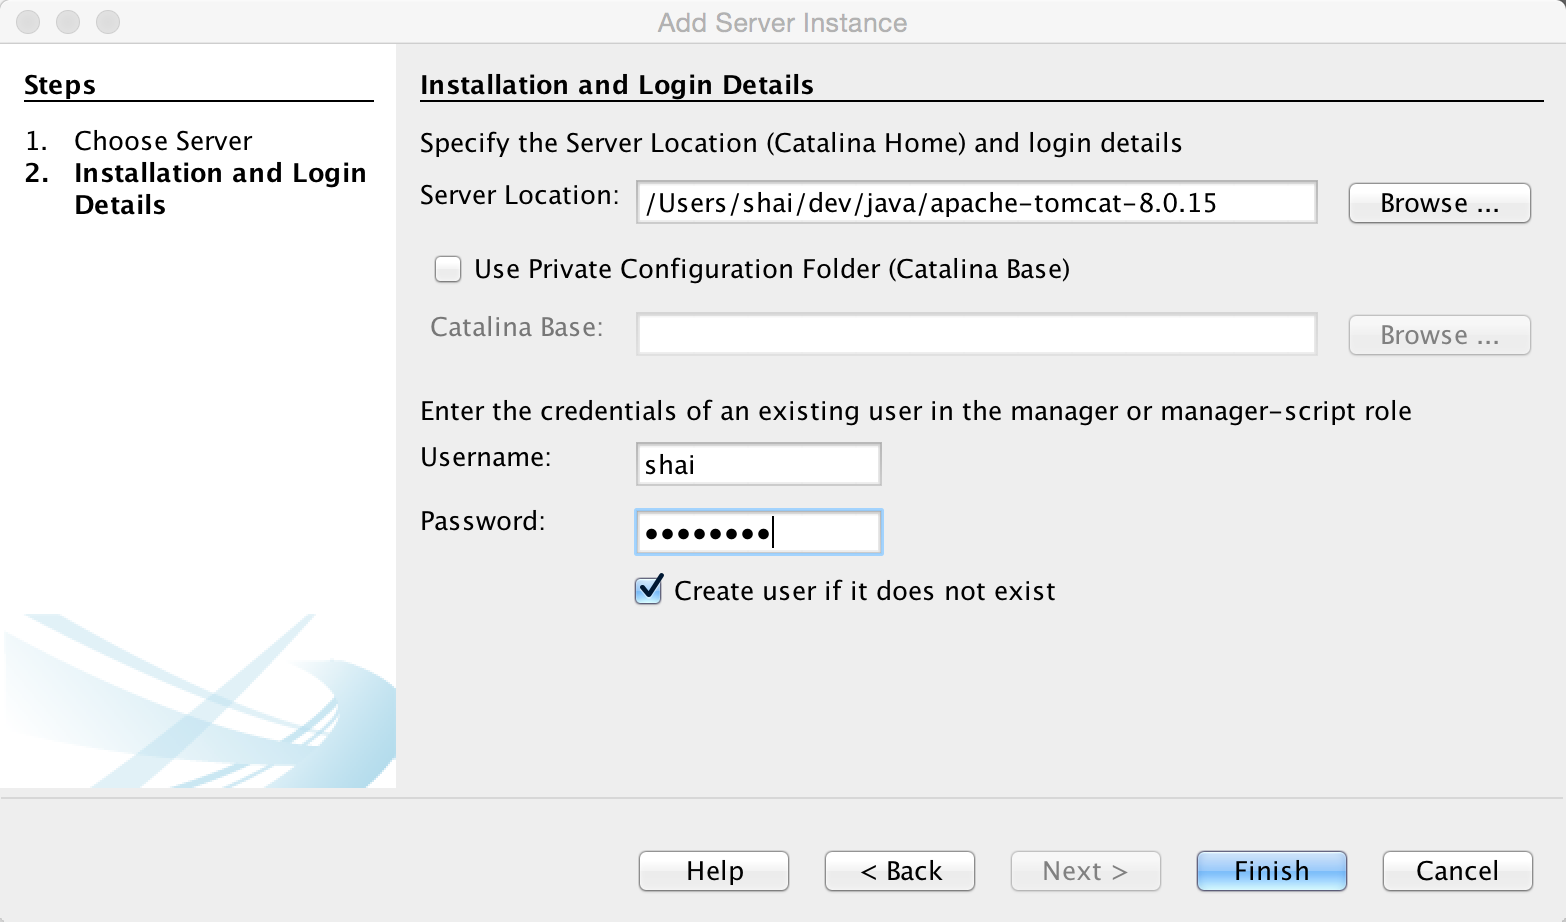
Normally you should have a server setup locally. I use Tomcat since it’s really trivial and I don’t really need much but there are many great Java webservers out there and this should work with all of them!
|
Tip
|
The types of arguments are pretty limited however you can pass an arbitrary Externalizable object which can be "anything"
|

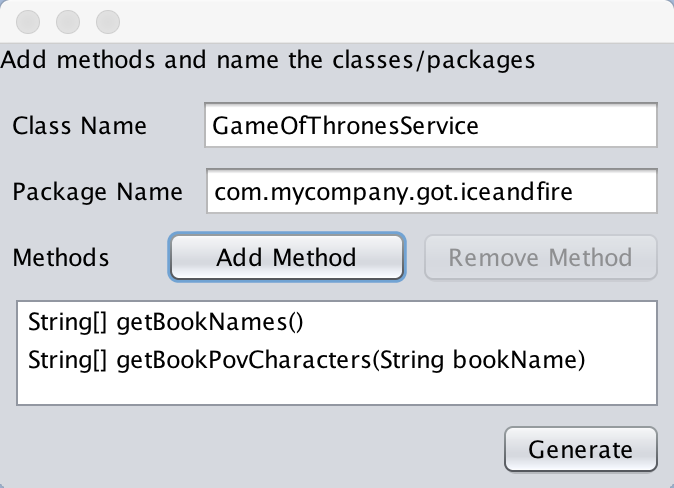
We can now open the GameOfThronesServiceServer.java file in the server and it looks like this:
public class GameOfThronesServiceServer {
public static String[] getBookNames() {
// your code goes here...
return null;
}
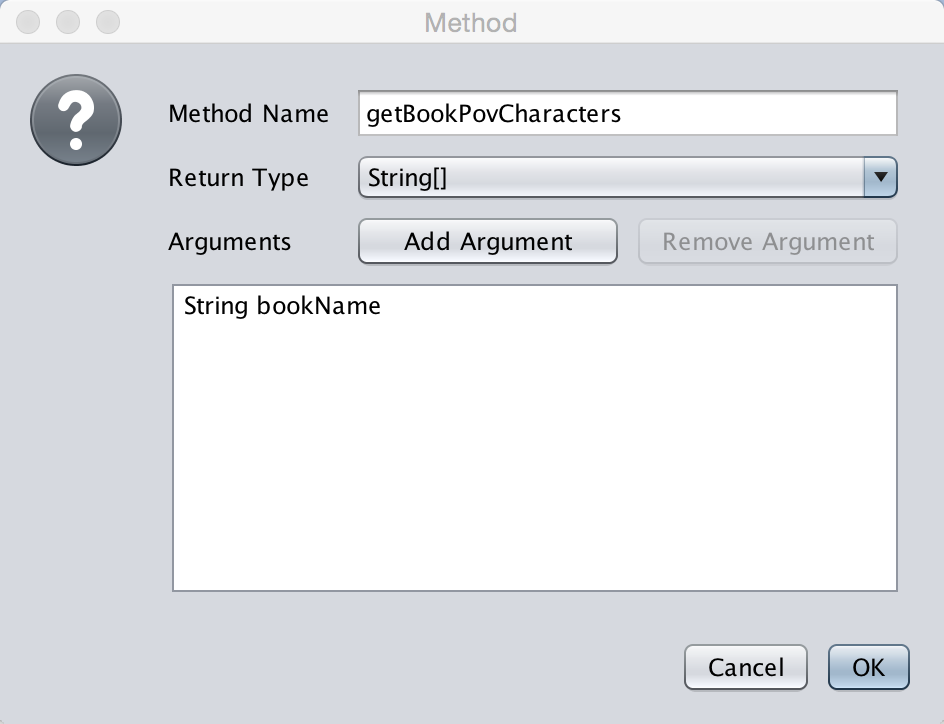
public static String[] getBookPovCharacters(String bookName) {
// your code goes here...
return null;
}
}All we need to do is fill in the code, for this example we’ll only implement the first method for simplicity:
public class GameOfThronesServiceServer {
    public static String[] getBookNames() {
        return new String[] {
            "A Game of Thrones", "A Clash Of Kings", "A Storm Of Swords", "A Feast For Crows",
            "A Dance With Dragons", "The Winds of Winter", "A Dream of Spring"
        };
    }

    public static String[] getBookPovCharacters(String bookName) {
        // your code goes here...
        return null;
    }
}
Now lets open the client side code, in the GameOfThronesService.java file we see this
public class GameOfThronesService {
private static final String DESTINATION_URL = "http://localhost:8080/cn1proxy";
//...
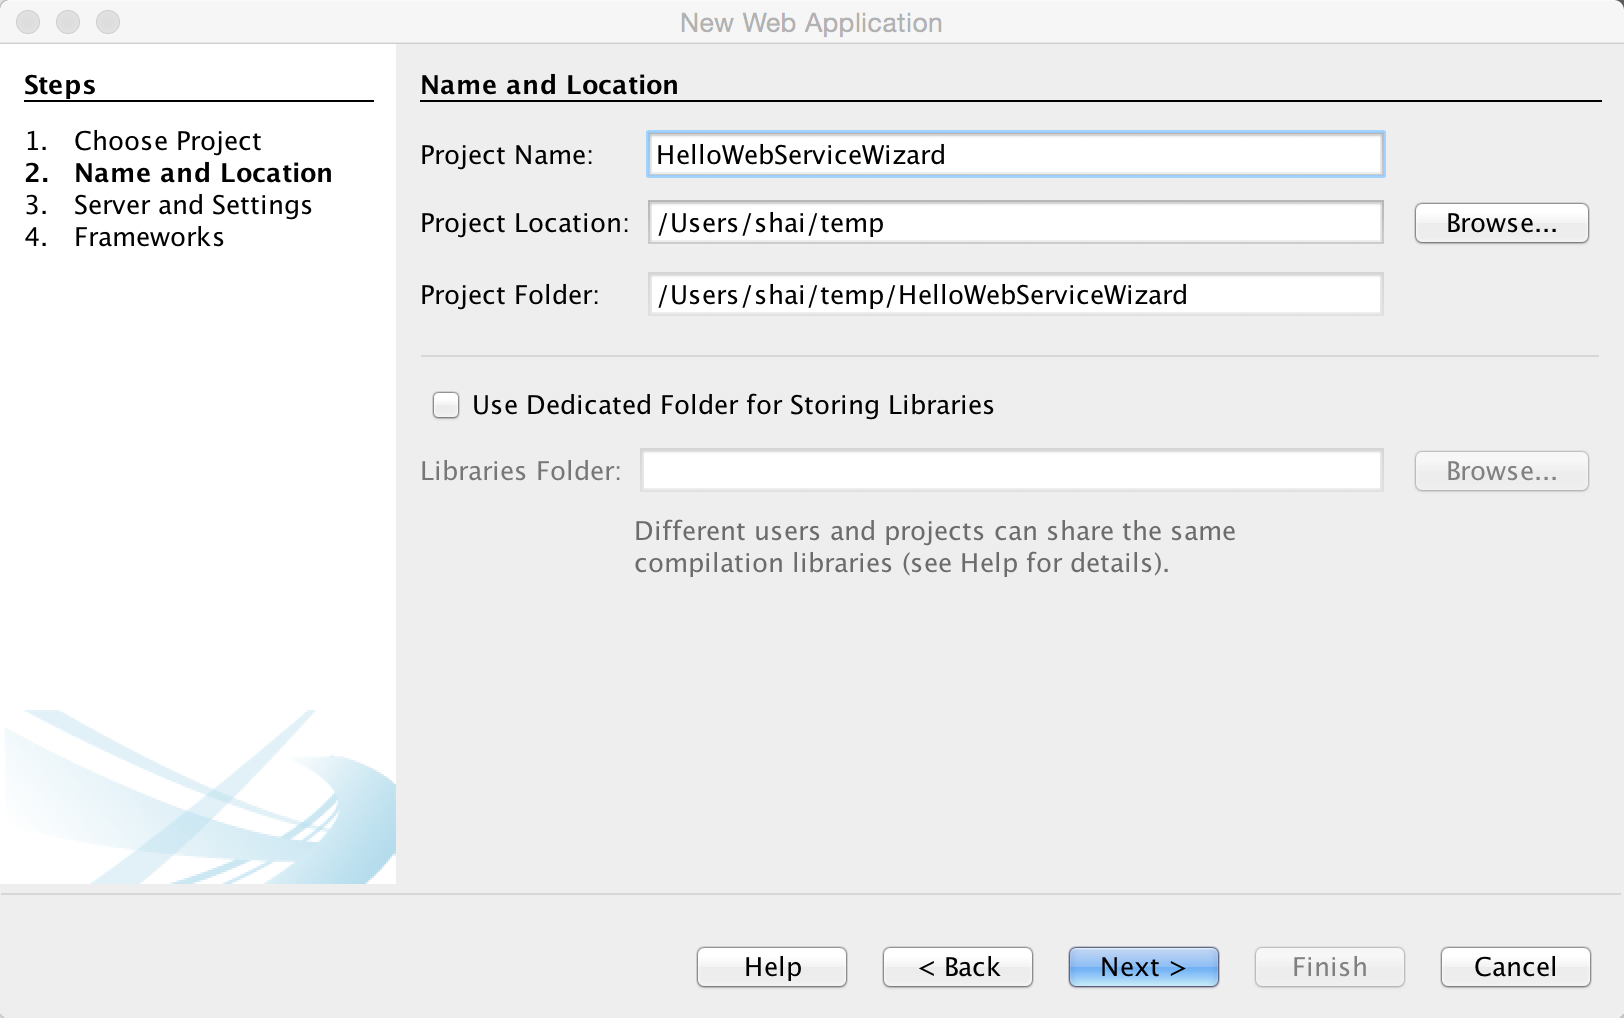
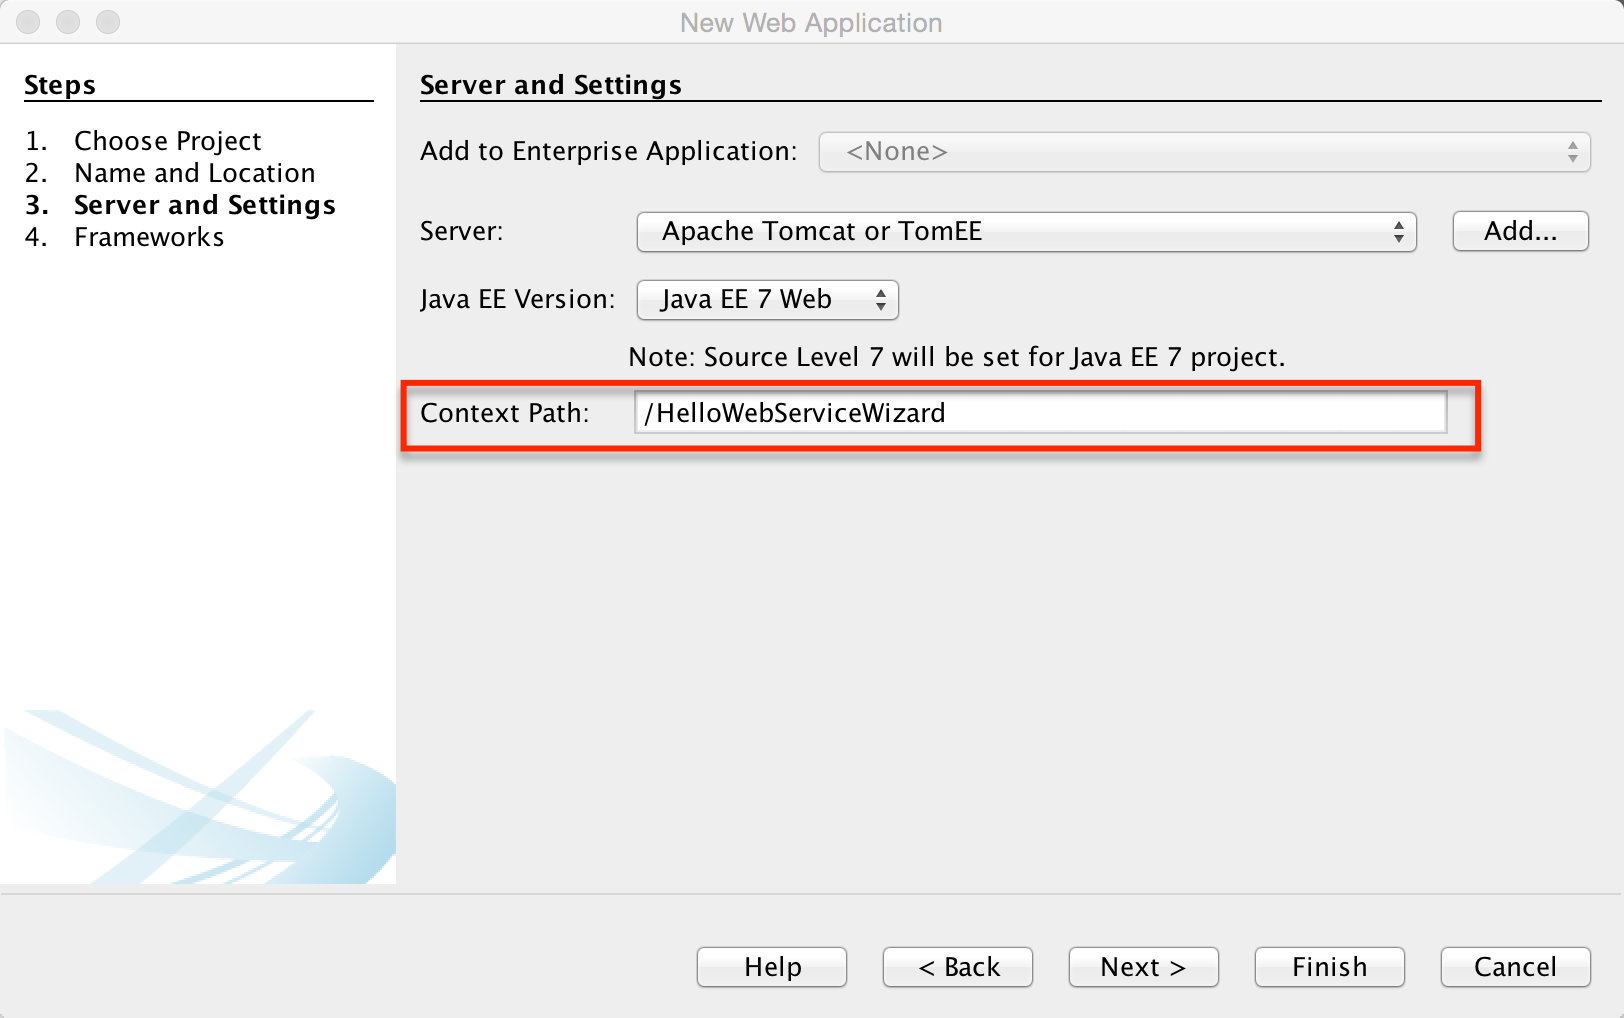
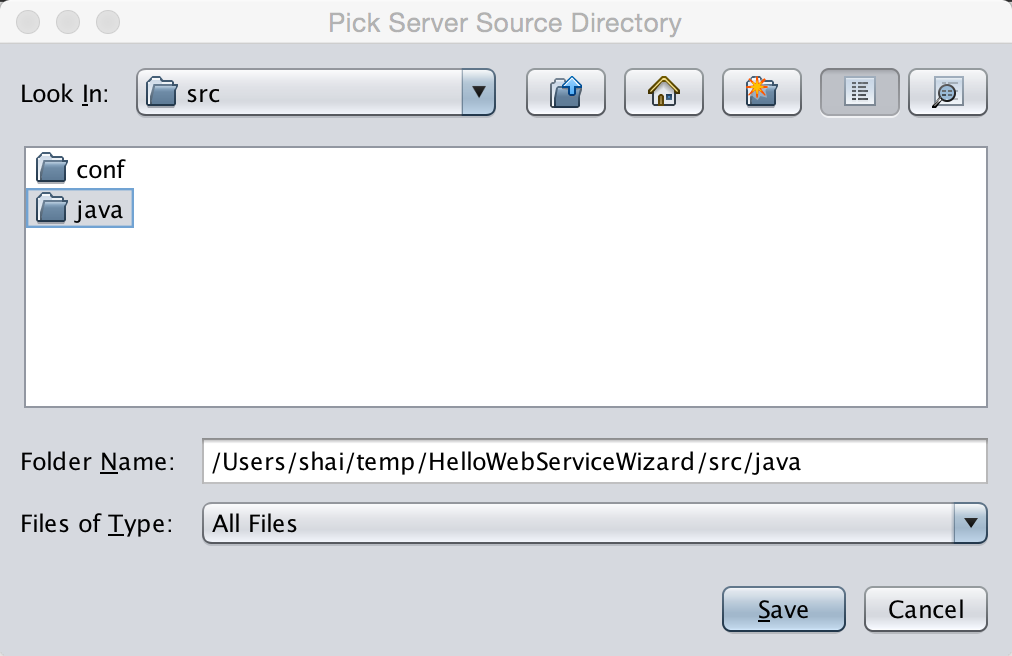
}The destination URL needs to point at the actual server which you will recall from the new project creation should include "HelloWebServiceWizard". So we can fix the URL to:
private static final String DESTINATION_URL = "http://localhost:8080/HelloWebServiceWizard/cn1proxy";You would naturally need to update the host name of the server for running on a device otherwise the device would need to reside within your internal network and point to your IP address.
It is now time to write the actual client code that calls this. Every method we defined above is now defined as a static method within the GameOfThronesService class with two permutations. One is a synchronous permutation that behaves exactly as expected. It blocks the calling thread while calling the server and might throw an IOException if something failed.
This type of method (synchronous method) is very easy to work with since it’s completely legal to call it from the event dispatch thread and it’s very easy to map it to application logic flow.
The second type of method uses the async JavaScript style callbacks and accepts the callback interface. It returns immediately and doesn’t throw any exception. It will call onSuccess/onError based on the server result.
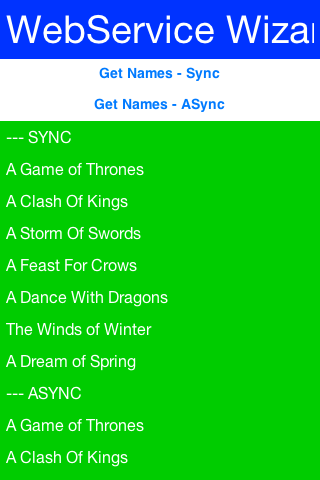
You can pick either one of these approaches based on your personal preferences. Here we demonstrate both uses with the server API:
Form hi = new Form("WebService Wizard", new BoxLayout(BoxLayout.Y_AXIS));
Button getNamesSync = new Button("Get Names - Sync");
Button getNamesASync = new Button("Get Names - ASync");
hi.add(getNamesSync).add(getNamesASync);

getNamesSync.addActionListener((e) -> {
    try {
        String[] books = GameOfThronesService.getBookNames();
        hi.add("--- SYNC");
        for(String b : books) {
            hi.add(b);
        }
        hi.revalidate();
    } catch(IOException err) {
        Log.e(err);
    }
});

getNamesASync.addActionListener((e) -> {
    GameOfThronesService.getBookNamesAsync(new Callback<String[]>() {
        @Override
        public void onSucess(String[] value) {
            hi.add("--- ASYNC");
            for(String b : value) {
                hi.add(b);
            }
            hi.revalidate();
        }

        @Override
        public void onError(Object sender, Throwable err, int errorCode, String errorMessage) {
            Log.e(err);
        }
    });
});
Caching server data locally is a huge part of the advantage a native app has over a web app. Normally this is non-trivial as it requires a delicate balance especially if you want to test the server resource for changes.
HTTP provides two ways to do that the ETag and Last-Modified. While both are great they are non-trivial to use and by no definition seamless.
We just added an experimental feature to connection request that allows you to set the caching mode to one of 4 states either globally or per connection request:
-
OFF is the default meaning no caching.
-
SMART means all get requests are cached intelligently and caching is "mostly" seamless
-
MANUAL means that the developer is responsible for the actual caching but the system will not do a request on a resource that’s already "fresh"
-
OFFLINE will fetch data from the cache and wont try to go to the server. It will generate a 404 error if data isn’t available
You can toggle these in the specific request by using setCacheMode(CachingMode) and set the global
default using setDefaultCacheMode(CachingMode).
|
Note
|
Caching only applies to GET operations, it will not work for POST or other methods
|
There are several methods of interest to keep an eye for:
protected InputStream getCachedData() throws IOException;
protected void cacheUnmodified() throws IOException;
public void purgeCache();
public static void purgeCacheDirectory() throws IOException;This returns the cached data. This is invoked to implement readResponse(InputStream) when running offline
or when we detect that the local cache isn’t stale.
The smart mode implements this properly and will fetch the right data. However, the manual mode doesn’t store the data and relies on you to do so. In that case you need to return the data you stored at this point and must implement this method for manual mode.
This is a callback that’s invoked to indicate a cache hit, meaning that we already have the data.
The default implementation still tries to call all the pieces for compatibility (e.g. readResponse).
However, if this is unnecessary you can override that method with a custom implementation or even a blank
implementation to block such a case.
These methods are pretty self explanatory. Notice one caveat though…
When you download a file or a storage element we don’t cache them and rely on the file/storage element to be present and serve as "cache". When purging we won’t delete a file or storage element you downloaded and thus these might remain.
However, we do remove the ETag and Last-Modified data so the files might get refreshed the next time around.
The CachedDataService allows caching data and only updating it if the data changed on the server. Normally the download API’s won’t check for update if there is a local cache of the data (e.g. URLImage always uses the local copy). This isn’t a bad thing, it’s pretty efficient.
However, it might be important to update the image if it changed but we still want caching.
The CachedDataService will fetch data if it isn’t cached locally and cache it. When you "refresh" it will send a special HTTP request that will only send back the data if it has been updated since the last refresh:
CachedDataService.register();
CachedData d = (CachedData)Storage.getInstance().readObject("LocallyCachedData");

if(d == null) {
  d = new CachedData();
  d.setUrl("http://....");
}
// check if there is a new version of this on the server
CachedDataService.updateData(d, new ActionListener() {
    public void actionPerformed(ActionEvent ev) {
        // invoked when/if the data arrives, we now have a fresh cache
        Storage.getInstance().writeObject("LocallyCachedData", d);
    }
});Codename One provides the Externalizable interface, which is similar to the Java SE Externalizable interface.
This interface allows an object to declare itself as Externalizable for serialization (so an object can be stored in a
file/storage or sent over the network). However, due to the lack of reflection and use of obfuscation these objects
must be registered with the Util class.
Codename One doesn’t support the Java SE Serialization API due to the size issues and complexities related to obfuscation.
The major objects that are supported by default in the Codename One Externalizable are:
String, Collection, Map, ArrayList, HashMap, Vector, Hashtable, Integer, Double, Float, Byte, Short, Long, Character, Boolean, Object[],
byte[], int[], float[], long[], double[].
Externalizing an object such as h below should work just fine:
Map<String, Object> h = new HashMap<>();
h.put("Hi","World");
h.put("data", new byte[] {(byte)1});
Storage.getInstance().writeObject("Test", h);
However, notice that some things aren’t polymorphic e.g. if we will externalize a String[] we will get back an Object[]
since String arrays aren’t detected by the implementation.
|
Important
|
The externalization process caches objects so the app will seem to work and only fail on restart! |
Implementing the Externalizable interface is only important when we want to store a proprietary object. In this case we must register the object with the com.codename1.io.Util class so the externalization algorithm will be able to recognize it by name by invoking:
Util.register("MyClass", MyClass.class);|
Warning
|
You should do this early on in the app e.g. in the init(Object) but you shouldn’t do it in a static initializer within the object as that might never be invoked!
|
An Externalizable object must have a default public constructor and must implement the following 4 methods:
public int getVersion();
public void externalize(DataOutputStream out) throws IOException;
public void internalize(int version, DataInputStream in) throws IOException;
public String getObjectId();
The getVersion() method returns the current version of the object allowing the stored data to change its structure in the future (the version is then passed when internalizing the object). The object id is a String uniquely representing the object;
it usually corresponds to the class name (in the example above the Unique Name should be MyClass).
|
Warning
|
It’s a common mistake to use getClass().getName() to implement getObjectId() and it would seem to work in the simulator. This isn’t the case though!Since devices obfuscate the class names this becomes a problem as data is stored in a random name that changes with every release. |
Developers need to write the data of the object in the externalize method using the methods in the data output stream and read the data of the object in the internalize method e.g.:
public void externalize(DataOutputStream out) throws IOException {
    out.writeUTF(name);
    if(value != null) {
        out.writeBoolean(true);
        out.writeUTF(value);
    } else {
        out.writeBoolean(false);
    }
    if(domain != null) {
        out.writeBoolean(true);
        out.writeUTF(domain);
    } else {
        out.writeBoolean(false);
    }
    out.writeLong(expires);
}

public void internalize(int version, DataInputStream in) throws IOException {
    name = in.readUTF();
    if(in.readBoolean()) {
        value = in.readUTF();
    }
    if(in.readBoolean()) {
        domain = in.readUTF();
    }
    expires = in.readLong();
}
Since strings might be null sometimes we also included convenience methods to implement such externalization. This effectively writes a boolean before writing the UTF to indicate whether the string is null:
public void externalize(DataOutputStream out) throws IOException {
    Util.writeUTF(name, out);
    Util.writeUTF(value, out);
    Util.writeUTF(domain, out);
    out.writeLong(expires);
}

public void internalize(int version, DataInputStream in) throws IOException {
    name = Util.readUTF(in);
    value = Util.readUTF(in);
    domain = Util.readUTF(in);
    expires = in.readLong();
}
Assuming we added a new date field to the object we can do the following. Notice that a Date is really a long value in Java that can be null. For completeness the full class is presented below:
public class MyClass implements Externalizable {
    private static final int VERSION = 2;
    private String name;
    private String value;
    private String domain;
    private Date date;
    private long expires;

    public MyClass() {}

    public int getVersion() {
        return VERSION;
    }

    public String getObjectId() {
        return "MyClass";
    }

    public void externalize(DataOutputStream out) throws IOException {
        Util.writeUTF(name, out);
        Util.writeUTF(value, out);
        Util.writeUTF(domain, out);
        if(date != null) {
            out.writeBoolean(true);
            out.writeLong(date.getTime());
        } else {
            out.writeBoolean(false);
        }
        out.writeLong(expires);
    }

    public void internalize(int version, DataInputStream in) throws IOException {
        name = Util.readUTF(in);
        value = Util.readUTF(in);
        domain = Util.readUTF(in);
        if(version > 1) {
            boolean hasDate = in.readBoolean();
            if(hasDate) {
                date = new Date(in.readLong());
            }
        }
        expires = in.readLong();
    }
}
Notice that we only need to check for compatibility during the reading process as the writing process always writes the latest version of the data.
Codename One provides several tools to simplify the path between networking/IO & GUI. A common task of showing a wait dialog or progress indication while fetching network data can be simplified by using the InfiniteProgress class e.g.:
InfiniteProgress ip = new InfiniteProgress();
Dialog dlg = ip.showInifiniteBlocking();
request.setDisposeOnCompletion(dlg);
The process of showing a progress bar for a long IO operation such as downloading is automatically mapped to the IO stream in Codename One using the SliderBridge class.
|
Tip
|
You can simulate network delays and disconnected network in the Simulator menu |
The SliderBridge class can bind a ConnectionRequest to a Slider and effectively indicate the progress of the download. E.g.:
Form hi = new Form("Download Progress", new BorderLayout());
Slider progress = new Slider();
Button download = new Button("Download");
download.addActionListener((e) -> {
    ConnectionRequest cr = new ConnectionRequest("https://www.codenameone.com/img/blog/new_icon.png", false);
    SliderBridge.bindProgress(cr, progress);
    NetworkManager.getInstance().addToQueueAndWait(cr);
    if(cr.getResponseCode() == 200) {
        hi.add(BorderLayout.CENTER, new ScaleImageLabel(EncodedImage.create(cr.getResponseData())));
        hi.revalidate();
    }
});
hi.add(BorderLayout.SOUTH, progress).add(BorderLayout.NORTH, download);
hi.show();
Codename One includes a Log API that allows developers to just invoke Log.p(String) or Log.e(Throwable) to log information to storage.
As part of the premium cloud features it is possible to invoke Log.sendLog() in order to email a log directly to the developer account. Codename One can do that seamlessly based on changes printed into the log or based on exceptions that are uncaught or logged e.g.:
Log.setReportingLevel(Log.REPORTING_DEBUG);
DefaultCrashReporter.init(true, 2);
This code will send a log every 2 minutes to your email if anything was changed. You can place it within the init(Object) method of your application.
For a production application you can use Log.REPORTING_PRODUCTION which will only email the log on exception.
At this moment Codename One only supports TCP sockets. Server socket (listen/accept) is only available on Android and the simulator but not on iOS.
You can check if Sockets are supported using the Socket.isSupported(). You can test for server socket support using Socket.isServerSocketSupported().
To use sockets you can use the Socket.connect(String host, int port, SocketConnection eventCallback) method.
To listen on sockets you can use the Socket.listen(int port, Class scClass) method which will instantiate a
SocketConnection instance (scClass is expected to be a subclass of SocketConnection) for every incoming
connection.
This simple example allows you to create a server and a client assuming the device supports both:
public class MyApplication {
    private Form current;

    public void init(Object context) {
        try {
            Resources theme = Resources.openLayered("/theme");
            UIManager.getInstance().setThemeProps(theme.getTheme(theme.getThemeResourceNames()[0]));
        } catch(IOException e){
            e.printStackTrace();
        }
    }

    public void start() {
        if(current != null){
            current.show();
            return;
        }
        final Form soc = new Form("Socket Test");
        Button btn = new Button("Create Server");
        Button connect = new Button("Connect");
        final TextField host = new TextField("127.0.0.1");
        btn.addActionListener((evt) -> {
            soc.addComponent(new Label("Listening: " + Socket.getIP()));
            soc.revalidate();
            Socket.listen(5557, SocketListenerCallback.class);
        });
        connect.addActionListener((evt) -> {
            Socket.connect(host.getText(), 5557, new SocketConnection() {
                @Override
                public void connectionError(int errorCode, String message) {
                    System.out.println("Error");
                }

                @Override
                public void connectionEstablished(InputStream is, OutputStream os) {
                    try {
                        int counter = 1;
                        while(isConnected()) {
                            os.write(("Hi: " + counter).getBytes());
                            counter++;
                            Thread.sleep(2000);
                        }
                    } catch(Exception err) {
                        err.printStackTrace();
                    }
                }
            });
        });
        soc.setLayout(new BoxLayout(BoxLayout.Y_AXIS));
        soc.addComponent(btn);
        soc.addComponent(connect);
        soc.addComponent(host);
        soc.show();
    }

    public static class SocketListenerCallback extends SocketConnection {
        private Label connectionLabel;

        @Override
        public void connectionError(int errorCode, String message) {
            System.out.println("Error");
        }

        private void updateLabel(final String t) {
            Display.getInstance().callSerially(new Runnable() {
                public void run() {
                    if(connectionLabel == null) {
                        connectionLabel = new Label(t);
                        Display.getInstance().getCurrent().addComponent(connectionLabel);
                    } else {
                        connectionLabel.setText(t);
                    }
                    Display.getInstance().getCurrent().revalidate();
                }
            });
        }

        @Override
        public void connectionEstablished(InputStream is, OutputStream os) {
            try {
                byte[] buffer = new byte[8192];
                while(isConnected()) {
                    int pending = is.available();
                    if(pending > 0) {
                        int size = is.read(buffer, 0, 8192);
                        if(size == -1) {
                            return;
                        }
                        if(size > 0) {
                            updateLabel(new String(buffer, 0, size));
                        }
                    } else {
                        Thread.sleep(50);
                    }
                }
            } catch(Exception err) {
                err.printStackTrace();
            }
        }
    }

    public void stop() {
        current = Display.getInstance().getCurrent();
    }

    public void destroy() {
    }
}In standard Java we usually have a POJO (Plain Old Java Object) which has getters/setters e.g. we can have a
simple Meeting class like this:
public class Meeting {
     private Date when;
     private String subject;
     private int attendance;

     public Date getWhen() {
        return when;
    }

     public String getSubject() {
        return subject;
     }

     public int getAttendance() {
        return attendance;
     }

     public void setWhen(Date when) {
        this.when = when;
    }

     public void setSubject(String subject) {
        this.subject  = subject;
     }

     public void setAttendance(int attendance) {
        this.attendance = attendance;
     }
}
That’s a classic POJO and it is the force that underlies JavaBeans and quite a few tools in Java.
The properties are effectively the getters/setters e.g. subject, when etc. but properties have several features
that are crucial:
-
They can be manipulated in runtime by a tool that had no knowledge of them during compile time
-
They are observable - a tool can monitor changes to a value of a property
-
They can have meta-data associated with them
These features are crucial since properties allow us all kinds of magic e.g. hibernate/ORM uses properties to bind Java objects to a database representation, jaxb does it to parse XML directly into Java objects and GUI builders use them to let us customize UI’s visually.
POJO’s don’t support most of that so pretty much all Java based tools use a lot of reflection & bytecode manipulation. This works but has a lot of downsides e.g. say I want to map an object both to the Database and to XML/JSON.
Would the bytecode manipulation collide?
Would it result in duplicate efforts?
And how do I write custom generic code that uses such abilities? Do I need to manipulate the VM?
These are all very abstract ideas, lets look at how we think properties should look in Java and how we can benefit from this moving forward.
This is the same class as the one above written with properties:
public class Meeting implements PropertyBusinessObject {
     public final Property<Date,Meeting> when = new Property<>("when");
     public final Property<String,Meeting> subject = new Property<>("subject");
     public final Property<Integer,Meeting>  attendance = new Property<>("attendance");
     private final PropertyIndex idx = new PropertyIndex(this, "Meeting", when, subject, attendance);

    @Override
    public PropertyIndex getPropertyIndex() {
        return idx;
    }
}
This looks a bit like a handful so let’s start with usage which might clarify a few things then dig into the class itself.
When we used a POJO we did this:
Meeting meet = new Meeting();
meet.setSubject("My Subject");
Log.p(meet.getSubject());
With properties we do this:
Meeting meet = new Meeting();
meet.subject.set("My Subject");
Log.p(meet.subject.get());At first glance it looks like we just created public fields (which we did) but if you will look closely at the declaration
you will notice the final keyword:
public final Property<String,Meeting> subject = new Property<>("subject");This means that this code will not compile:
meet.subject = otherValue;So all setting/getting must happen thru the set/get methods and they can be replaced. E.g. this is valid syntax that prevents setting the property to null and defaults it to an empty string:
public final Property<String,Meeting> subject = new Property<>("subject", "") {
     public Meeting set(String value) {
         if(value == null) {
            return Meeting.this;
         }
         return super.set(value);
     }
};|
Note
|
We’ll discuss the reason for returning the Meeting instance below
|
Since Property is a common class it’s pretty easy for introspective code to manipulate properties. However,
it can’t detect properties in an object without reflection.
That’s why we have the index object and the PropertyBusinessObject interface (which defines getPropertyIndex).
The PropertyIndex class provides meta data for the surrounding class including the list of the properties within.
It allows enumerating the properties and iterating over them making them accessible to all tools.
Furthermore all properties are observable with the property change listener. I can just write this to instantly print out any change made to the property:
meet.subject.addChangeListener((p) -> Log.p("New property value is: " + p.get()));That’s the simple stuff that can be done with properties, but they can do much more!
For starters all the common methods of Object can be implemented with almost no code:
public class Meeting implements PropertyBusinessObject {
     public final Property<Date,Meeting> when = new Property<>("when");
     public final Property<String,Meeting> subject = new Property<>("subject");
     public final Property<Integer,Meeting>  attendance = new Property<>("attendance");
     private final PropertyIndex idx = new PropertyIndex(this, "Meeting", when, subject, attendance);

    @Override
    public PropertyIndex getPropertyIndex() {
        return idx;
    }

    public String toString() {
        return idx.toString();
    }

    @Override
    public boolean equals(Object obj) {
        return obj.getClass() == getClass() && idx.equals(((TodoTask)obj).getPropertyIndex());
    }

    @Override
    public int hashCode() {
        return idx.hashCode();
    }
}
This is easy thanks to introspection…
We already have some simple code that can convert an object to/from JSON Maps e.g. this can fill the property values from parsed JSON:
meet.getPropertyIndex().populateFromMap(jsonParsedData);And visa versa:
String jsonString = meet.toJSON();We also have a very simple ORM solution that maps values to table columns and can create tables. It’s no hibernate but sqlite isn’t exactly big iron so it might be good enough.
One of the problematic issues with constructors is that any change starts propagating everywhere. If I have fields in the constructor and I add a new field later I need to keep the old constructor for compatibility.
So we added a new syntax:
Meeting meet = new Meeting().
        subject.set("My Subject").
        when.set(new Date());
That is why every property in the definition needed the Meeting generic and the set method returns the Meeting
instance…
We are pretty conflicted on this feature and are thinking about removing it.
Without this feature the code would look like this:
Meeting meet = new Meeting();
meet.subject.set("My Subject");
meet.when.set(new Date());Lets assume I have an object called Contacts which includes contact information of contact e.g.:
public class Contact implements PropertyBusinessObject {
    public final IntProperty<Contact> id  = new IntProperty<>("id");
    public final Property<String, Contact> name = new Property<>("name");
    public final Property<String, Contact> email = new Property<>("email");
    public final Property<String, Contact> phone = new Property<>("phone");
    public final Property<Date, Contact> dateOfBirth = new Property<>("dateOfBirth", Date.class);
    public final Property<String, Contact> gender  = new Property<>("gender");
    public final IntProperty<Contact> rank  = new IntProperty<>("rank");
    public final PropertyIndex idx = new PropertyIndex(this, "Contact", id, name, email, phone, dateOfBirth, gender, rank);

    @Override
    public PropertyIndex getPropertyIndex() {
        return idx;
    }

    public Contact() {
        name.setLabel("Name");
        email.setLabel("E-Mail");
        phone.setLabel("Phone");
        dateOfBirth.setLabel("Date Of Birth");
        gender.setLabel("Gender");
        rank.setLabel("Rank");
    }
}
Standard Java Objects can be serialized in Codename One by implementing the Codename One Externalizable interface. You also need to register the Externalizable object so the implementation will be aware of it. Codename One business objects are seamlessly Externalizable and you just need to register them.
E.g. you can do something like this in your init(Object) method:
new Contact().getPropertyIndex().registerExternalizable();After you do that once you can write/read contacts from storage if you so desire:
Storage.getInstance().writeObject("MyContact", contact);

Contact readContact = (Contact)Storage.getInstance().readObject("MyContact");
This will obviously also work for things like List<Contact> etc…
Writing SQL code can be tedious. Which is why SQLMap is such an important API for some of us. SQLMap allows CRUD (Create, Read, Update, Delete) operations on the builtin SQLite database using property objects.
If we continue the example from above to show persistence to the SQL database we can just do something like this:
private Database db;
private SQLMap sm;
public void init(Object context) {
    theme = UIManager.initFirstTheme("/theme");
    Toolbar.setGlobalToolbar(true);
    Log.bindCrashProtection(true);

    try {
        Contact c = new Contact();
        db = Display.getInstance().openOrCreate("propertiesdemo.db"); // (1)
        sm = SQLMap.create(db); // (2)
        sm.setPrimaryKeyAutoIncrement(c, c.id); // (3)
        sm.createTable(c); // (4)
    } catch(IOException err) {
        Log.e(err);
    }
}
In the above code we do the following:
-
Create or open an SQLite database using the standard syntax
-
Create a properties binding instance
-
Define the primary key for contact as
idand set it toauto incrementwhich will give it a unique value from the database -
Call SQL’s createTable if the table doesn’t exist yet!
|
Tip
|
Notice that at this time altering a created table isn’t possible so if you add a new property you might need to detect that and do an alter call manually
|
We can then add entries to the contact table using:
sm.insert(myContact);We can update an entry using:
sm.update(myContact);And delete an entry using:
sm.delete(myContact);Listing the entries is more interesting:
List<PropertyBusinessObject> contacts = sm.select(c, c.name, true, 1000, 0);

for(PropertyBusinessObject cc : contacts) {
    Contact currentContact = (Contact)cc;

   // ...
}
The arguments for the select method are:
-
The object type
-
The attribute by which we want to sort the result (can be null)
-
Whether sort is ascending
-
Number of elements to fetch
-
Page to start with - in this case if we have more than 1000 elements we can fetch the next page using
sm.select(c, c.name, true, 1000, 1)
There are many additional configurations where we can fine tune how a specific property maps to a column etc.
The SQLMap API is very simplistic and doesn’t try to be Hibernate/JPA for mobile. So basic things aren’t available at this time and just won’t work. This isn’t necessarily a problem as mobile databases don’t need to be as powerful as server databases.
Right now we can’t map an object to another object in the database with the typical one-many, one-one etc. relationships that would could do with JPA. The SQLMap API is really simplistic and isn’t suited for that level of mapping at this time.
If there is demand for this it’s something we might add moving forward but our goal isn’t to re-invent hibernate.
SQLite is sensitive to threading issues especially on iOS. We mostly ignored the issue of threading and issue all calls in process. This can be a problem for larger data sets as the calls would usually go on the EDT.
This is something we might want to fix for the generic SQLite API so low level SQL queries will work with our mapping in a sensible way.
Right now we don’t support table altering to support updated schemas. This is doable and shouldn’t be too hard to implement correctly so if there is demand for doing it we’ll probably add support for this.
We ignored functions, joins, transactions and a lot of other SQL capabilities.
You can use SQL directly to use all of these capabilities e.g. if you begin a transaction before inserting/updating or deleting this will work as advertised however if a rollback occurs our mapping will be unaware of that so you will need to re-fetch the data.
You will notice we mapped auto-increment so we will generally try to map things that make sense for various use cases, if you have such a use case we’d appreciate pull requests and feedback on the implementation.
As mentioned above, we don’t cache anything and there might be a collision if you select the same object twice you will get two separate instances that might collide if you update both (one will "win").
That means you need to pay attention to the way you cache objects to avoid a case of a modified version of an object kept with an older version.
Some objects make sense as global objects, we can just use the Preferences API to store that data directly but then we don’t have the type safety that property objects bring to the table. That’s where the binding of property objects to preferences makes sense. E.g. say we have a global Settings property object we can just bind it to preferences using:
PreferencesObject.create(settingsInstance).bind();So if settings has a property called companyName it would bind into Preferences under the Settings.companyName entry.
We can do some more elaborate bindings such as:
PreferencesObject.create(settingsInstance).
    setPrefix("MySettings-").
    setName(settingsInstance.companyName, "company").
    bind();
This would customize all entry keys to start with MySettings- instead of Settings.. This would also set the company name entry to company so in this case instead of Settings.companyName we’d have MySettings-company.
One of the bigger features of properties are their ability to bind UI to a property. E.g. if we continue the sample above with the Contact class let’s say we have a text field on the form and we want the property (which we mapped to the database) to have the value of the text field. We could do something like this:
myNameTextField.setText(myNameTextField.getText());
myNameTextField.addActionListener(e -> myContact.name.set(myNameTextField.getText()));
That would work nicely but what if we changed the property value, that wouldn’t be reflected back into the text field?
Also that works nicely for text field but what about other types e.g. numbers, check boxes, pickers etc. this becomes a bit more tedious with those.
Binding makes this all seamless. E.g. the code above can be written as:
UiBinding uib = new UiBinding();
uib.bind(myNameTextField, myContact.name);
The cool thing is that this works with multiple component types and property types almost magically. Binding works by using an adapter class to convert the data to/from the component. The adapter itself works with a generic converter e.g. this code:
uib.bind(myRankTextField, myContact.rank);Seems similar to the one above but it takes a String that is returned by the text field and seamlessly converts it to the integer needed by rank. This also works in the other direction…
We can easily build a UI that would allow us to edit the Contact property in memory:
Container resp = new Container(BoxLayout.y());
UiBinding uib = new UiBinding();

TextField nameTf = new TextField();
uib.bind(c.name, nameTf);
resp.add(c.name.getLabel()). // (1)
        add(nameTf);

TextField emailTf = new TextField();
emailTf.setConstraint(TextField.EMAILADDR);
uib.bind(c.email, emailTf);
resp.add(c.email.getLabel()).
        add(emailTf);

TextField phoneTf = new TextField();
phoneTf.setConstraint(TextField.PHONENUMBER);
uib.bind(c.phone, phoneTf);
resp.add(c.phone.getLabel()).
        add(phoneTf);

Picker dateOfBirth = new Picker();
dateOfBirth.setType(Display.PICKER_TYPE_DATE); // (2)
uib.bind(c.dateOfBirth, dateOfBirth);
resp.add(c.dateOfBirth.getLabel()).
        add(dateOfBirth);

ButtonGroup genderGroup = new ButtonGroup();
RadioButton male = RadioButton.createToggle("Male", genderGroup);
RadioButton female = RadioButton.createToggle("Female", genderGroup);
RadioButton undefined = RadioButton.createToggle("Undefined", genderGroup);
uib.bindGroup(c.gender, new String[] {"M", "F", "U"}, male, female, undefined); // (3)
resp.add(c.gender.getLabel()).
        add(GridLayout.encloseIn(3, male, female, undefined));

TextField rankTf = new TextField();
rankTf.setConstraint(TextField.NUMERIC);
uib.bind(c.rank, rankTf); // (4)
resp.add(c.rank.getLabel()).
add(rankTf);-
Notice I use the label of the property which allows better encapsulation
-
We can bind picker seamlessly
-
We can bind multiple radio buttons to a single property to allow the user to select the gender, notice that labels and values can be different e.g. "Male" selection will translate to "M" as the value
-
Numeric bindings "just work"
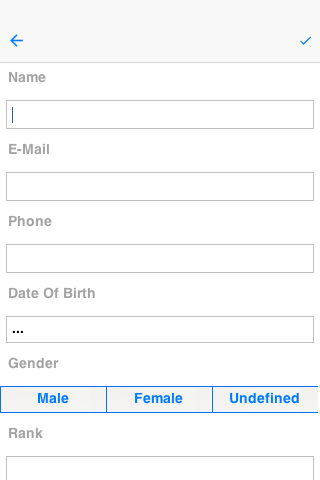
We skipped a couple of fact about the bind() method. It has an additional version that accepts a ComponentAdapter which allows you to adapt the binding to any custom 3rd party component. That’s a bit advanced for now but I might discuss this later.
However, the big thing I "skipped" was the return value… bind returns a UiBinding.Binding object when performing the bind. This object allows us to manipulate aspects of the binding specifically unbind a component and also manipulate auto commit for a specific binding.
Auto commit determines if a property is changed instantly or on commit. This is useful for a case where we have an "OK" button and want the changes to the UI to update the properties only when "OK" is pressed (this might not matter if you keep different instances of the object). When auto-commit is on (the default which you can change via setAutoCommit in the UiBinding) changes reflect instantly, when it’s off you need to explicitly call commit() or rollback() on the Binding class.
commit() applies the changes in the UI to the properties, rollback() restores the UI to the values from the properties object (useful for a "reset changes" button).
Binding also includes the ability to "unbind" this is important if you have a global object that’s bound to a UI that’s discarded. Binding might hold a hard reference to the UI and the property object might create a memory leak.
By using the disconnect() method in Binding we can separate the UI from the object and allow the GC to cleanup.
Up until now this was pretty cool but if you looked at the UI construction code above you would see that it’s pretty full of boilerplate code. The thing about boilerplate is that it shows where automation can be applied, that’s the exact idea behind the magical "InstantUI" class. This means that the UI above can be generated using this code:
InstantUI iui = new InstantUI();
iui.excludeProperty(myContact.id); // (1)
iui.setMultiChoiceLabels(myContact.gender, "Male", "Female", "Undefined"); // (2)
iui.setMultiChoiceValues(myContact.gender, "M", "F", "U");
Container cnt = iui.createEditUI(myContact, true); // (3)-
The id property is useful for database storage but we want to exclude it from the UI
-
This implements the
gendertoggle button selection, we provide a hint to the UI so labels and values differ -
We create the UI from the screenshot above with one line and it’s seamlessly bound to the properties of myContact. The second argument indicates the "auto commit" status.
This still carries most of the flexibilities of the regular binding e.g. I can still get a binding object using:
UiBinding.Binding b = iui.getBindings(cnt);You might not have noticed this but in the previous vebose code we had lines like:
emailTf.setConstraint(TextField.EMAILADDR);You might be surprised to know that this will still work seamlessly without doing anything, as would the picker component used to pick a date…
The picker component implicitly works for date type properties, numeric constraints and numbers are implicitly used for number properties and check boxes are used for booleans.
But how do we know to use an email constraint for the email property?
We have some special case defaults for some common property names, so if your property is named email it will use an email constraint by default. If it’s named url or password etc. it will do the "right thing" unless you explicitly state otherwise. You can customize the constraint for a specific property using something like:
iui.setTextFieldConstraint(contact.email, TextArea.ANY);This will override the defaults we have in place. The goal of this tool is to have sensible "magical" defaults that "just work".