-
Notifications
You must be signed in to change notification settings - Fork 5
Excitation_alignment
Excitation arm alignment is critical for mesoSPIM performance. It is done in several steps, described below.
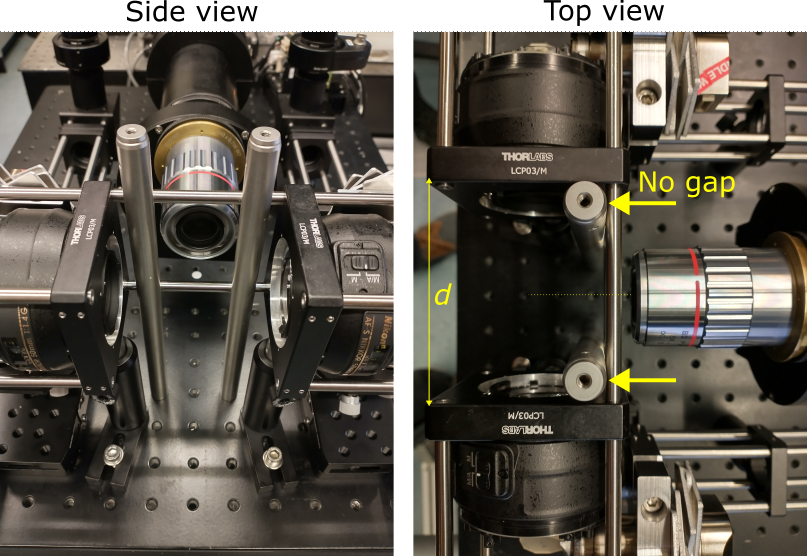
During the building process, the excitation arm assembly must be aligned to the hole pattern of the base breadboard, which serves as a global reference. This can be done, for example, by screwing two steel posts (2x Thorlabs TR200/M) into the breadboard and pushing the excitation cage rods against them (idea credit: Robert Zinzen, MDC Berlin), see photo:

Checkpoints:
- no gap between the TR200/M posts and the excitation cage rods,
- the detection objective in the center between the excitation objectives,
- distance d between excitation objective mounts is approximately 75 mm,
- the excitation cage is securely clamped to the breadboard.
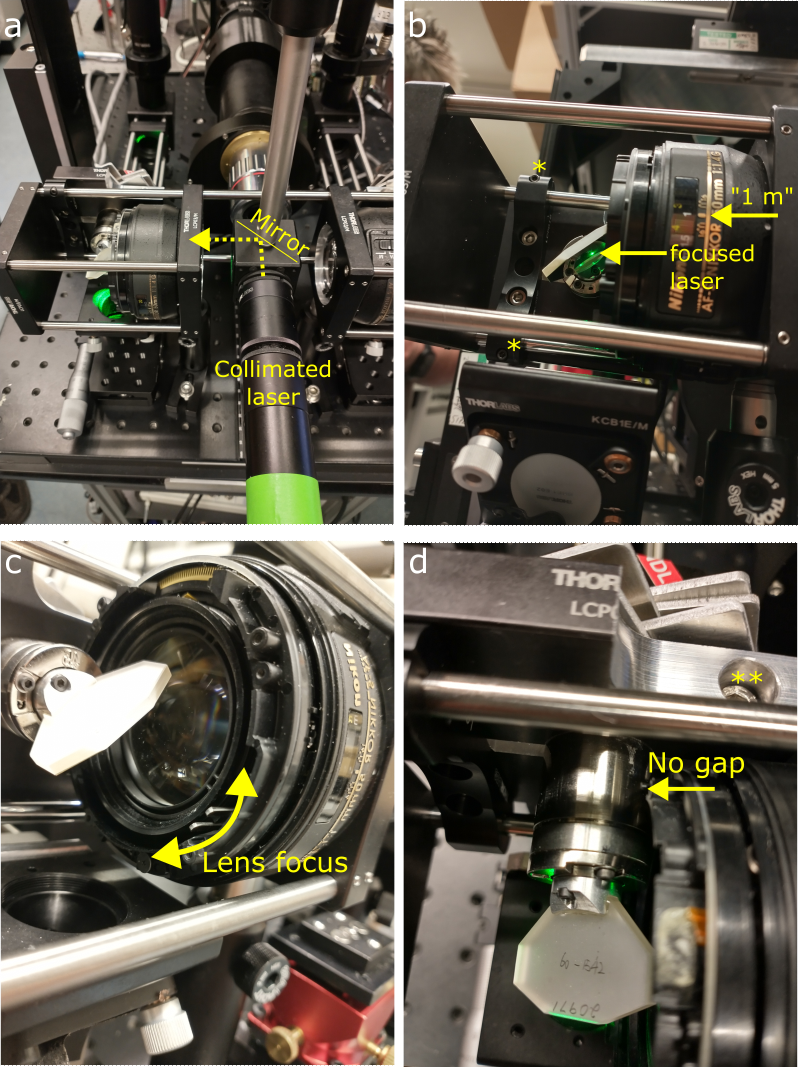
It is important to position the galvo center at the focal plane of the excitation objective, so that angular beam motion in the galvo plane becomes purely vertical translation of the focused beam in the sample plane. In general, finding the correct galvo position could be achieved with the beam collimator. Collimated laser beam is sent through the Nikon objective and must be focused at the galvo, close to center of the mirror (Fig. panels a, b).
However, since the Benchtop construction is stereotyped, you can skip the usage of the beam collimator tool and adjust the galvo/lens mutual positions as follows:
- set the lens internal focusing position so that dial on the barrel points to "1 m" reading (Fig. b,c). Move the focusing lever with a screwdriver if needed.
- loosen the galvo mount cage screws (marked *) and move it until galvo barrel touches the Nikon objective plastic housing (Fig. d).
- loosen the galvo clamp screw (marked **) and rotate the galvo to a 45-deg angle to the optical axis of the Nikon objective. Tighten the clamp screw.
- tighten all relevant screws to avoid drift and slipping of galvo or Nikon objective.

The galvo is now at the correct axial position relative to the Nikon objective.
- Overview
- Room requirements
- Safety
- Parts list
-
Assembly
- Overview
- Detection arm
- Excitation arms
- Sample stages
- Electronics
- Lasers
- Immersion chambers (TODO)
- Front cover (with webcam)
- Enclosure (TODO)
- Usage
- Troubleshooting and typical errors (TODO)
- Maintenance(TODO)
- Technical notes